 In the world of Linux containers where deployment takes on the order of seconds, even the best-case scenario for spinning up a new Windows host can seem like an eternity.
Clearly, you don’t want to wait for the entire Windows install process each time you bring up a Windows guest OS. Even automated, this would take 15+ minutes and all it would deliver is a base, non-patched, non-customized system.
Windows Sysprep allows you to build a base Windows template with any patches, customizations, and files that you want in a base system. And then any subsequent guest OS created with that template will inherit all those template basics.
I wrote this article to give developers a peek into how these templates are created so they can influence the base images that their Operations teams generate.
Download Windows 2012
You can get an 180-day evaluation version of Windows 2012 R2 Datacenter directly from Microsoft as long as you sign in with your free personal account (outlook.com or hotmail.com account works fine).
https://www.microsoft.com/en-us/evalcenter/evaluate-windows-server-2012-r2
After downloading this 4.5 Gb file, you should have a local ISO file named something like: 9600.17050.WINBLUE_REFRESH.140317-1640_X64FRE_SERVER_EVAL_EN-US-IR3_SSS_X64FREE_EN-US_DV9.iso
Create a base Windows instance in VirtualBox
If you don’t have VirtualBox installed, see my instructions here for Ubuntu 14.04/16.04.
Now we want to create a base running instance of Windows 2012 R2 within VirtualBox on Ubuntu. Open the VirtualBox GUI, and follow the instructions below:
- Create a new Virtual Machine
- Machine > New.
- Name = ‘w2k12base’, type=windows, version=windows 20012(64 bit), Next
- Memory=1024, Next
- Create a virtual drive, Create
- Hard drive type=VDI, Next
- Dynamically allocated, Next
- Name of drive=’w2k12base’, 80Gb, Create
- Configure the new Virtual Machine
- Select VM, hit ‘Settings’
- Select ‘General’ from the left side categories, then the ‘Advanced’ tab and enable the shared clipboard bidirectional
- Select ‘Audio’ from the left side categories, disable (not usually needed for server work)
- Select ‘Display’ from the left side categories, make video memory 128Mb (ensures we have enough for our resolution choice later)
- Select ‘Network’ from the left side categories, validate that Network Adapter 1 is set to “NAT”. You could set Adapter 2 to “Bridged” if you wanted it to be a peer of your host machine
- Select ‘Shared Folders’ from the left side categories, and press the + icon to add a share to your host machine. Add a share that points back to the directory on your host that contains the ISO file (e.g. ‘/home/user/Downloads’) and then select a folder name for the guestOS that doesn’t conflict (e.g. ‘DownloadsShared’). Check the boxes for auto-mount and permanent
- Select ‘Storage’ from left side categories (screenshot below)
- Expand the ‘Controller: SATA’ line, so that the empty DVD icon is displayed as a child.
- Select the empty DVD line
- From the right hand menu, browse to the ISO and press OK
- Start VM – select then press ‘Start’ button for the VM
- Go through Windows Setup
-
- language=English, time=English, Keyboard=US, Next
- ‘Install Now’
- Windows Server 20012 R2 Datacenter Evaluation (Server with a GUI) x64, Next
- Accept License, Next.
- Choose ‘Custom Install Windows only’
- Drive 0 Unallocated Space, Next
- WAIT for windows files/features/updates to finish and restart
- Virtual Box > Machine > Settings > Storage, and remove ISO disk from the virtual CD Drive
- Type initial password for local Administrator, “ThisIsMyP4ss!”, then Finish
-
- Install VirtualBox Guest Tools
- VirtualBox > Input > Keyboard > Insert Control-Alt-Delete
- Login as Administrator/ThisIsMyP4ss!
- VirtualBox > Devices > Insert guest additions CD
- Open Windows Explorer, open the DVD Drive
- Double-click ‘VBoxWindowsAdditions.exe’
- Select all defaults (allowing trust for Oracle installer along the way), and finally ‘reboot now’
- Virtual Box > Machine > Settings > Storage, and remove VirtualBox Guest customizations disk from the virtual CD Drive
In this article we are focusing on creating a Windows template for VirtualBox, note that if you were preparing this VM for a production instance running VMware you would instead be installing a “VMware Tools” agent and not the VirtualBox guest additions agent.
Customize the Windows install
Now that you have a base Windows install that is tailored for our virtualization engine, you need to prepare it with the patches, software, and customizations that you want for all your cloned Windows hosts.
Install latest Windows Updates
The first thing you’ll want to do is pull up “Windows Update” and apply all the latest patches. If you do not, then every Windows host you clone will require patching from the moment it is instantiated.
Install Files and software
Then you will want to place all the common utilities/files/software onto the guest OS. This may be the installation of utilities like 7zip or Notepad++, or Java and a Tomcat server so it is ready for application deployments, or a zip file that contains scripts that will be run post-deployment.
Folders, files, and simple utilities are not an issue, but more complex application with dependent services and complex registry settings can be broken after Sysprep. Also, not all applications do well when a machine name is different than what is noted in the registry/config file or domain status changes.
You have to experiment to determine if an application can be installed before Sysprep, or must be executed post-instantiation.
Run Sysprep
Now that we have a Windows 2012 guest OS that serves as the ideal template for our environment, we need to run Sysprep and shut the system down.
This process is customized with a configuration file named “unattend.xml”. You can find multiple examples of this file, and full documentation of the settings here.
I’ve created an “unattend.xml” that you can download from my github. This is an enhanced version of this file listed on this Microsoft page.
You will need to copy this file to the guest OS at c:\windows\system32\sysprep\unattend.xml. The easiest way is to use the shared VirtualBox folder setup earlier which should show up in Windows Explorer as a shared drive. But you can also copy-paste it from the clipboard, or use FTP, or any other mechanism you wish.
Delete any files in the ‘sysprep\Panther’ folder to avoid issues where previous sysprep files and status can affect your run and run sysprep as shown below:
> del /q c:\windows\system32\sysprep\panther\*.*
> c:\windows\system32\sysprep\sysprep.exe /generalize /oobe /shutdown /unattend:c:\windows\system32\sysprep\unattend.xml
The next time the system is powered on, it will run through the Sysprep process which creates a unique SID and a fresh system.
Create a snapshot
One of the tricks we will use to save a considerable amount of disk space and get super fast startup times on our Windows clones is to use the concept of a VirtualBox Linked clone.
After running Windows Updates, your Windows template is probably in the 20Gb size range, and that isn’t including any other software or files you may have placed on the guest OS. Instead of forcing a fresh copy of the entire 20Gb+ every time you want to spin up a Windows host, a linked clone allows your instance to use the 20Gb parent disk as a source, and then simply persist any differences.
Take these steps from the VirtualBox GUI to create a parent snapshot that will serve as the basis for any number of linked clones:
- Select “w2k12base” from the VM list
- Click on “Snapshots” from the right of the top menu bar
- Click on the camera icon to take a snapshot
- In the popup dialog, use “sysprep-ready” as the name, hit OK
Create a Windows 2012 linked clone
Now that you have a parent snapshot, you can use it to create any number of linked clone “child” instances.
- Create a linked clone
- Right-click on w2k12base template’s snapshot “sysprep-ready”
- Select “clone”
- Choose a name for the new guest OS, “clone1”
- Check “Reinitialize the MAC address”, Next
- Select “Linked clone”, hit “Clone”
- Instantiate your linked clone
- Select “clone1” from the VM list
- Hit the “Start” icon in the top menu bar
- You will see Sysprep doing its work and restarting the host a couple of times
- Within 60 seconds you will be at the Windows main desktop logged on as Administrator
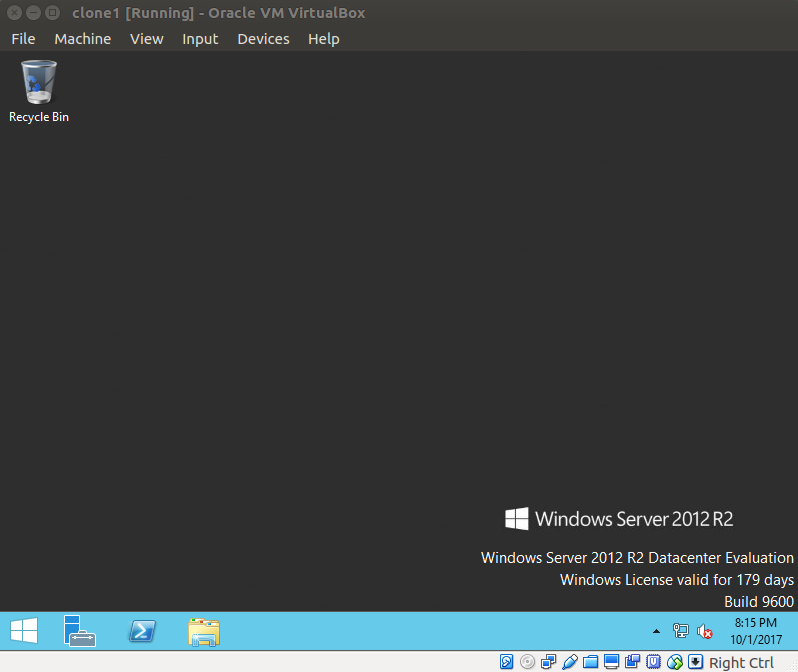
As you can see, once we did all the hard work with Sysprep, spinning up a new Windows 2012 instance takes less than a minute!
This article uses a trial ISO for Windows 2012. If the licensing watermark as shown in the bottom right of the screen is expired, make sure to run “slmgr.vbs /rearm” to give it another 180 grace period or your machine will shutdown after about 30 minutes.
Post Creation steps
Now that you have a fresh guest OS, you still need to perform a set of steps that makes it ready for your environment. At the very least you will want to change the name, activate the Windows licensing, possibly add it to a AD domain, enable services, modify the firewall, enable remoting via winrm/powershell, etc.
Hopefully these are tasks you have scripted in Powershell and batch files, and if so you should consider adding them to the <FirstLogonCommands> in unattend.xml so you do not have to touch the system.
Typically virtualization engines provide some kind of hook for passing values such as the intended hostname, so that the computer hostname, network and other critical values can be passed in to guest OS customization scripts. For example vSphere has the Customization Specification Manager, vCloud Director has guest Customizations, and VirtualBox has vboxmanage/vboxcontrol that allows communication of values from host to guest.
Performance notes on Linked Clones
Take note that using linked clones can have performance ramifications if you plan on these guest OS instances running continually for months or if they are I/O intensive to the parent c:\ drive. Just like snapshots, the differential image being written builds up and has to be taken into account for future operations [1,2,3]. You can help counter this by adding another virtual drive post-instantiation that serves as the data drive for most of the application I/O operations and also put the Windows pagefile.sys on the data drive.
VMware supports a similar linked clone concept [1,2,3,4] and uses it extensively with Horizon for virtual desktops. However, in production deployments linked clones are not used much since storage deduplication is enabled, replication/DR is easier when you can avoid these dependencies, guest OS typically have long lives and so fully independent disks will be more performant, and the initial spin up time is not as significant as these previous factors.
BUT for development environments where quick spinup time leads to faster development cycles and hosts are tore down continually, linked clones have high utility.
REFERENCES
https://technet.microsoft.com/en-us/library/cc721940(v=ws.10).aspx (sysprep docs)
https://technet.microsoft.com/en-us/library/c026170e-40ef-4191-98dd-0b9835bfa580 (simple sample unattend.xml files)
https://technet.microsoft.com/en-us/library/cc722132(v=ws.10).aspx (unattend.xml full reference)
https://technet.microsoft.com/en-us/library/cc749278(v=ws.10).aspx (oobe docs)
https://www.virtualbox.org/manual/ch01.html#clone (linked clones doc)
http://myvirtualcloud.net/vdi-and-storage-de-duplication-good-or-bad-marriage/ (linked clones and dedup storage)
http://misheska.com/blog/2013/07/28/windows-server-2012-automated-install-settings/ (win2012 sysprep)
https://github.com/joefitzgerald/packer-windows/blob/master/answer_files/2012_r2/Autounattend.xml (win2012 unattend.xml using packer)
https://github.com/rgl/windows-2016-vagrant/blob/master/autounattend.xml (win2016 unattend.xml)
https://github.com/joefitzgerald/packer-windows/blob/master/answer_files/2012_r2/Autounattend.xml (win2012 unattend.xml with winrm and Autologin)
Pass Order: windowsPE, offlineServicing, generalize, specialize, auditSystem, auditUser, oobeSystem
https://blogs.technet.microsoft.com/enterprisemobility/2007/03/20/enabling-remote-desktop-using-unattended-setup/ (unattend.xml with firewall and rdp)
Windows Automated Installation Kit
https://www.vagrantup.com/docs/virtualbox/configuration.html