![]() AWS Certificate Manager can generate custom TLS certificates that can be used by AWS resources to enable secure TLS communication.
AWS Certificate Manager can generate custom TLS certificates that can be used by AWS resources to enable secure TLS communication.
In this article, I will delegate authority of a custom subdomain to AWS Route 53, then allow AWS ACM to generate certificates for this subdomain. This subdomain and certificate can then be used within the AWS ecosystem to secure communication (e.g. API gateway, Load Balancers, CloudFront, etc.).
The same could be done with a base domain, but I believe this example using a subdomain fits better with an enterprise scenario where a subdomain is used to expose an API Gateway or CloudFront cache and base domain ownership remains as-is.
Prerequisite
In order to go through this example, you need to have ownership of a domain name. And the ability to administer that domain so that records can be created for subdomain delegation.
Solution overview
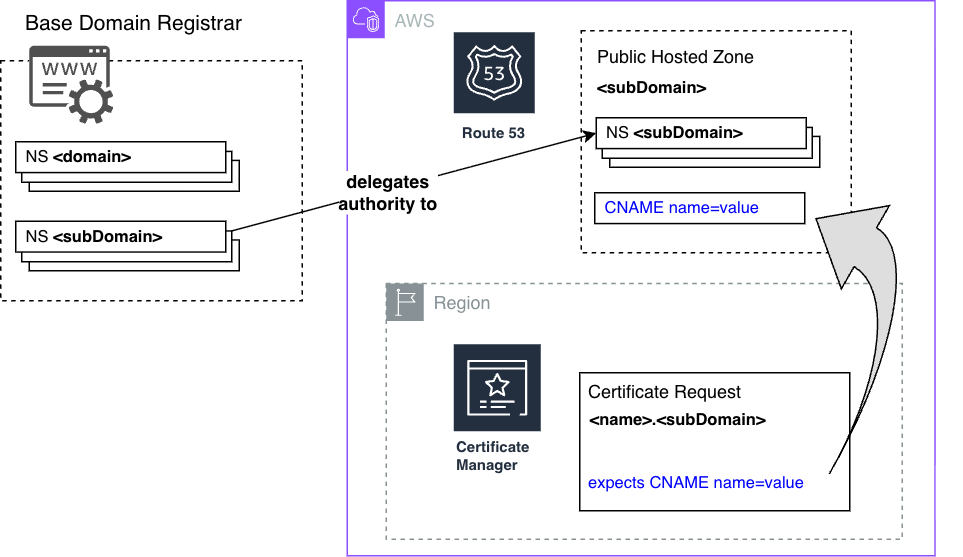
In this example, I have ownership of a base domain name, ‘fabianleepublic.org’, and will be delegating authority of a subdomain ‘aws.fabianleepublic.org’ to AWS Route53.
Then I will submit a certificate request to AWS Certificate Manager under that subdomain, and will offer proof of domain ownership by creating the required CNAME record under the Route53 hosted zone.
![]()
![]()
Create a Route53 hosted zone for the subdomain
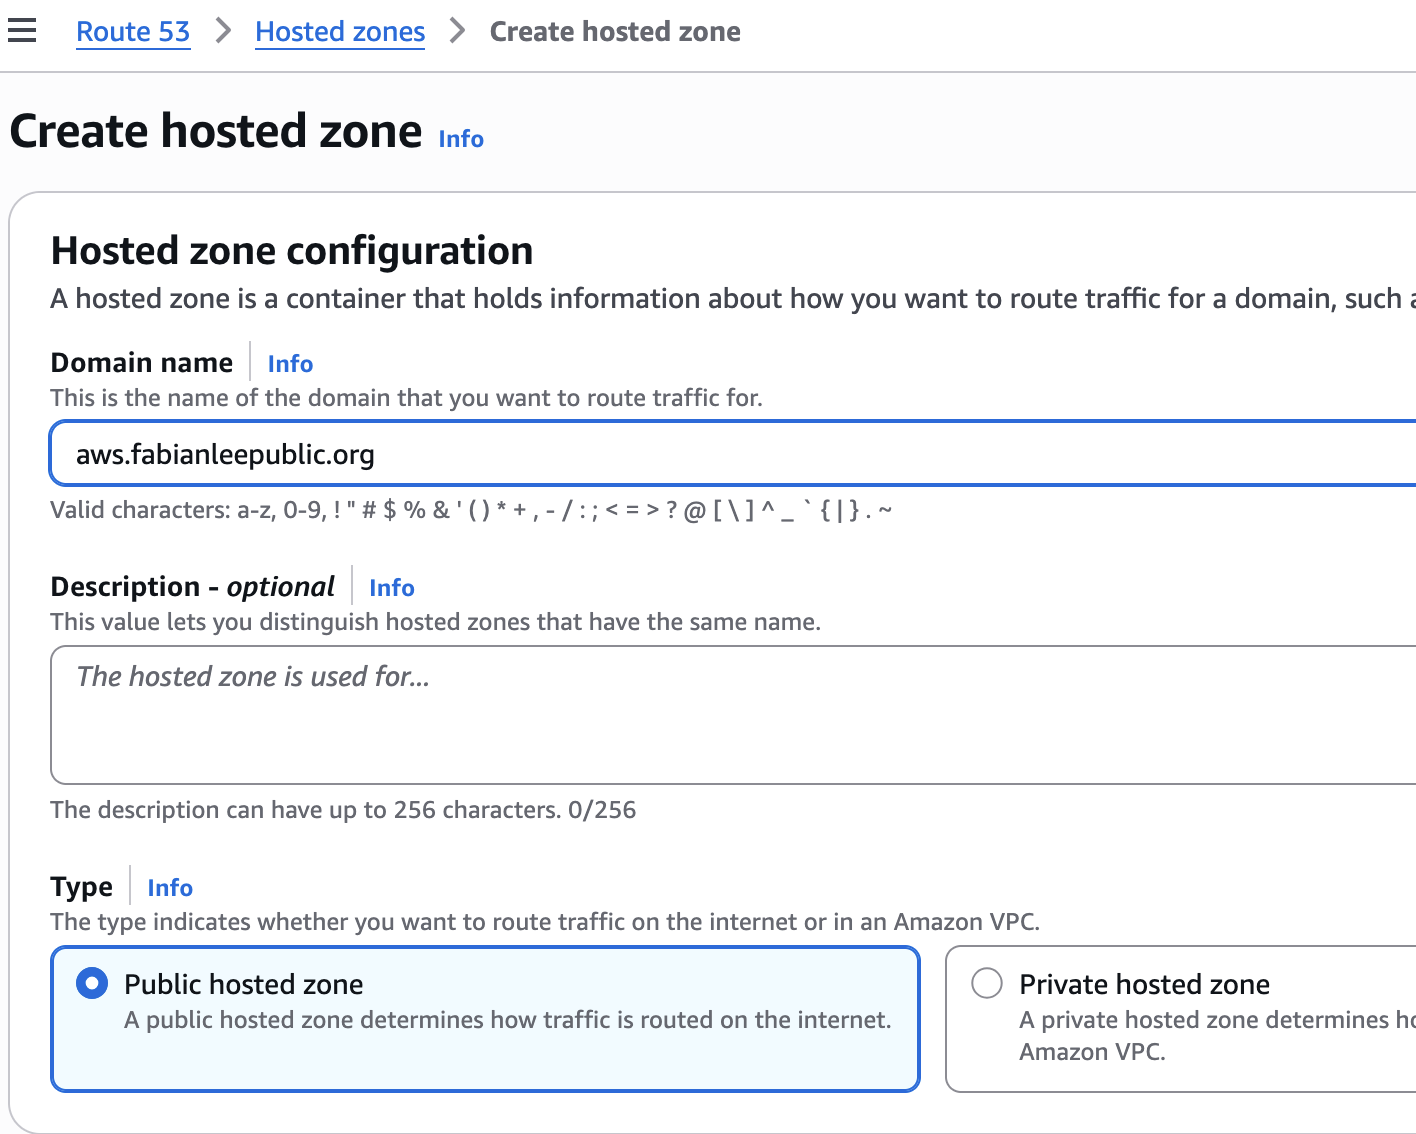
From Route 53 > Hosted Zones, click “Create hosted zone”, and create a public hosted zone.
My base domain is “fabianleepublic.org”, and I want AWS Route 53 to manage the subdomain “aws” in the example below.
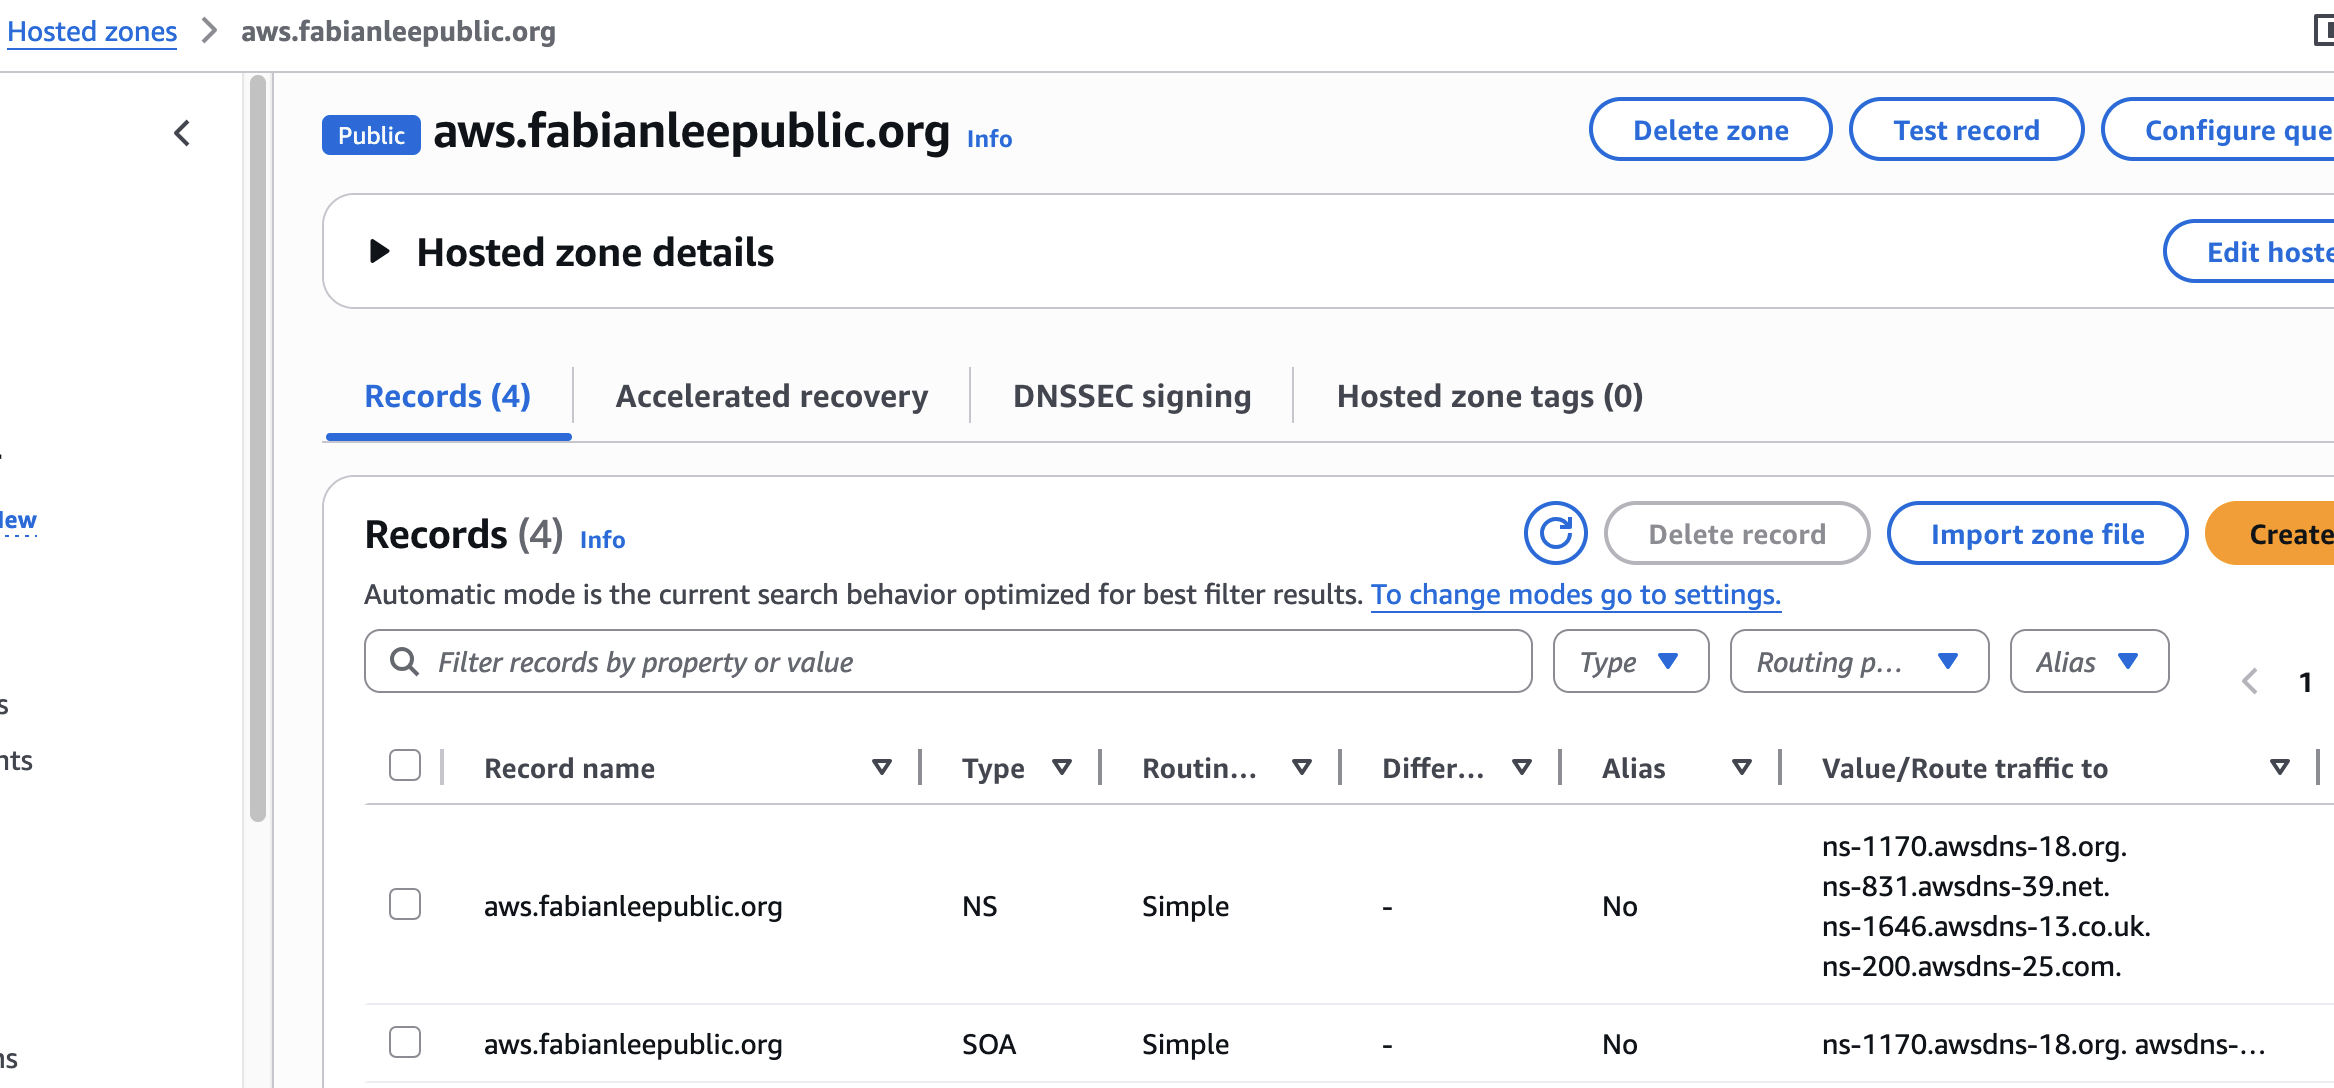
When you click into the details of this new hosted zone, you will see two records that are automatically created by AWS. An SOA, that notes authority information and the one we are primarily interested in, the “NS” record.
This NS record denotes which name servers are responsible for resolution of this subdomain. In the example below, you can see there are four different AWS servers (ns-xxx.awsdns-xx) that take responsibility for records in this subdomain.
Create NS forwarding records in the base domain to forward to Route53
At the moment, the four AWS nameservers above will never be queried by public consumers. If these AWS servers were queried directly, yes they would return the correct resolutions, but the public DNS hierarchical server structure does not recognize or delegate to them.
To change this, you must add “NS” records in your base domain that point to each of these four AWS nameservers. Then, your base domain will forward any requests for entries in the subdomain to AWS nameservers.
This is where the implementation becomes very specific to your base domain registrar. Every domain registrar (GoDaddy, Namecheap, CloudFlar, PorkBun, etc.) have their own web admin interface or API to create NS records.
In my case, I have a PorkBun managed base domain, and so clicking into the DNS settings for “fabianleepublic.org” allows me to add four NS records that look like below. Notice that each “NS” type record has one of the four AWS nameserver as shown by Route 53 in the previous section.
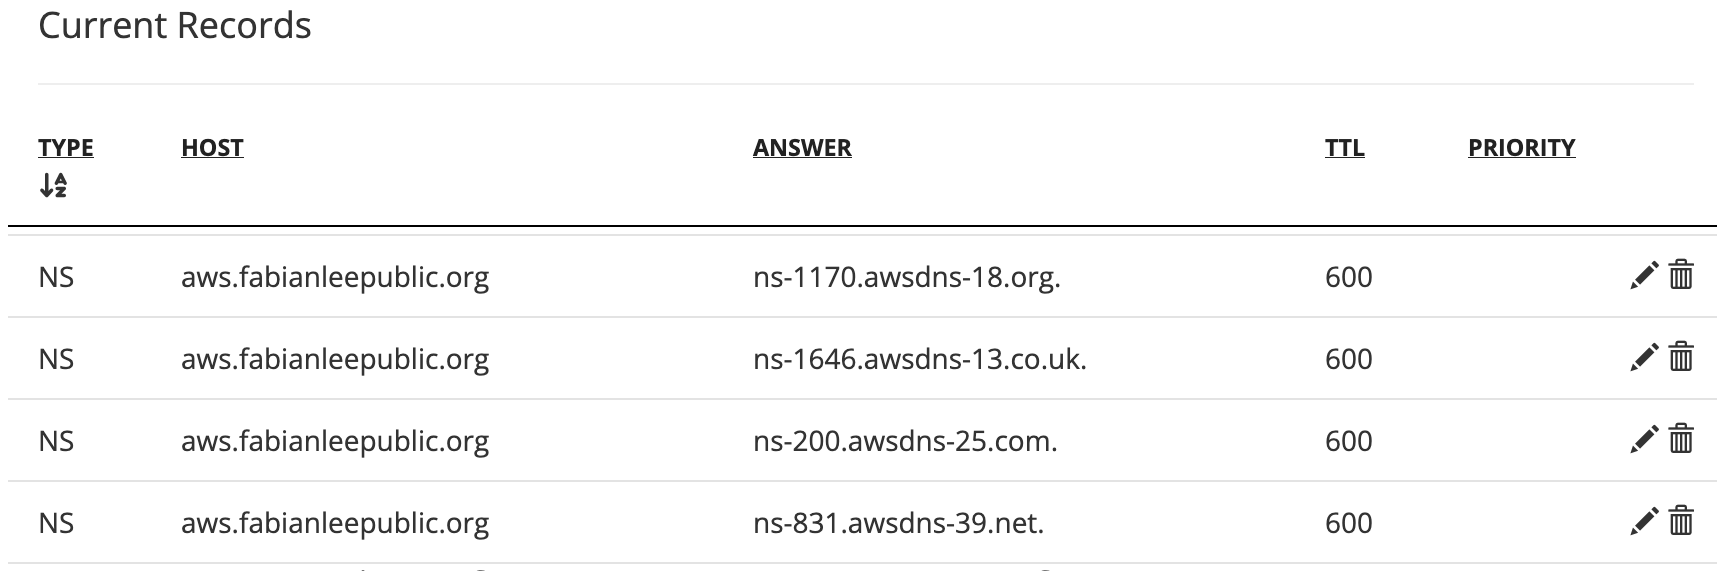
Now public DNS queries for the “aws” subdomain will be served by AWS Route 53 instead of by Porkbun (the base registrar). In other words, Route53 nameservers are part of the public DNS resolution chain.
I cannot provide exact instructions for your registrar, but the the goal remains the same, add “NS” entries for each AWS nameserver shown in Route53.
Create a certificate request in AWS Certificate Manager
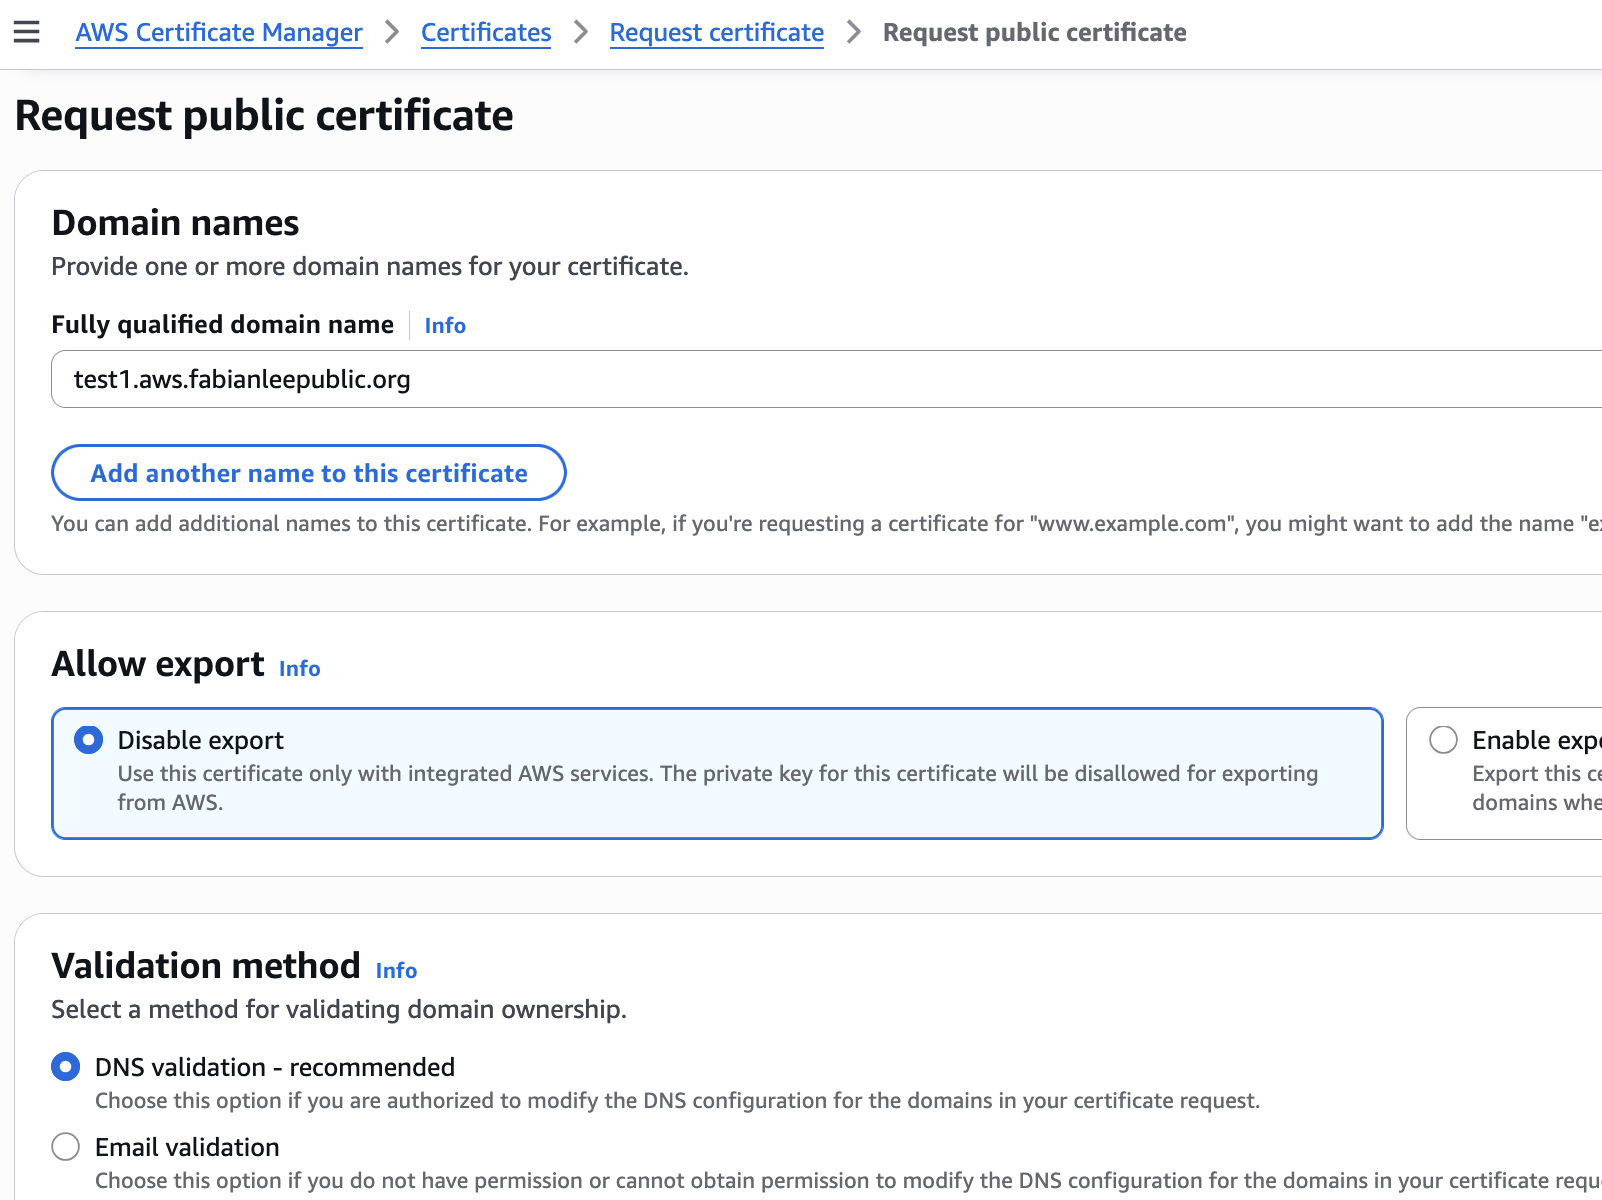
Create a certificate request by navigating to the AWS console: AWS Certificate Manager>Certificates>Request Certificate
Use a subdomain FQDN of “test1.aws.fabianleepublic.org”, and use the ‘Disable export’, ‘DNS validation’, and ‘RSA 20248’ settings. Then press the ‘Request’ button at the bottom.
![]()
Create a DNS record to validate the certificate request
After you create the record, you will be taken straight to the request details page like below. Or you navigate to AWS Certificate Manager>List certificates and click on the request.
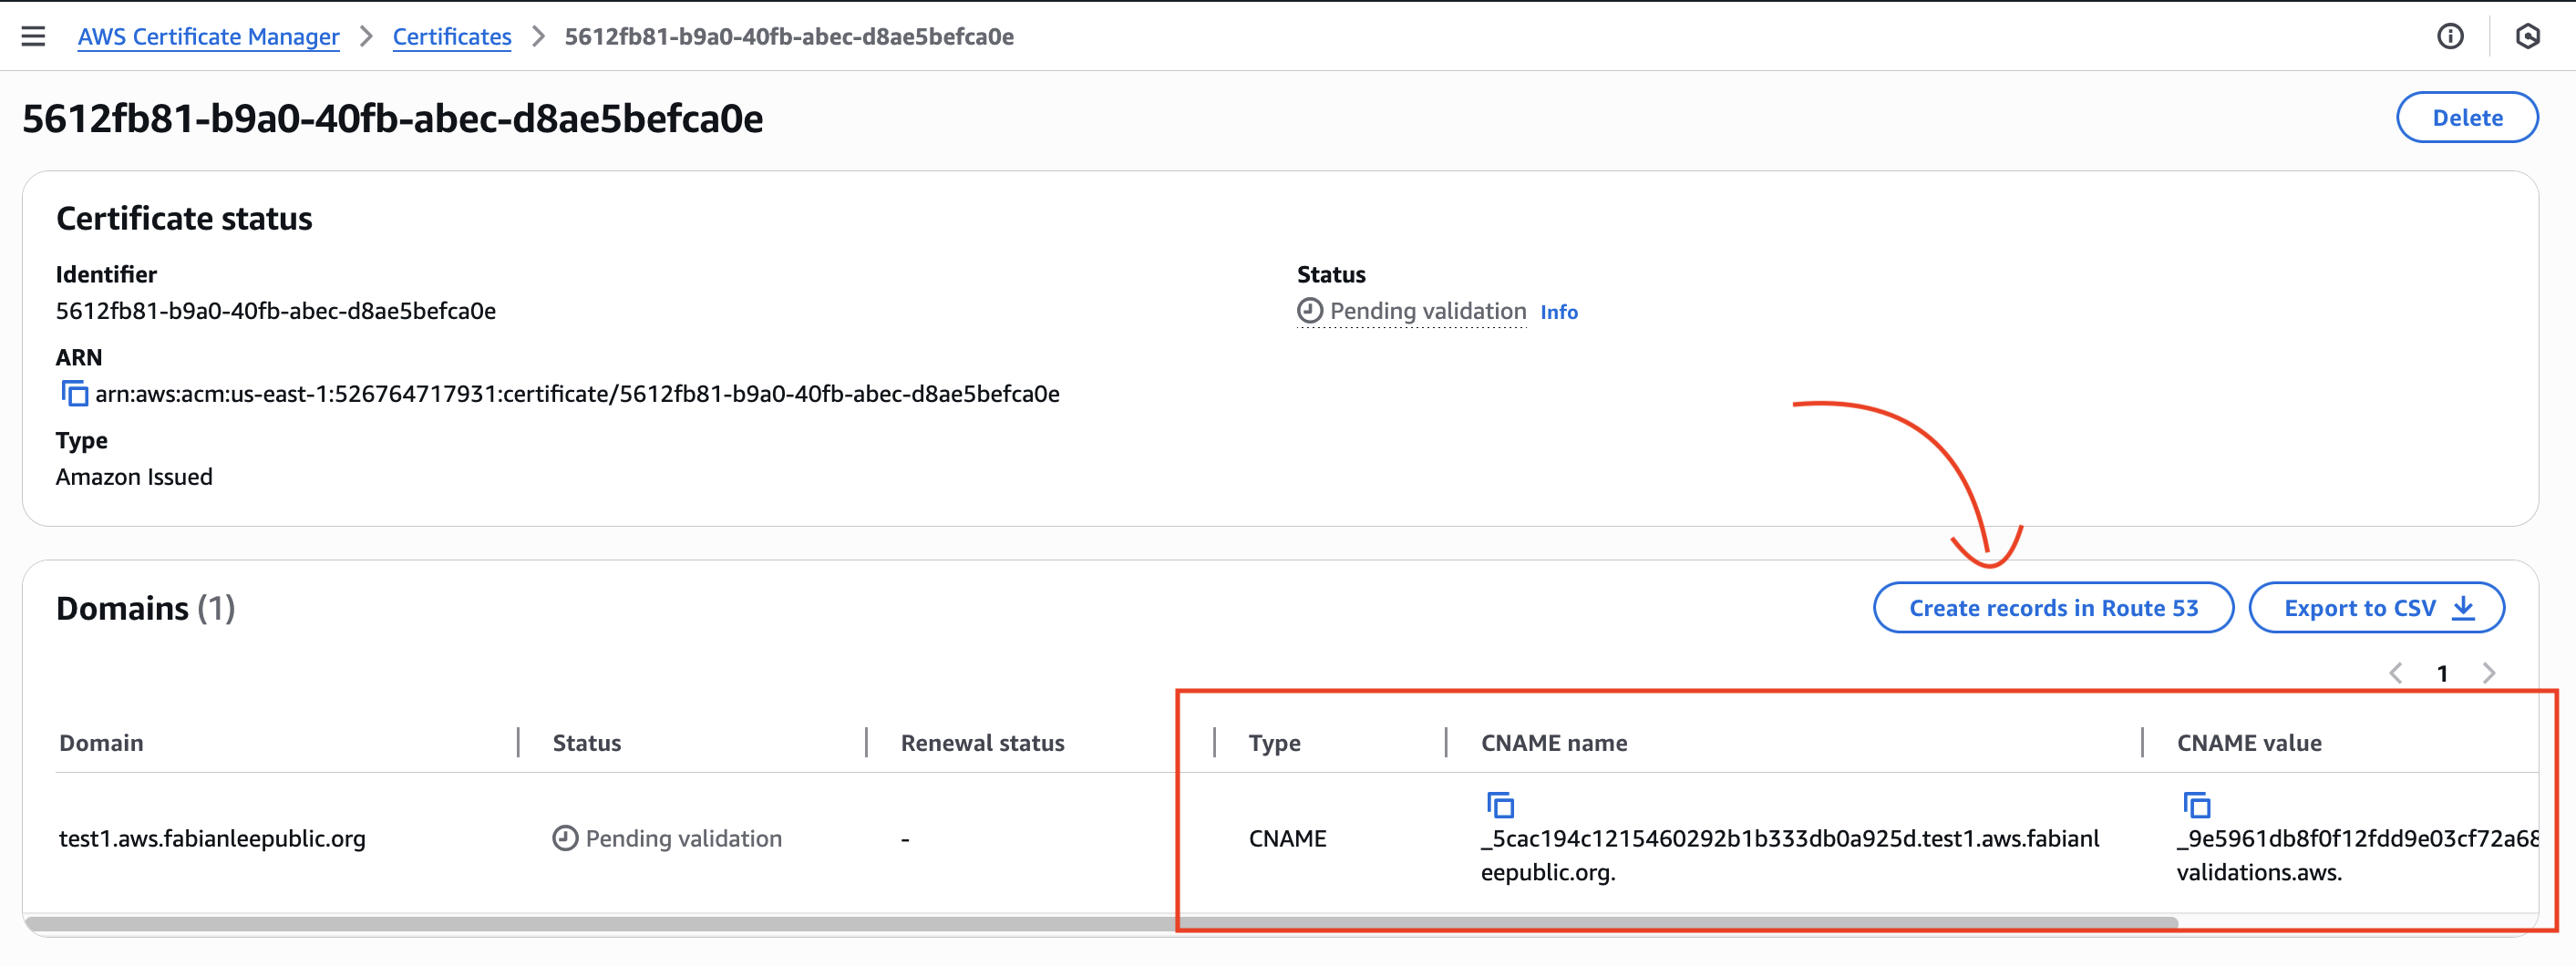
This will show you the CNAME record that AWS is expecting to exist before the certificate will be generated. In this way, ownership of the domain is proven and the certificate request is deemed valid.
Because we are requesting a certificate in the Route 53 hosted domain that we have delegated authority to, there is a button “Create records in Route 53” that makes it very easy to add this CNAME record. We could also create it manually by navigating to Route 53>Hosted Zones and copying/pasting the values, but we will use this convenience in the UI and simply press the button.
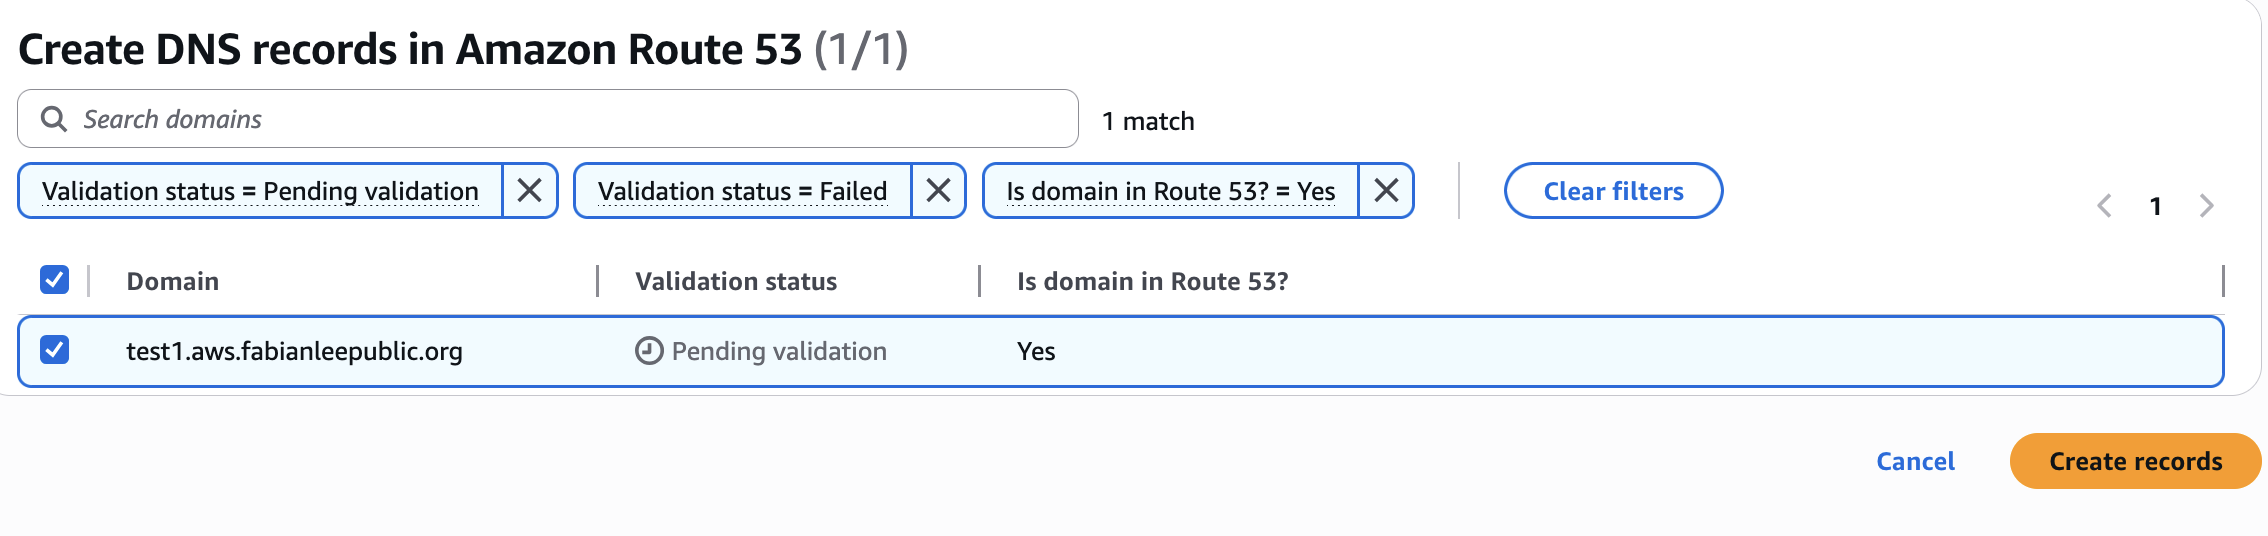
This will bring up the following validation page, and you can press “Create records”.
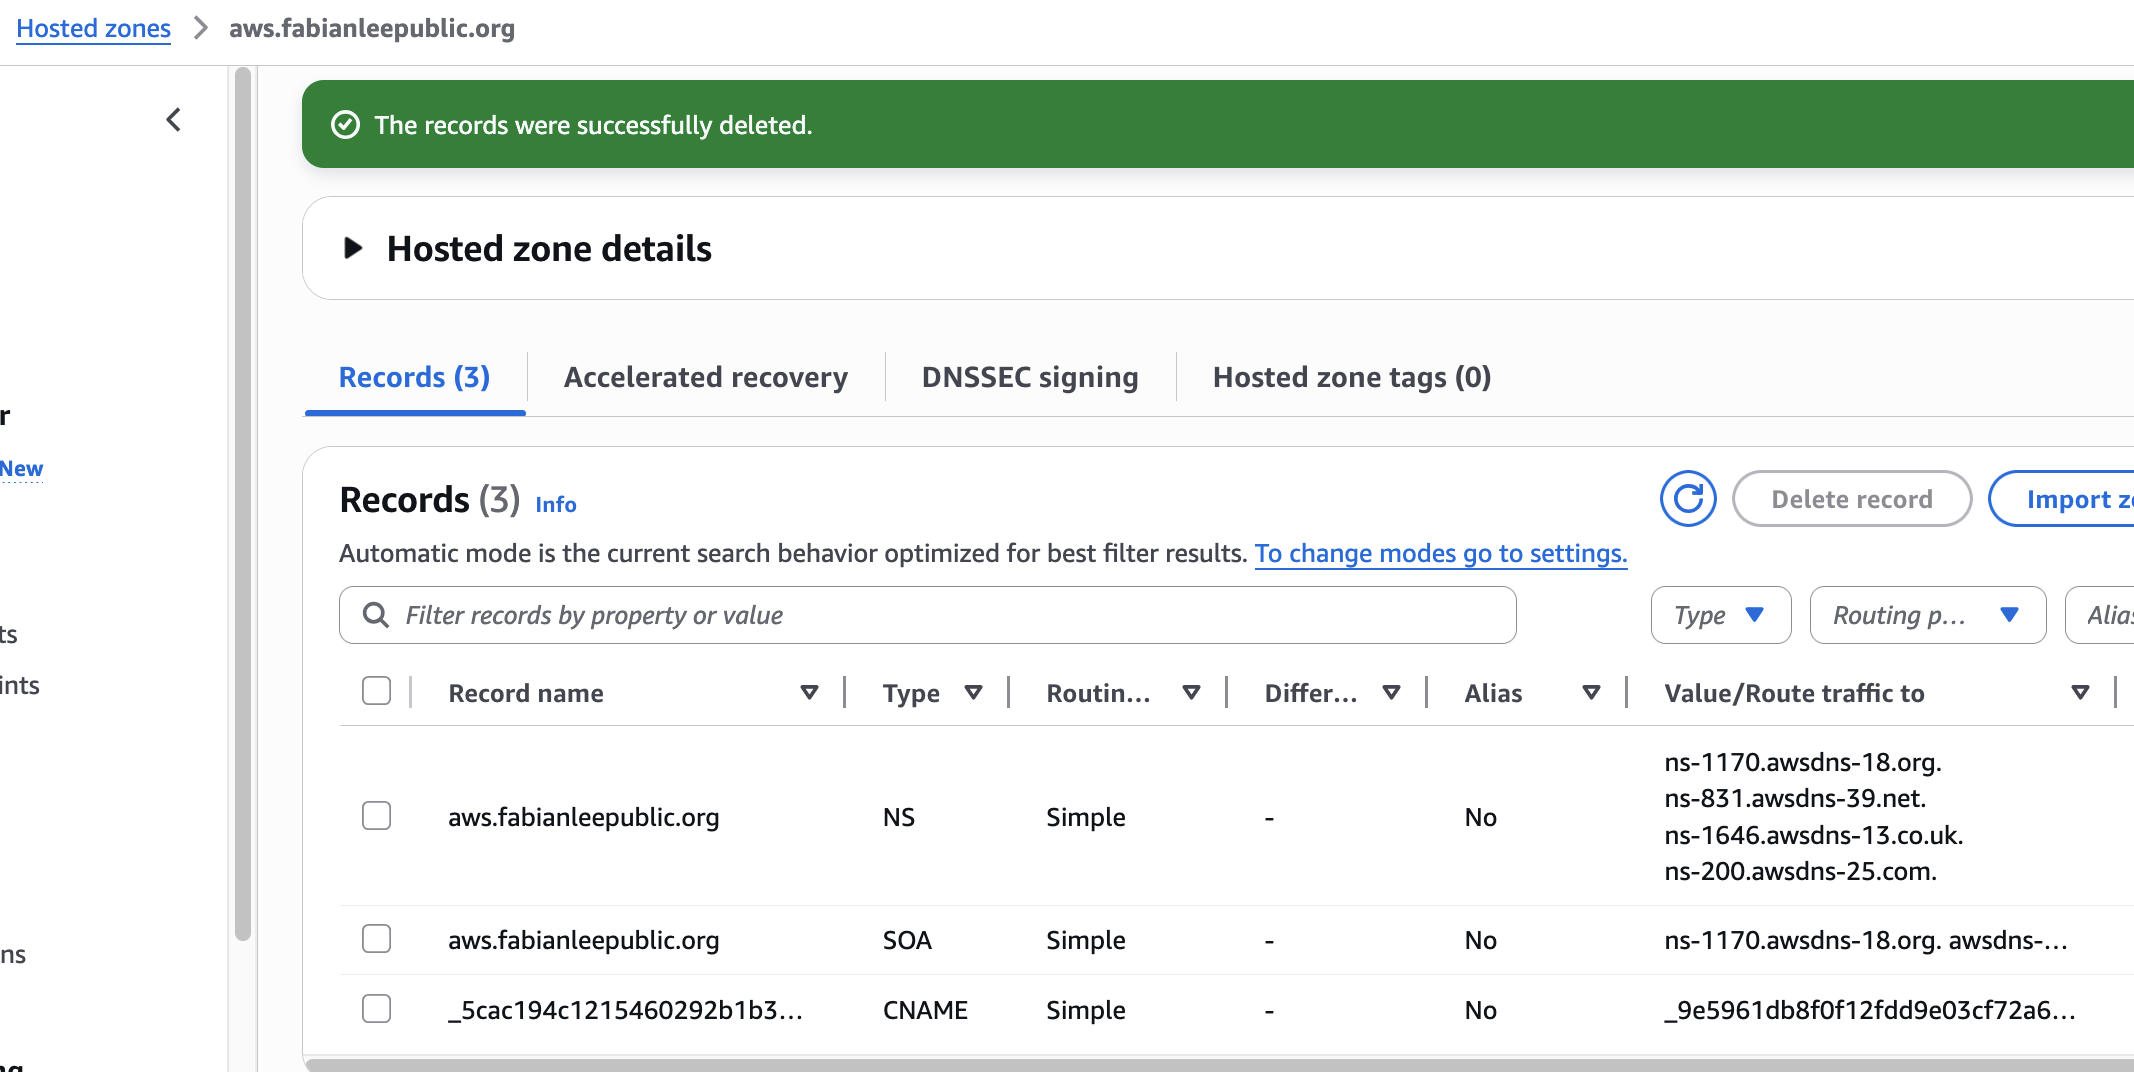
If we want to double-check in Route 53>Hosted zones, we can see this CNAME record was added to the subdomain.
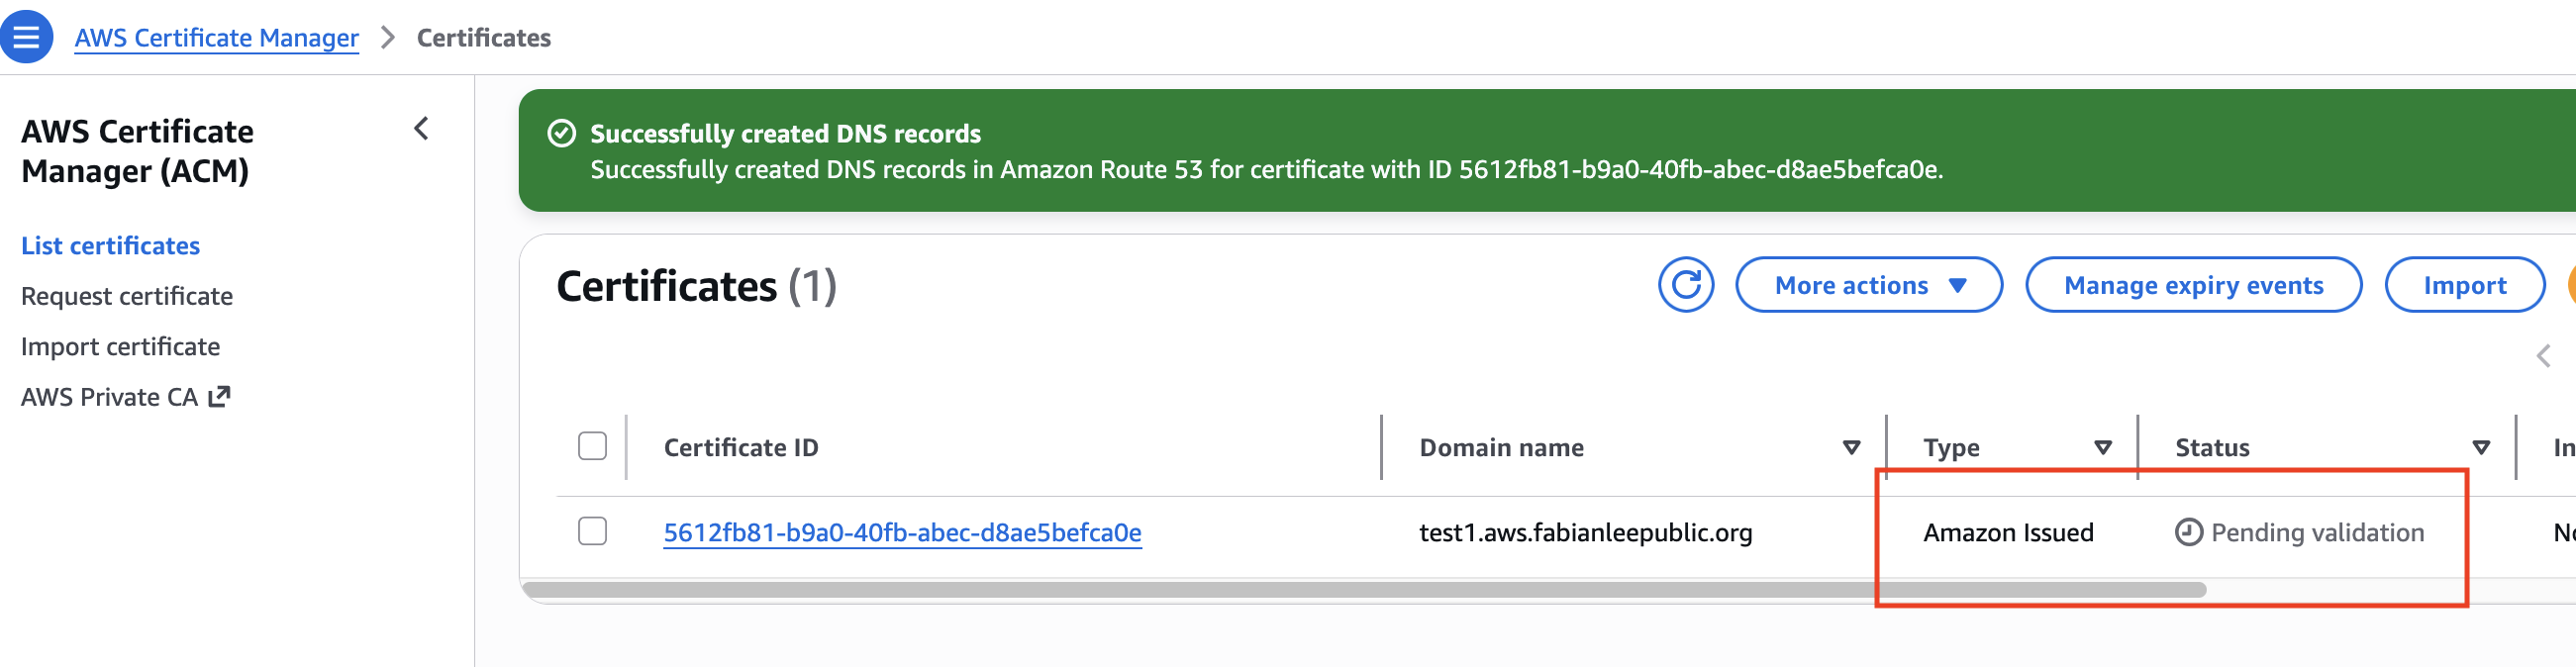
Waiting for DNS validation
You may have to wait anywhere from 5-30 minutes, but the certificate will be in “Pending validation” mode until the DNS records propagate and the AWS backend processes are able to validate, then generate the requested certificate.
After the AWS backend validates the DNS CNAME record (which proves ownership), it will generate the certificate and the user interface will reflect that like below.
![]()

After that, you can use this certificate in AWS resources such as: Load Balancers, CloudFront, and Gateway API.
REFERENCES
AWS docs, request a public certificate using ACM
AWS docs, generate cert using ACM for API Gateway
Sunday Nwoye, Creating SSL Certificates using ACM
Chinmay Tonape, Creating SSL Certificates using ACM with dns validation and terraform
github draw.io diagram for this article