![]() The open-source Zabbix monitoring solution has a REST API that provides the ability for deep integrations with your existing monitoring, logging, and alerting systems.
The open-source Zabbix monitoring solution has a REST API that provides the ability for deep integrations with your existing monitoring, logging, and alerting systems.
This fosters development of community-driven modules like the py-zabbix Python module, which is an easy way to automate Zabbix as well as send/retrieve metrics.
Installation
We will make sure python and pip are installed on our Ubuntu host, and then use pip to install the py-zabbix module.
$ sudo apt-get install git software-properties-common python python-pip -y

$ pip install py-zabbix
Validate Web access
Before moving on, validate that you have access to the Zabbix server via your browser, and that you know the correct credentials.
You should see a login screen like below when going to the URL http://<zabbixserver>/zabbix

Zabbix API for automation
Go ahead and grab my ZabbixAPI.py file hosted on github and run a quick test which will connect to Zabbix, retrieve all the enabled host names, look for any templates with ‘Linux’ in the name, and then show you a list of the most recent trigger issues.
$ wget https://raw.githubusercontent.com/fabianlee/blogcode/master/ZabbixAPI.py

$ chmod 755 ZabbixAPI.py

$ ./ZabbixAPI.py http://127.0.0.1/zabbix Admin zabbix
The output should look something like below:
Going to connect to http://127.0.0.1/zabbix as Admin
Zabbix API version: 2.4.8
----------------------------
All enabled hosts: [u'zabbix2', u'grafana', u'trusty1']
----------------------------
templates with Linux in their name: [u'Template OS Linux', u'Template SNMP OS Linux']
----------------------------
TRIGGER PRIORITY 2: Lack of free swap space on {HOST.NAME}
TRIGGER PRIORITY 2: /etc/passwd has been changed on {HOST.NAME}
TRIGGER PRIORITY 2: Lack of free swap space on {HOST.NAME}
TRIGGER PRIORITY 2: Lack of free swap space on {HOST.NAME}
TRIGGER PRIORITY 3: Zabbix agent on {HOST.NAME} is unreachable for 5 minutes
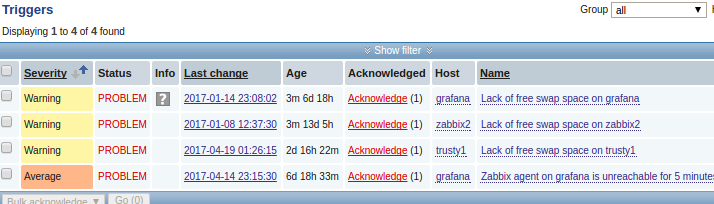
You can see that the triggers reported above match the ones reported in the web GUI.
Of interest in ZabbixAPI.py is making the connection to the Zabbix server:
zapi = ZabbixAPI(url, use_older_authenticate_method, user, password)
Then constructing a REST call to the ‘host.get’ method using the correct parameters (as defined by the Zabbix API).
enabledhosts = zapi.do_request('host.get',
{
'filter': {'status': '0'},
'output': 'extend'
})
hostnames = [host['host'] for host in enabledhosts['result']]
And then pulling the latest triggers, once again using the API reference for ‘trigger.get’
triggers = zapi.do_request('trigger.get', { 'min_severity':'2', 'withUnacknowledgedEvents':'true','sortfield':['priority'], 'sortorder': 'ASC', 'limit':'5', 'output':'extend' })
for trigger in triggers['result']:
 print "TRIGGER PRIORITY {}: {}".format(trigger['priority'],trigger['description'])
Other Examples
I have other examples of py-zabbix usage in github:
- ZabbixUpdateDescription.py – updates the visible name of host
- ZabbixSetHostGroups.py – sets the hostgroups for a host
- ZabbixDeleteHost.py – deletes a host
- ZabbixCreateWebScenario.py – creates web scenario and trigger on failure
Sending/Retrieving metrics
There is some asymmetry here to understand. In the examples above using the REST API, you used the web port of the Zabbix server and it required authorization. Then same holds true when you retrieve item values.
However, when you send metrics to Zabbix, that is done via port 10051 (by default), and is done using a simple binary protocol. Values are sent without requiring authentication.
Before running these next two scripts, you MUST create two custom fields of type “zabbix trapper”. In the web GUI, select Configuration > Hosts, then on the host you want to experiment with, select “items” and it will list the items it is monitoring.
Press “create item”, and use the name “mystr1” of type “zabbix trapper” of data type “text” and press “add”. Then create another item with name “myint1” of type “zabbix trapper” of data type “numeric unsigned” and press “add”.
Now we will populate that string field by using my ZabbixSender.py script:
$ wget https://raw.githubusercontent.com/fabianlee/blogcode/master/ZabbixSender.py

$ chmod 755 ZabbixSender.py

$ ./ZabbixSender.py 127.0.0.1 myhost mystr1 testvalue1
{"failed": 0, "chunk": 1, "total": 1, "processed": 1, "time": "0.000097"}

$ ./ZabbixSender.py 127.0.0.1 myhost mystr1 testvalue2
{"failed": 0, "chunk": 1, "total": 1, "processed": 1, "time": "0.000095"}
From the web GUI, go to Monitoring > Latest data, and filter by the host you selected. You should see that the ‘mystr1’ field is populated with ‘testvalue2’ if you followed the steps above.
Now, let’s retrieve those values using my ZabbixGetMetrics.py instead of the web GUI.
$ wget https://raw.githubusercontent.com/fabianlee/blogcode/master/ZabbixGetMetrics.py

$ chmod 755 ZabbixGetMetrics.py

$ ./ZabbixGetMetrics.py  http://127.0.0.1/zabbix Admin zabbix trusty1 mystr1
Going to connect to http://127.0.0.1/zabbix as Admin, and retrieve from host trusty1 the item teststr1
Zabbix API version: 2.4.8
----------------------------
Found host trusty1 with id 10106
Found item mystr1 on host trusty1 with item id/type 23769/4
----------------------------
Retrieved 2 rows of history
2017-04-21 15:15:48 @ testvalue2
2017-04-21 15:15:45 @ testvalue1
REFERENCES
https://github.com/blacked/py-zabbix/tree/master/pyzabbix
https://www.zabbix.com/documentation/2.4/manpages/zabbix_sender
https://repo.zabbix.com/zabbix/2.4/ubuntu/pool/main/z/zabbix/
Installing Zabbix Sender for debugging:
wget https://repo.zabbix.com/zabbix/2.4/ubuntu/pool/main/z/zabbix/zabbix-sender_2.4.8-1+trusty_amd64.deb
dpkg -i zabbix-sender_2.4.8-1+trusty_amd64.deb
zabbix_sender -vv -z <zabbixServer> -s <hostKey> -k <key> -o <value>