 Android is one of the leading platforms of the mobile industry. By installing an Android emulator on your Ubuntu desktop, you can bring this power to your desktop.
More often than not, an Android emulator is used for custom development of mobile apps, but don’t overlook its utility as a way to access your favorite mobile applications directly from your desktop, or as a way to preview upcoming Android releases.
There is the official Android Emulator, of course, but for this article we are going with the emulator from Genymotion. This emulator provides a rich set of device choices (Galaxy, Nexus, etc.), disk/RAM resource settings, OpenGL hardware acceleration, sensor management, and other nice features that really set it apart.
Prerequisites
Install Virtualbox
Genymotion leverages virtualization technology to create each Android device, so you must have VirtualBox installed. I have written an article here which fully describes the installation process on Ubuntu.
Install GCC 4.9
This is not mentioned in the official documentation, but your Ubuntu server will need the basic development toolchain and gcc 4.9 installed in order to install Genymotion.
$ sudo add-apt-repository ppa:ubuntu-toolchain-r/test
$ sudo apt-get update
$ sudo apt-get install gcc-4.9 g++-4.9 -y
Also in order to avoid an error where ‘CXXABI_x.y.z’ is not found when running the installer, issue the following commands.
$ LD_LIBRARY_PATH=/usr/local/lib64/:$LD_LIBRARY_PATH
$ export LD_LIBRARY_PATH
Download Genymotion binaries
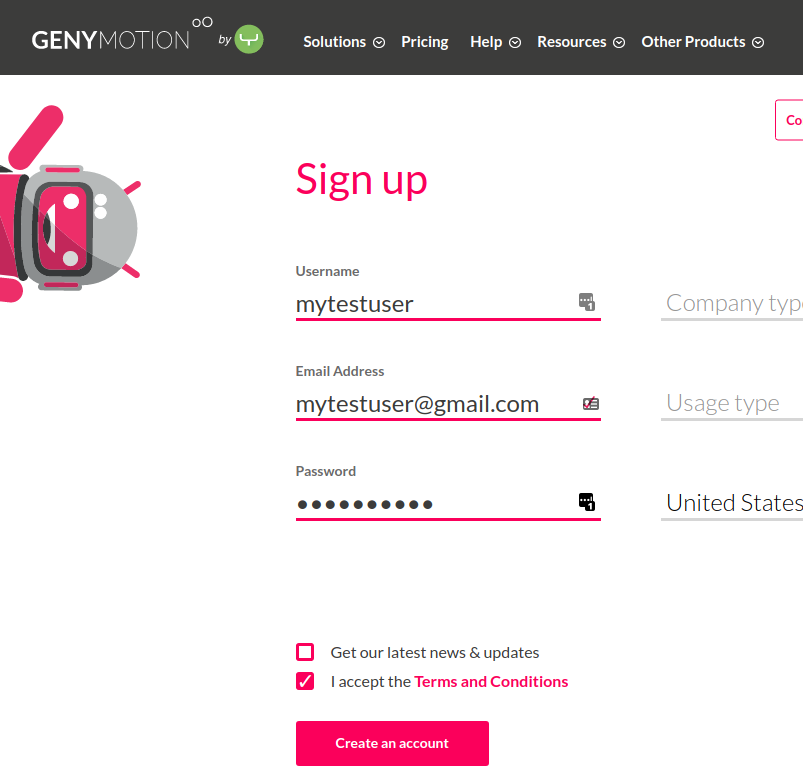
Although Genymotion is free for personal use, you will need to create an account in order to download the software. Go to https://www.genymotion.com, and click on “Sign In” at the top. This will take you to a sign in form, where you can press the “Create an account” button.
Fill in the essential form details, and then press “Create an account” as shown below.
Now that you are signed in, you can download the binaries. The free “personal use only” version can be found by selecting: “Resources” > “Fun Zone” from the top menu or going directly to https://www.genymotion.com/fun-zone/ and clicking on the “Download” button.
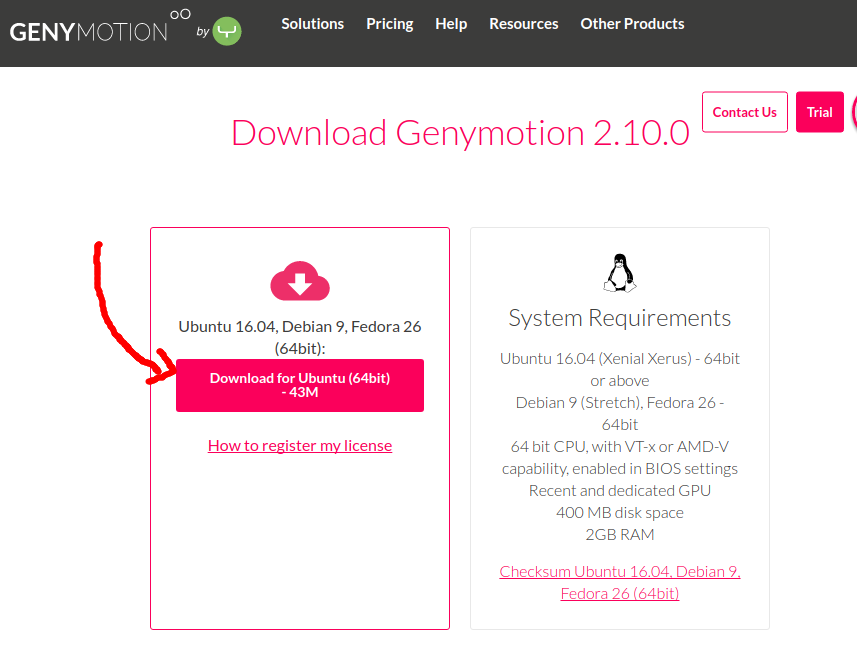
At the download page, you will see a button that allows you to download the binaries for your platform. As shown below, these are the Ubuntu 64 bit binaries.
Install Genymotion
Now we can run the installation from the download directory:
$ chmod u+x genymotion-2.10.0-linux_x64.bin
$ ./genymotion-2.10.0-linux_x64.bin
And the output will look something like this:
Installing for current user only. To install for all users, restart this installer as root.

Installing to folder [/home/fabian/Downloads/genymotion]. Are you sure [y/n] ?

- Trying to find VirtualBox toolset .................... OK (Valid version of VirtualBox found: 5.1.18r114002)
 - Extracting files ..................................... OK (Extract into: [/home/fabian/Downloads/genymotion])
 - Installing launcher icon ............................. OK

Installation done successfully.

You can now use these tools from [/home/fabian/Downloads/genymotion]:
 - genymotion
 - genymotion-shell
 - gmtool
Run Genmotion for the first time
$ cd genymotion
$ ./genymotion
A dialog will popup asking you to “Sign in or enter a license” or buy a license, click on the button to sign in using the account you created earlier.
As shown below, click on the “Sign In” button and you will have a small dialog window where you should enter in your Genymotion account credentials.
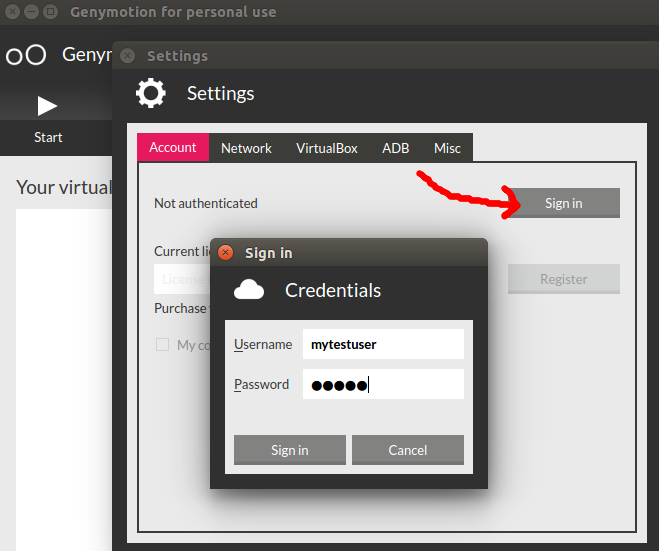
If your credentials are validated, the parent dialog will now say “Current license: Personal use” and you can close the settings dialog.
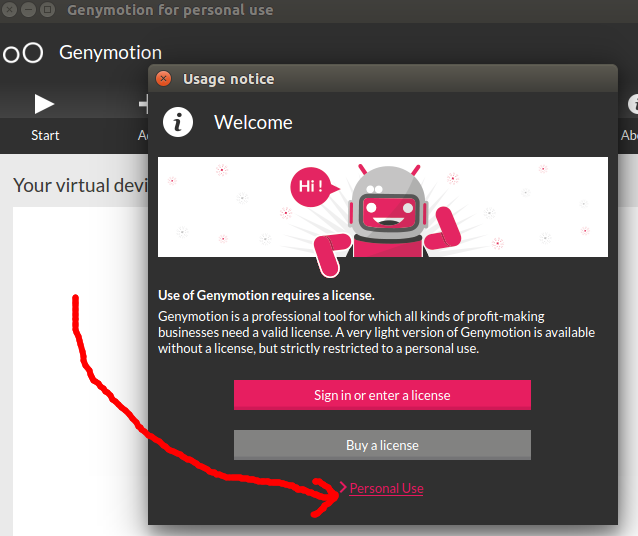
Now you will be presented with a “Usage notice” dialog, click on the “Personal Use” link at the bottom (as shown below) and you will be presented with a EULA screen where you can check the box and press “Accept”.
Create new device
With all these initial licensing steps and EULA acceptance out of the way, now you can create a virtual Android device.
Click the “+” Add icon to create a new device and a dialog with a long list of available devices will be shown. This includes generic custom phones/tables with Android 4.x up to the latest release, Google Nexus, NTC, HTC, Pixel, Motorolla, and Samsung.
Chose your favorite, I’m going to choose a custom phone with Android 7.1.0 for this example, click “Next” a couple of times and Genymotion will take care of downloading (takes a few minutes) and then deploying the virtual device. When complete, it will show a success message.
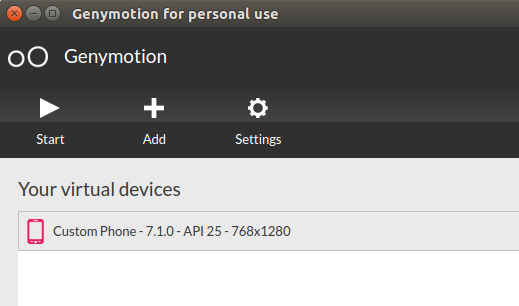
Click on the virtual device you just created as shown below, and then press “Start”.
Genymotion will then spin up a new virtual device, and you should see a screen similar to the one shown below. Which is exactly what you would expect on a physical Android device. There are function buttons to the right of the virtual screen that allow you to control GPS, networking, volume, power buttons, etc.
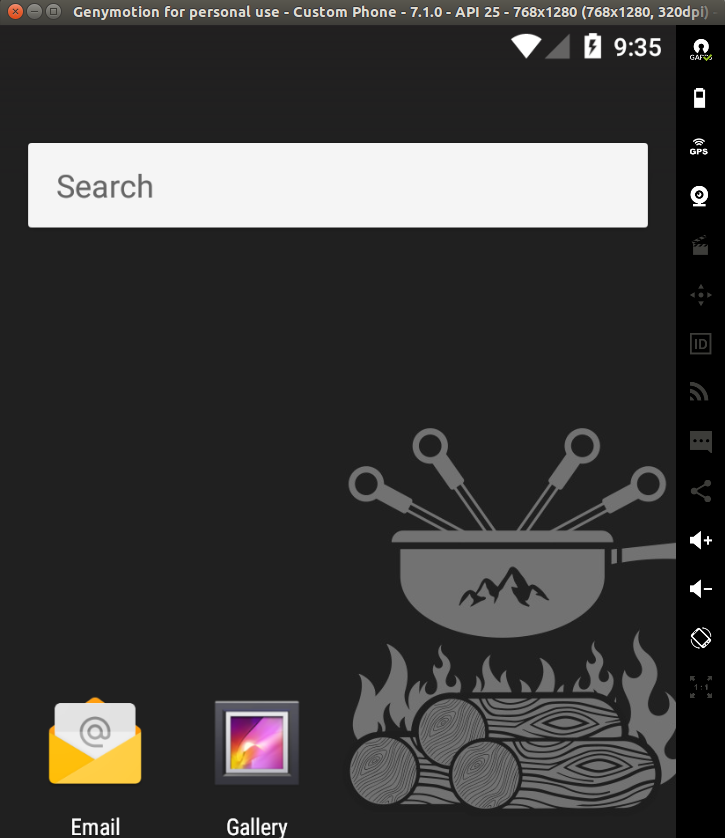
But what is conspicuously absent from this virtual device is the Google Play Store or other Google apps. I believe this is due to Google only wanting to license Google Play preloaded for physical devices.
In order to get Google Apps installed, simply click on the top right-most icon labled “GAPPS” as shown below.
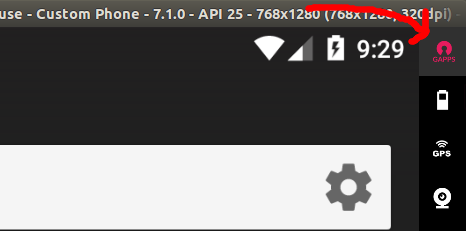
After installation, restart the device by holding the power button down for 3 seconds (bottom icon).
After restart, you will have an icon to the Google Play Store, sign in with your Google credentials and now you have access to run all apps available from Play Store. For example, if you install Google Play Center and the game “Clash Royale” you get the full playing experience using your mouse.

REFERENCES
https://www.genymotion.com/fun-zone/
https://www.genymotion.com/download/
https://docs.genymotion.com/Content/01_Get_Started/License/Registering_the_license_key.htm
https://www.genymotion.com/blog/2-10-open-gapps-widget/ (2.10 has 1-button for install of Google Play)
https://github.com/codepath/android_guides/wiki/Genymotion-2.0-Emulators-with-Google-Play-support (pre 2.10 manual install of Google Play services)
ERROR: /usr/lib/x86_64-linux-gnu/libstdc++.so.6: version `CXXABI_1.3.8′ not found (required by /home/fabian/Downloads/genymotion/player)