 Spotify allows users or systems to access their data and features via OAuth2. Note that this is not intended for centralized authentication, and does not implement OIDC.
In this article, I will show how to use the Spotify Dashboard to configure an Application that can support OAuth2. We will then use a small, local Docker image to implement the Client Application side and smoke test the solution.
Prerequisites
- Sign up for a free account from the Spotify Developer site, click on “Sign up for a free Spotify account here”
- Install a local Docker daemon for our smoke tests
Sign-in to Spotify Developer dashboard
Sign in to the Spotify Developer Dashboard at https://developer.spotify.com/dashboard/applications.
Create an Application
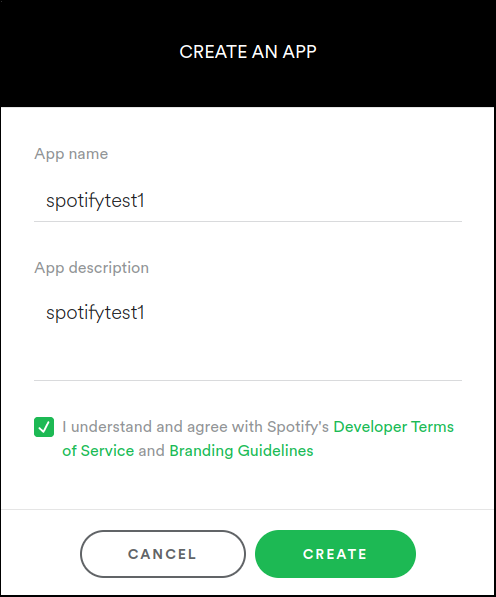
As described in the documentation, press the “Create an App” button. Use the name and description “spotifytest1”, check the agreement box, and press “Create”.
Configure the Application
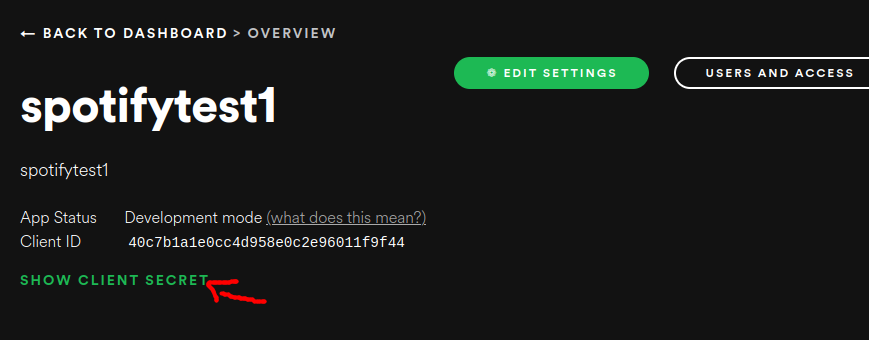
After pressing the Create button, you will be taken to the Application page. This will show you the OAuth2 client ID and OAuth2 client secret. You need to save these values for our testing later.
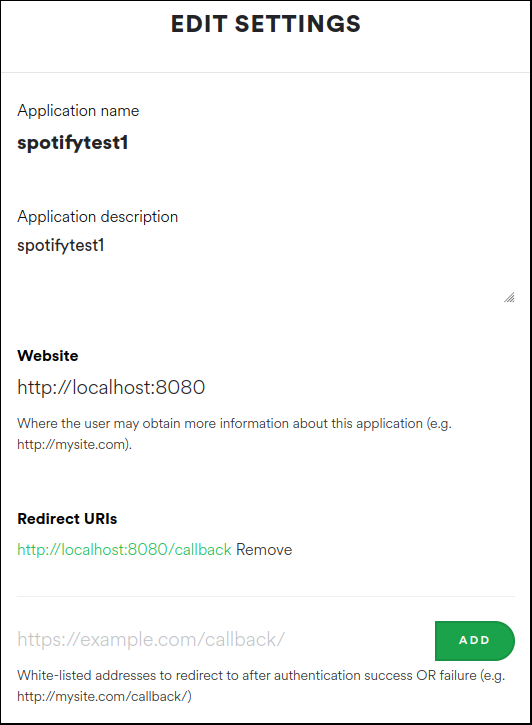
Press the “Edit Settings” button to configure the application for our local test. For the website, use “http://localhost:8080” and add a Redirect URI “http://localhost:8080/callback” and press “Save”.
Validate flow with sample Client Application
You now have the necessary Spotify App configuration to support OAuth2 from the “Authentication Server” perspective. You can validate by using your browser and a small local web application that will serve as the OAuth2 “Client Application” entity.
I would recommend you enable the developer mode of your browser (F12 on Firefox and Chrome), so you can follow along with the network requests being made.
I have built a small Docker image using Go that serves the role of “Client Application” and starts a web server on localhost:8080, and is ready to accept a code back from Spotify at “http://localhost:8080/callback”
export AUTH_SERVER=accounts.spotify.com
export AUTH_PROVIDER=spotify

# values shown after App creation
export CLIENT_ID=<the oauth2 client id>
export CLIENT_SECRET=<the oauth2 client secret>

export SCOPE="streaming"

# remove any older container runs
docker rm oauth2-client-app-golang

# run docker image locally, listening on localhost:8080
docker run -it --rm \
--name oauth2-client-app-golang \
--network host \
-p 8080:8080 \
-e AUTH_PROVIDER=$AUTH_PROVIDER \
-e AUTH_SERVER=$AUTH_SERVER \
-e CLIENT_ID=$CLIENT_ID \
-e CLIENT_SECRET=$CLIENT_SECRET \
-e SCOPE="$SCOPE" \
fabianlee/oauth2-client-app-golang:1.0.0
Pointing your browser at http://localhost:8080 will show a simple web page with a login link.
Press “OAuth2 LOGIN to spotify” and it will redirect you to “localhost:8080/login/”, which silently redirects to Spotify at “https://accounts.spotify.com/authorize” with parameters client_id, scope, and redirect_uri.
Spotify will then display a login form where you can enter in the credentials of a valid user. Use the same credentials that you signed into the developer console with, and press “LOG IN”.

From the browser developer console you will see a GET response back to the “http://localhost:8080/callback” with a code parameter.
Opaque to the end user, the Client web application then takes this code and exchanges it for an Access Token via POST to https://accounts.spotify.com/api/token. You can see these values in the container console.
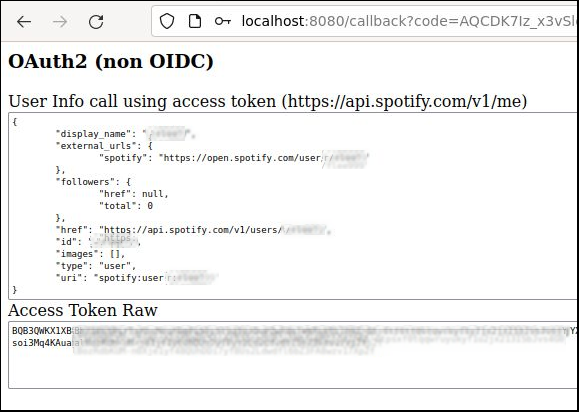
The Spotify user info endpoint at https://api.spotify.com/v1/me is then called with an “Authorization: Bearer <accessToken>” header to provide the final user view shown below and prove the validity of the access token.
REFERENCES
Spotify docs, on OAuth2 Appication
Spotify docs, on OAuth2 scopes
Spotify docs, on OAuth2 Authorization code flow
fabianlee github, oauth2-client-app-golang
fabianlee dockerhub, oauth2-client-app-golang
NOTES
Although Spotify is non-OIDC compliant (OAuth2 only) because it only returns an Access Token and not an ID token, it does have a public well-known/openid-configuration, which can be confusing.
Spotify returns a non-JWT access token, you can validate the token by using it to call an API endpoint such as https://api.spotify.com/v1/me with a header “Authentication: Bearer <accessToken>”