![]() okta is an Identity and Access Management solution that can be used to provide OAuth2 and OIDC authentication and authorization to your applications.
okta is an Identity and Access Management solution that can be used to provide OAuth2 and OIDC authentication and authorization to your applications.
In this article, I will show how to use the okta Dashboard to configure a hosted okta Application that can support OAuth2/OIDC. We will then use a small, local Docker image to implement the Client Application side and smoke test the solution.

Prerequisites
- Sign up for a free account from the okta developer site, press “Sign Up” on the top left and you will be assigned a custom subdomain of the form “dev-xxxx-admin.okta.com”
- Install a local Docker daemon for our smoke tests
Sign-in to okta developer console
Sign in to https://developer.okta.com, or directly to your subdomain at https://dev-xxxx-admin.okta.com. You will be led through the login process, and ultimately end up at your personalized subdomain dashboard landing page (https://dev-xxxx-admin.okta.com/admin/getting-started).
This subdomain (without the ‘-admin’) suffix is important for our smoke test later, because it is the location of the okta Authentication Server endpoints. For example, you should be able to pull up the OIDC well-known metadata at the following URL.
https://dev-xxxx.okta.com/.well-known/openid-configuration
Create OAuth2 Application in the okta dashboard
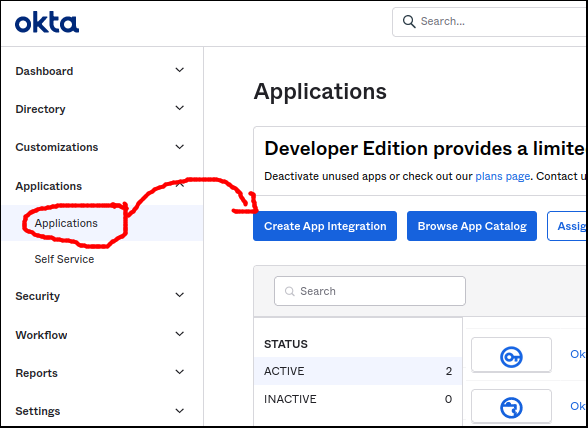
From your subdomain dashboard, select Applications > Applications from the left-hand sidebar, then press the “Create App Integration” button.
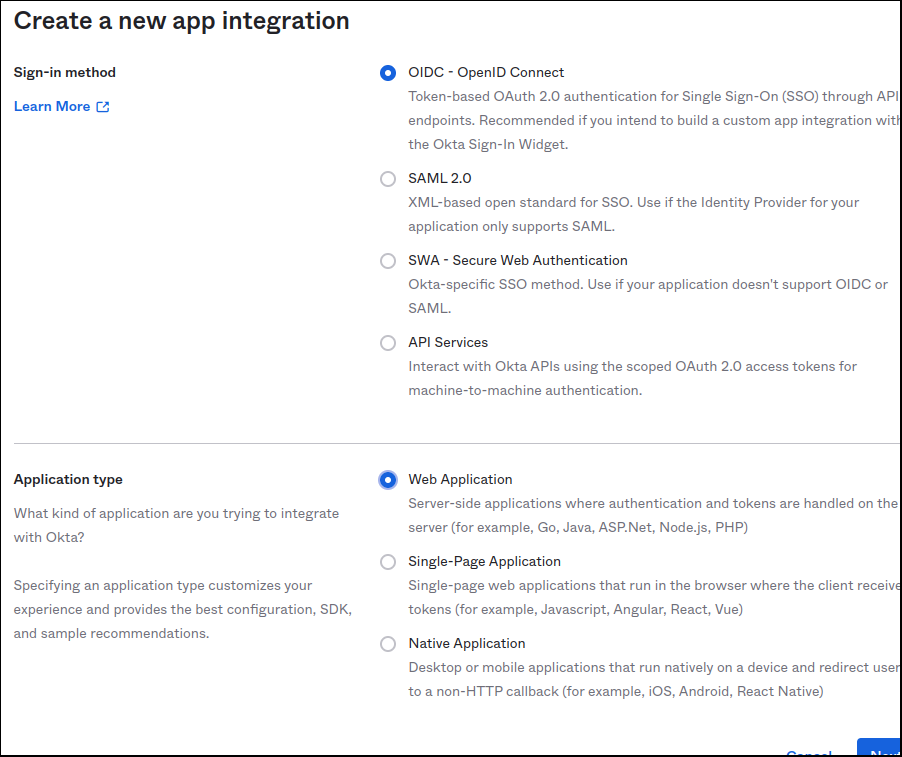
Select “OIDC – OpenID Connect” as the Sign-In method, then “Web Application” as the application type. Then press “Next”.
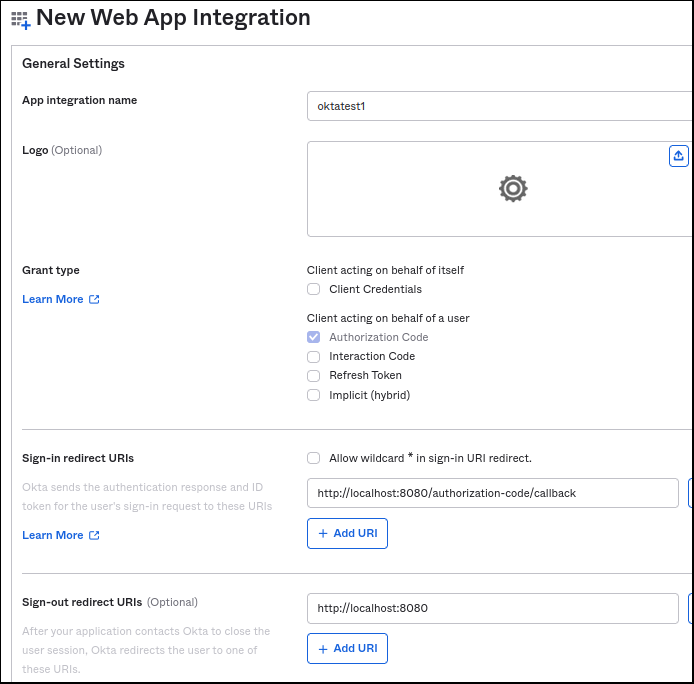
Fill in the name as “oktatest1″, Grant type=”Authorization Code”, leave the default Sign-in redirect URI as “http://localhost:8080/authorization-code/callback”, and Sign-out redirect URI as “http://localhost:8080”. For Controlled Access select “Allow everyone in your organization to access”, and enable immediate access should be checked. Then press “Save”.
This will create the okta Application, and provide you the generated OAuth2 Client ID and Client Secret. You need to save both these values, because they will be used in our smoke test in the section below.

Validate flow with sample Client Application
You now have the necessary okta configuration to support OAuth2/OIDC from the “Authentication Server” perspective. You can validate by using your browser and a small local web application that will serve as the OAuth2 “Client Application” entity.
I would recommend you enable the developer mode of your browser (F12 on Firefox and Chrome), so you can follow along with the network requests being made.
I have built a small Docker image using Go that serves the role of “Client Application” and starts a web server on localhost:8080, and is ready to accept a code back from okta at “http://localhost:8080/authorization-code/callback”
# custom subdomain (take '-admin' suffix off dashboard URL)
export AUTH_SERVER=dev-xxxx.okta.com
export AUTH_PROVIDER=okta

# values shown after okta App creation
export CLIENT_ID=<the oauth2 client id>
export CLIENT_SECRET=<the oauth2 client secret>

export SCOPE="openid"

# remove any older container runs
docker rm oauth2-client-app-golang

# run docker image locally, listening on localhost:8080
docker run -it --rm \
--name oauth2-client-app-golang \
--network host \
-p 8080:8080 \
-e AUTH_PROVIDER=$AUTH_PROVIDER \
-e AUTH_SERVER=$AUTH_SERVER \
-e CLIENT_ID=$CLIENT_ID \
-e CLIENT_SECRET=$CLIENT_SECRET \
-e SCOPE="$SCOPE" \
fabianlee/oauth2-client-app-golang:1.0.0
Pointing your browser at http://localhost:8080 will show a simple web page with a login link.
Press “OIDC LOGIN to okta” and it will redirect you to “localhost:8080/login/”, which silently redirects to the okta custom subdomain at “https://dev-xxxx.okta.com/oauth2/v1/authorize” with parameters client_id, scope, and redirect_uri.
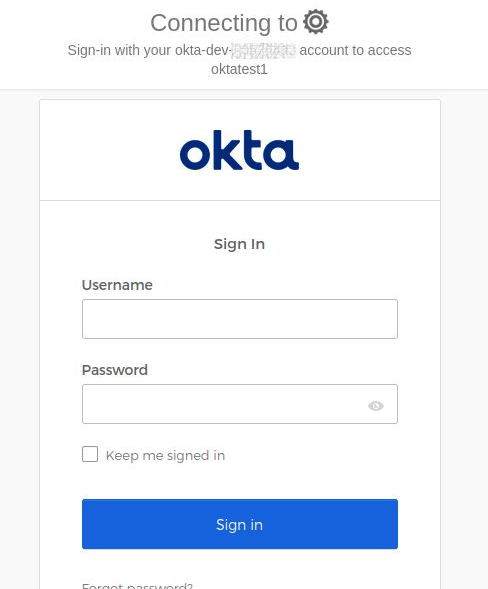
okta will then display a login form where you can enter in the credentials of a valid user. Use the same credentials that you signed into the developer console with, and press “Sign in”.
From the browser developer console you will see a GET response back to the “http://localhost:8080/authorization-code/callback” with a code parameter.
Opaque to the end user, the Client web application then takes this code and exchanges it for an ID and Access Token via POST to https://dev-xxxx.okta.com/oauth2/v1/token. You can see these values in the container console.
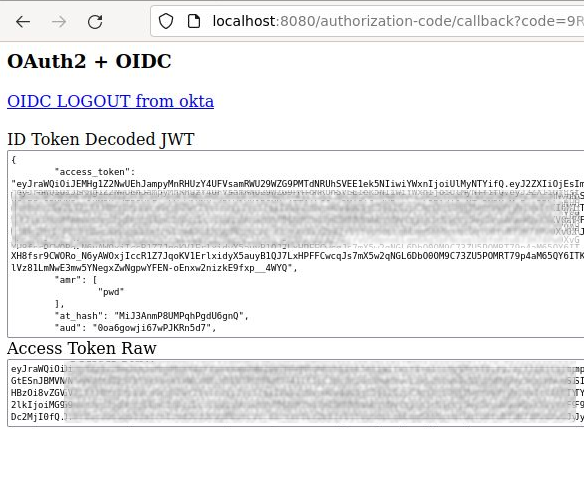
The decoded JWT ID Token and raw Access Token are then displayed in the browser, along with a logout link to the okta provider.
REFERENCES