![]() HashiCorp Vault is a secret and encryption management system that allows your organization to secure sensitive information such as API keys, certificates, and passwords.
HashiCorp Vault is a secret and encryption management system that allows your organization to secure sensitive information such as API keys, certificates, and passwords.
It has tight integrations with Kubernetes that allows containers to fetch secrets without requiring hardcoding them into environment variables, files, or external services.
The official docs already provide usage scenarios, so this article will focus on an end-to-end installation and validation.
Overview
There are multiple methods to install HashiCorp Vault, but in this article we will use Helm to install the Vault server into an existing Kubernetes cluster. The default parameters deploy a single server as a StatefulSet with a simple file system PVC, which meets our needs as a proof-of-concept (see docs on HA and hardening for production deployments).
After installation, we will enable the Kubernetes authentication method for Vault. This will enable Kubernetes Service Accounts to provide a JWT token validated by the kube-API TokenReview to authorize secret access by a client.
Finally, using annotations on a yaml Kubernetes Deployment manifest, we can then specify the secret path we wish to fetch, and the Vault sidecar will fetch that secret for use by our application.
Install Vault server into Kubernetes
This is assuming you already have a Kubernetes cluster, a valid KUBECONFIG, and Helm installed.
# test of kubectl access
kubectl get nodes -o wide

# add local helm repo
helm repo add hashicorp https://helm.releases.hashicorp.com
helm search repo hashicorp/vault

# custom vault namespace
vault_ns=vault

# install Vault into custom namespace
helm upgrade --install vault hashicorp/vault --namespace $vault_ns --create-namespace --set "ui.enabled=true" --set "server.logLevel=trace" --set "injector.logLevel=trace"
Validate installation
# show objects created
$ kubectl get all -n $vault_ns
NAME                                        READY   STATUS    RESTARTS   AGE
pod/vault-0                                 0/1     Running   0          4m12s
pod/vault-agent-injector-7c48dbf948-m8crg   1/1     Running   0          4m12s

NAME                               TYPE        CLUSTER-IP      EXTERNAL-IP   PORT(S)             AGE
service/vault-internal             ClusterIP   None                    8200/TCP,8201/TCP   4m12s
service/vault-agent-injector-svc   ClusterIP   10.43.181.148           443/TCP             4m12s
service/vault                      ClusterIP   10.43.72.149            8200/TCP,8201/TCP   4m12s
service/vault-ui                   ClusterIP   10.43.58.95             8200/TCP            5s

NAME                                   READY   UP-TO-DATE   AVAILABLE   AGE
deployment.apps/vault-agent-injector   1/1     1            1           4m12s

NAME                                              DESIRED   CURRENT   READY   AGE
replicaset.apps/vault-agent-injector-7c48dbf948   1         1         1       4m12s

NAME                     READY   AGE
statefulset.apps/vault   0/1     4m12s

# this hook inserts vault sidecar into apps wanting secret access
$ kubectl get mutatingwebhookconfiguration
NAME WEBHOOKS AGE
vault-agent-injector-cfg 4 12h

# show service accounts and secrets created by vault installation
$ kubectl get serviceaccount,secrets -n vault
NAME                                  SECRETS   AGE
serviceaccount/default                0         6m
serviceaccount/vault                  0         6m
serviceaccount/vault-agent-injector   0         6m

NAME                                 TYPE                                  DATA   AGE
secret/sh.helm.release.v1.vault.v1   helm.sh/release.v1                    1      6m
Look at the logs of the vault StatefulSet “vault-0” pod.
# expected INFO message below because still sealed
$ kubectl logs vault-0 -n $vault_ns | grep INFO | tail
...
2023-11-06T17:47:38.057Z [INFO]  core: security barrier not initialized
2023-11-06T17:47:38.057Z [INFO]  core: seal configuration missing, not initialized
Initialize and unseal Vault
The Vault server now needs to be initialized using ‘vault operator init‘, which will output a list of unseal keys.
$ kubectl exec --stdin=true --tty=true vault-0 -n $vault_ns -- vault operator init

Unseal Key 1: MBFSDepD9E6whREc6Dj+k3pMaKJ6cCnCUWcySJQymObb
Unseal Key 2: zQj4v22k9ixegS+94HJwmIaWLBL3nZHe1i+b/wHz25fr
Unseal Key 3: 7dbPPeeGGW3SmeBFFo04peCKkXFuuyKc8b2DuntA4VU5
Unseal Key 4: tLt+ME7Z7hYUATfWnuQdfCEgnKA2L173dptAwfmenCdf
Unseal Key 5: vYt9bxLr0+OzJ8m7c7cNMFj7nvdLljj0xWRbpLezFAI9

Initial Root Token: s.zJNwZlRrqISjyBHFMiEca6GF
Copy these values into a hardened and secure location on your local system, they will not be output again.
Then run the unseal command below until the key threshold is reached (default is 3).
kubectl exec --stdin=true --tty=true vault-0 -n $vault_ns -- vault operator unseal <unsealKey1>
Key                Value
---                -----
Seal Type          shamir
Initialized        true
Sealed             true
Total Shares       5
Threshold          3
Unseal Progress    1/3
Unseal Nonce       afa50b86-3b70-85bf-3e93-570a2423c766
Version            1.15.1
Build Date         2023-10-20T19:16:11Z
Storage Type       file
HA Enabled         false
Notice the “Unseal Progress is now 1/3”. Repeat this command twice more with <unsealKey2> an <unsealKey3>, at which time the ‘Sealed’ field will return false.
Create secrets using CLI
We will exec into the “vault-0” pod to validate we can run a basic set of Vault commands.
# go inside the container
kubectl exec -it vault-0 -n $vault_ns -- /bin/sh

# provide the 'Initial Root Token' from above as the password
vault login

# enable the kv2 secrets engine
vault secrets enable -path=secret kv-v2

# create secret
vault kv put secret/webapp/config foo=bar username="static-user" password="static-password"

# validate secret exists
$ vault kv get secret/webapp/config
====== Secret Path ======
secret/data/webapp/config

======= Metadata =======
Key                Value
---                -----
created_time       2023-11-06T14:00:24.217352744Z
custom_metadata
deletion_time      n/a
destroyed          false
version            1

====== Data ======
Key         Value
---         -----
foo         bar
password    static-password
username    static-user

# exit container
exit
Validate secrets from Vault UI
You can also check this secret we just created is available in the Vault web UI. Port forward the ‘vault-ui’ service to your localhost port at 8200.
kubectl port-forward service/vault-ui -n $vault_ns 8200:8200
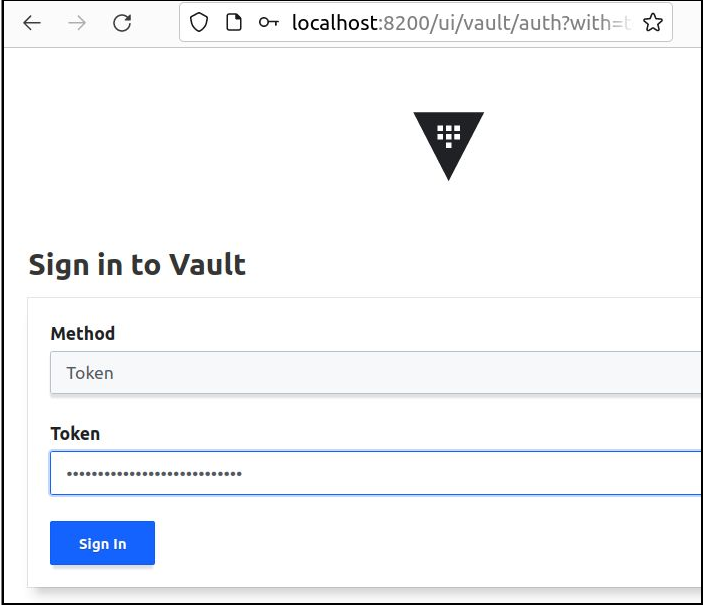
Using your web browser, point at http://localhost:8200/ui and use the ‘Initial Root Token’ originally returned from ‘vault operator init’ to login.
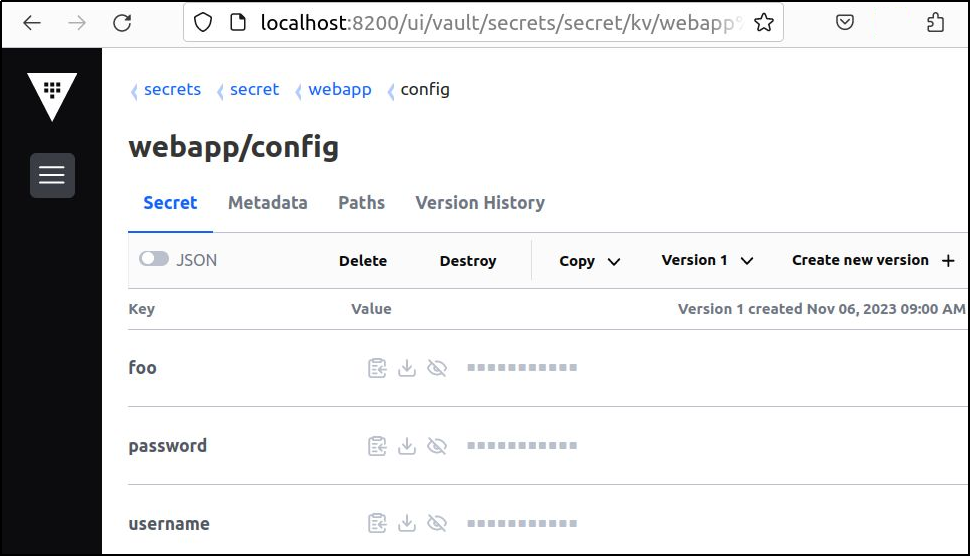
Navigate to secrets > secret > webapp > config, and you should see our secret and its keys: foo, username, password.
Configure Kubernetes authentication
To allow the Kubernetes cluster components and the HashiCorp Vault to communicate with each other, they must be configured with a trusted authentication method.
There are multiple authentication methods available from Vault. A common one is the Kubernetes method where the Vault server communicates back to the cluster using kube-API to authenticate with a Kubernetes Service Account (TokenReview API).
Create Kubernetes Service Account with TokenReviews permission
# create Kubernetes service account
kubectl create sa vault-auth -n $vault_ns

# create secret for service account
kubectl create -n $vault_ns -f - <<EOF
apiVersion: v1
kind: Secret
metadata:
  name: vault-auth
  annotations:
    kubernetes.io/service-account.name: vault-auth
type: kubernetes.io/service-account-token
EOF

# create cluster rolebinding allowing 'tokenreviews.create'
# the existing 'auth-delegator' role can provide this
kubectl create clusterrolebinding vault-auth-cluster --clusterrole=system:auth-delegator --serviceaccount=$vault_ns:vault-auth

# validate service account now has 'tokenreviews.create'
kubectl auth can-i --list --as=system:serviceaccount:$vault_ns:vault-auth
# should return 'yes'
kubectl auth can-i create tokenreviews --as=system:serviceaccount:$vault_ns:vault-auth
Fetch authentication parameters
# make sure we have utility for parsing json
sudo apt install -y jq

# get JWT token for Kubernetes service account
token_reviewer_jwt=$(kubectl get secret vault-auth -n $vault_ns -o jsonpath='{.data.token}' | base64 -d)

# get CA cert for cluster
kubernetes_ca_cert=$(kubectl config view --raw --minify --flatten --output='jsonpath={.clusters[].cluster.certificate-authority-data}' | base64 -d)

# get kubernetes API endpoint
kubernetes_host=$(kubectl config view --raw --minify --flatten --output='jsonpath={.clusters[].cluster.server}')
Apply authentication parameters
We will exec into the “vault-0” pod to enable kubernetes authentication mode, then apply its configuration parameters.
# enable auth method
kubectl exec -it vault-0 -n $vault_ns -- vault auth enable kubernetes

# configure kubernetes auth parameters
kubectl exec -it vault-0 -n $vault_ns -- vault write auth/kubernetes/config disable_local_ca_jwt="true" kubernetes_host="$kubernetes_host" token_reviewer_jwt="$token_reviewer_jwt" kubernetes_ca_cert="$kubernetes_ca_cert"
Configure Vault policy and role
Vault still needs the policy and role that will be applied to the secret. Specify the privileges (read,write) in the policy, and the role which binds the Kubernetes service account to this policy.
# go inside the container
kubectl exec -it vault-0 -n $vault_ns -- /bin/sh

# create policy, 'data' must be inserted for kv2 path
echo 'path "secret/data/webapp/config" { capabilities=["read"] }' | vault policy write mypolicy -

# create role
vault write auth/kubernetes/role/myrole policies=mypolicy ttl=15m bound_service_account_names=vault-auth bound_service_account_namespaces=vault

# exit container
exit
Deploy pod with secrets enabled through sidecar
The Vault sidecar provides a transparent method for workloads to access Vault secrets by auto-pulling secrets from Vault and setting environment variables or writing files onto the running image, which the application can then access as normal environment variables or files.
The Vault mutatingwebhookconfiguration is responsible for inserting a Vault sidecar into any workloads you want enabled for secret access.
$ kubectl get mutatingwebhookconfiguration
NAME                                   WEBHOOKS   AGE
vault-agent-injector-cfg               1          10m
We will use a yaml manifest for a simple container “tiny-tools-kubernetes-auth-and-sidecar.yaml“, which looks like any other kubernetes manifest, except:
- It runs using the “vault-auth” service account we created earlier
- It has Vault-specific annotations meant for the Vault sidecar
The “spec.template.metadata.spec.serviceAccountName” is set to “vault-auth”, the Kubernetes service account we setup earlier.
serviceAccountName: vault-auth
And “spec.template.metadata.annotations” defines the Vault secret path and role we intend to use (docs).
        vault.hashicorp.com/agent-inject: 'true'
        vault.hashicorp.com/agent-init-first: 'false'
        vault.hashicorp.com/agent-cache-enable: 'true'
        vault.hashicorp.com/auth-type: 'kubernetes'
        vault.hashicorp.com/auth-config-path: '/var/run/secrets/kubernetes.io/serviceaccount/token'
        vault.hashicorp.com/remove-jwt-after-reading : 'false'
        vault.hashicorp.com/auth-path: auth/kubernetes
        vault.hashicorp.com/role: myrole
        vault.hashicorp.com/agent-inject-secret-mysecret.txt: secret/webapp/config
I have the full yaml of this manifest as a template, so you would setup the variables like below, and then render it.
# get template
wget https://raw.githubusercontent.com/fabianlee/blogcode/master/vault/tiny-tools-kubernetes-auth-and-sidecar.yaml

# setup variables
export app=tiny-tools-mytest-vault
export namespace_k8s=$vault_ns
export service_account_k8s=vault-auth
export vault_role=myrole
export vault_secret_path=secret/webapp/config

# show rendered template
cat tiny-tools-kubernetes-auth-and-sidecar.yaml | DOLLAR_SIGN='$' envsubst

# apply rendered template to cluster
cat tiny-tools-kubernetes-auth-and-sidecar.yaml | DOLLAR_SIGN='$' envsubst | kubectl apply -f -

# show deployment
$ kubectl get deployment $app -n $vault_ns
NAME                      READY   UP-TO-DATE   AVAILABLE   AGE
tiny-tools-mytest-vault   1/1     1            1           2m

# show containers in pod (app and vault sidecar)
$ kubectl get pods -n $vault_ns -lapp=$app -o jsonpath='{range .items[*].spec.containers[*]}{.image}{"\n"}{end}'
giantswarm/tiny-tools:3.12
hashicorp/vault:1.15.1

# show vault sidecar logs (should be no errors)
kubectl logs deployment/$app -n $vault_ns -c vault-agent
Validate secret from Kubernetes pod
From Vault sidecar
From the Vault sidecar you can use the ‘vault’ CLI utilty to fetch the secret.
$ kubectl exec -it deployment/$app -n $vault_ns -c vault-agent -- /bin/sh -c "VAULT_ADDR=http://localhost:8200 vault kv get $vault_secret_path"
====== Secret Path ======
secret/data/webapp/config
...
====== Data ======
Key         Value
---         -----
foo         bar
password    static-password
username    static-user
From application container
From the main application container we can use curl to request the secret from the local Vault sidecar which listens on port 8200.
# kv2 engine API needs 'data' inserted into path
kubectl exec -it deployment/$app -n $vault_ns -c tiny-tools -- curl -X GET http://localhost:8200/v1/secret/data/webapp/config
Secret written to app container as file
Our annotation “vault.hashicorp.com/agent-inject-secret-mysecret.txt” is requesting that a file be created named “mysecret.txt” (docs). We can verify the secret was rendered to that file inside our container.
$ kubectl exec -it deployment/$app -n $vault_ns -c tiny-tools -- cat /vault/secrets/mysecret.txt
foo = bar
password = static-password
username = static-user
REFERENCES
HashiCorp Vault developer intro
HashiCorp Vault install with Helm
HashiCorp Vault on Kubernetes guide
HashiCorp Vault authentication methods list
HashiCorp JWT OIDC-providers, using public key
HashiCorp Vault on Kubernetes security considerations
holdmybeersecurity.com, GitLab CI/CD pipeline with vault secrets
Google blog, Kubernetes bound service account tokens, ‘audience’ field
Ruan Bekker, Vault setup and quick use
HashiCorp blog, 3 different ways of integrating Vault (sidecar, CSI provider, secrets operator)
HashiCorp, injector annotations list
HashiCorp Support site, JWT auth with static keys
HashiCorp Support site, common reasons for 403 Permission Denied error
NOTES
Get Cluster info
# get CA cert for cluster
CLUSTER_CA_CERT=$(kubectl config view --raw --minify --flatten --output='jsonpath={.clusters[].cluster.certificate-authority-data}' | base64 -d)

# get OIDC endpoint content for cluster
CLUSTER_ENDPOINT=$(kubectl config view --raw --minify --flatten --output='jsonpath={.clusters[].cluster.server}')
OIDC_AUD=$(kubectl get --raw /.well-known/openid-configuration | jq -r ".issuer")
OIDC_URI=$(kubectl get --raw /.well-known/openid-configuration | jq -r '.jwks_uri' | grep -Po "https://[^ \/]*\K.*")
OIDC_CONTENT=$(kubectl get --raw $OIDC_URI)

# show
echo $OIDC_AUD
echo $OIDC_CONTENT | jq
Remove Vault server from cluster
helm uninstall vault -n $vault_ns
kubectl get all,secrets,serviceaccounts,rolebinding -n $vault_ns
kubectl delete ns $vault_ns --force --grace-period=0

# if stuck, clear finalizers
kubectl get ns $vault_ns -o json | jq '.spec.finalizers = []' | kubectl replace --raw "/api/v1/namespaces/$vault_ns/finalize" -f -
Get ‘iss’ field for Cluster (Vault docs)
echo '{"apiVersion": "authentication.k8s.io/v1", "kind": "TokenRequest"}' | kubectl create -f- --raw /api/v1/namespaces/default/serviceaccounts/default/token | jq -r '.status.token' | cut -d . -f2 | base64 -d | jq -r '.iss'
Get ‘aud’ field for Cluster (google blog)
sa_name=default
app_name=basic-debian-pod-bound-token
ootb_audience="foobar.com"

kubectl apply -f - <<EOF
apiVersion: v1
kind: Pod
metadata:
  name: $app_name
  namespace: default
  labels:
    app: $app_name
spec:
  serviceAccountName: $sa_name
  containers:
  - image: debian
    name: main
    command: ["sleep", "infinity"]
    volumeMounts:
    - name: my-bound-token
      mountPath: /var/run/secrets/my-bound-token
  volumes:
  - name: my-bound-token
    projected:
      sources:
      - serviceAccountToken:
          path: token
          audience: $audience
          expirationSeconds: 3600
EOF


kubectl wait pods -n default -l app=$app_name --for condition=Ready --timeout=90s

# show decoded 'aud' from token
jwt_token=$(kubectl exec -it $app_name -- cat /var/run/secrets/kubernetes.io/serviceaccount/token)
echo "$jwt_token" | jq -Rr 'split(".") | .[1] | @base64d | fromjson | .aud[0]'

# remove test pod
kubectl delete pod $app_name
Get single field from vault auth config
kubectl exec -it vault-0 -n $vault_ns -- vault read -field disable_local_ca_jwt auth/kubernetes/config
Check permissions on service account
kubectl auth can-i --list --namespace=vault --as=system:serviceaccount:vault:vault-auth
To show curl equivalent of vault command
vault write -output-curl-string auth/userpass/users/bob password="long-password"
Get audience and iss from TokenRequest [1,2]
echo '{"apiVersion": "authentication.k8s.io/v1", "kind": "TokenRequest"}' | kubectl create -f- --raw /api/v1/namespaces/default/serviceaccounts/default/token | jq -r '.status.token' | cut -d. -f2 | base64 -d | jq
If installing Vault integration into cluster, where Vault is external instance
helm upgrade --install vault hashicorp/vault --namespace $vault_ns --create-namespace --set "ui.enabled=true" --set "server.logLevel=trace" --set "injector.logLevel=trace" --set "global.externalVaultAddr=http://EXTERNAL_NAME:8200"