![]() Keycloak is an open-source Identity and Access Management (IAM) solution that can be used to provide authentication and authorization to your enterprise applications. One of the many protocols it supports is OAuth2/OIDC.
Keycloak is an open-source Identity and Access Management (IAM) solution that can be used to provide authentication and authorization to your enterprise applications. One of the many protocols it supports is OAuth2/OIDC.
One of the easiest ways to deploy Keycloak is directly into your Kubernetes cluster, exposed securely with an NGINX Ingress.
In this article, I will show you how to deploy Keycloak to a Kubernetes cluster, augmenting it with startup scripts that will bootstrap a custom Realm and OAuth2 Client. Then we will run a smoke test using a Docker image that acts as the OAuth2 Client Application.

Prerequisites
In order to go through this article, you first need the following:
- KUBECONFIG environment variable and reachable Kubernetes cluster
- NGINX Ingress Controller installed into your cluster (see official docs here)
- Cluster with a LoadBalancer implementation that will supply an IP to Ingress objects
If you are on a bare-metal Kubernetes flavor look into MetalLB as a LoadBalancer. You can refer to previous articles I’ve written on installing MetalLB for K3s, microk8s, and kubeadm.
If you are on a Hyperscaler such as Amazon/GCP they are already configured to automatically create a virtual LoadBalancer based on an Ingress definition.
Deploy Keycloak Identity Provider
Based on the official Keycloak Getting Started, use a slightly modified version of their manifest to deploy.
curl -s https://raw.githubusercontent.com/keycloak/keycloak-quickstarts/latest/kubernetes-examples/keycloak.yaml | sed 's/type: LoadBalancer/type: ClusterIP/' | kubectl apply -f -
Instead of the default LoadBalancer, we are going to expose the service in later sections using an Ingress.
Load TLS Secret into Cluster
We will be exposing Keycloak via TLS as ‘https://keycloak.kubeadm.local’. For purposes of keeping this article simple, let’s use a self-signed certificate.
# fqdn of exposed service
prefix=keycloak.kubeadm.local

# script using openssl to create self-signed cert
wget https://raw.githubusercontent.com/fabianlee/blogcode/master/keycloak/selfsigned-openssl.sh
chmod 755 selfsigned-openssl.sh

# key and cert will be placed in /tmp
./selfsigned-openssl.sh $prefix
Then load the key and certificate into a Kubernetes secret named ‘tls-credential’
kubectl create -n default secret tls tls-credential --key=/tmp/$prefix.key --cert=/tmp/$prefix.pem
Deploy NGINX Ingress
Here is an Ingress manifest that exposes the Keycloak service using the ‘tls-credential’ secret from the previous section.
# keycloak-subdomain-ingress.yaml
---
apiVersion: networking.k8s.io/v1
kind: Ingress
metadata:
  annotations:
    kubernetes.io/ingress.class: nginx
  labels:
    app: keycloak
  name: keycloak
spec:
  rules:
  - host: keycloak.kubeadm.local
    http:
      paths:
      - pathType: Prefix
        path: "/"
        backend:
          service:
            name: keycloak
            port:
              number: 8080
  tls:
  - hosts:
    - keycloak.kubeadm.local
    secretName: tls-credential
Apply to the cluster.
# download Ingress manifest shown above
wget https://raw.githubusercontent.com/fabianlee/blogcode/master/keycloak/keycloak-subdomain-ingress.yaml

# apply Ingress, which will expose on loadbalancer
kubectl apply -f keycloak-subdomain-ingress.yaml
The wait time varies depending on the load balancer implementation, but within minutes the Ingress should report back on where the service is exposed.
kubectl get Ingress keycloak -o json | jq .status
Loadbalancer DNS resolution
This is highly environment specific, but you need ‘keycloak.kubeadm.local’ to resolve to the IP address reported by the Ingress ‘.status’.
In a local bare-metal cluster, it may be sufficient to add an entry to your local “/etc/hosts” file or /etc/dnsmasq.conf. In a lab environment, you may need to create a host entry on the local upstream router. In an enterprise, you might need a DNS administrator to add a record to a zone.
Before you progress to the next section, make sure you have DNS resolution.
# both these commands will do dns resolution
nslookup keycloak.kubeadm.local
dig +short keycloak.kubeadm.local
Smoke Test base installation
With DNS now prepared, you should be able to curl the Keycloak main page from the command line.
# '-k' flag because certificate is self-signed
$ curl -ks https://keycloak.kubeadm.local | grep title
  <title>Welcome to Keycloak</title>
And from your browser you should be able to see a page like below, https://keycloak.kubeadm.local (admin/admin)

Automated Keycloak Realm and Client bootstrap scripts
With the base deployment now done, we would typically start a long set of manual steps to create a Realm and configure OAuth2 Client apps from the Keycloak GUI as described in the documentation here.
But you can also use the kcadm.sh tool located inside the container to script the creation of the required objects.
The steps below patch the Keycloak deployment with a poststart.sh and myclient.exported.json file that are used to automatically create the Realm, Group, User, and OAuth2 Client objects required.
# grab my keycloak startup and client json files
wget https://raw.githubusercontent.com/fabianlee/blogcode/master/keycloak/poststart.sh
wget https://raw.githubusercontent.com/fabianlee/blogcode/master/keycloak/myclient.exported.json
# create configmap of these files so they can be mounted in image
kubectl create configmap keycloak-configmap --from-file=poststart.sh --from-file=myclient.exported.json

# apply patch that mounts additional scripts and startup hook
wget https://raw.githubusercontent.com/fabianlee/blogcode/master/keycloak/keycloak-patch.yaml
kubectl apply -f keycloak-patch

# wait for keycloak to restart, then another 45 seconds for stabilization
kubectl rollout status deployment keycloak -n default --timeout=90s
sleep 45

# show the final OAuth2 client id and secret
# save these values for smoke testing in a later section !!!
kubectl exec -it deployment/keycloak -n default -c keycloak -- cat /tmp/keycloak.properties
If you would rather see the detailed manual steps required in the Keycloak web UI, jump to the bottom of this article.
Validate Realm and Client in Keycloak UI
You can verify all these objects were successfully created by logging into “myrealm” with credentials (admin/admin)
https://keycloak.kubeadm.local/admin/master/console/#/myrealm
Navigating to Myrealm > Clients section, you can click into ‘myclient’ to view the OAuth2 configuration.

If you look under the “Users” section you will see the list of users created in our poststart.sh script:
- ‘engineers’ group: engineer1, engineer2
- ‘managers’ group: manager1.

These will be used in our smoke test later to test group claims from the OAuth2 Access Token.
Validate flow with sample Client Application
You now have the necessary Keycloak configuration to support OAuth2/OIDC from the “Authentication Server” perspective. You can validate by using your browser and a small local web application that will serve as the OAuth2 “Client Application” entity.
I would recommend you enable the developer mode of your browser (F12 on Firefox and Chrome), so you can follow along with the network requests being made.
I have built a small Docker image using Go that serves the role of “Client Application” and starts a web server on localhost:8080, and is ready to accept a code back from Keycloak at “http://localhost:8080/oidc_callback”
# Keycloak server variables
export AUTH_PROVIDER=keycloak
export AUTH_SERVER=keycloak.kubeadm.local
export SCOPE="openid email profile"
export REALM=myrealm

# output earlier from /tmp/keycloak.properties inside container
export CLIENT_ID=<the keycloak client id>
export CLIENT_SECRET=<the keycloak client secret>

# remove any older container runs
docker rm oauth2-client-app-golang

# run docker image locally, listening on localhost:8080
docker run -it --rm \
--name oauth2-client-app-golang \
--network host \
-p 8080:8080 \
-e AUTH_PROVIDER=$AUTH_PROVIDER \
-e AUTH_SERVER=$AUTH_SERVER \
-e CLIENT_ID=$CLIENT_ID \
-e CLIENT_SECRET=$CLIENT_SECRET \
-e SCOPE="$SCOPE" \
-e REALM=$REALM \
fabianlee/oauth2-client-app-golang:1.0.0
Pointing your browser at http://localhost:8080 will show a simple web page with a login link.
Press “OIDC LOGIN to keycloak” and it will redirect you to “localhost:8080/login/keycloak”, which silently redirects to the Keycloak server at “/realms/myrealm/protocol/openid-connect/auth” with parameters for realm, client_id, scope, and redirect_uri.
Keycloak will then display a login form where you can enter in the credentials of a valid Keycloak user.
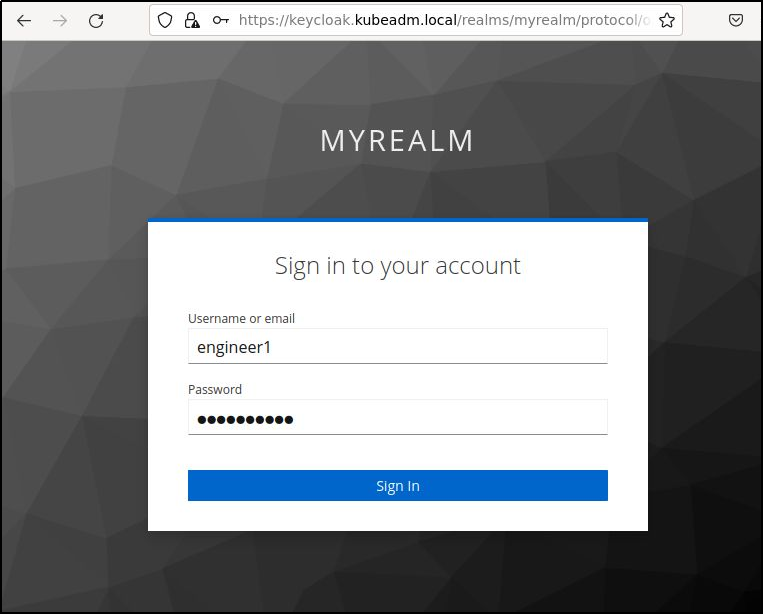
Login as engineer1 that was created in the poststart.sh script (engineer1/Password1!) and press “Sign In”.
From the browser developer console you will see a GET response back to the “http://localhost:8080/oidc_callback” with a code parameter.
Opaque to the end user, the Client web application then takes this code and exchanges it for an ID and Access Token via POST to https://keycloak.kubeadm.local/realms/myrealm/protocol/openid-connect/token. You can see these values in the container console.
The decoded JWT ID Token and raw Access Token are then displayed in the browser, along with a logout link to the Keycloak provider.

This Access Token can be used to access services on a 3rd party Resource Server by adding the “Authorization: Bearer <accessToken>” HTTP header to the request.
Feel free to decode the ID or Access JWT at any of the popular JWT decoders.
REFERENCES
github, be sure keycloak user has ’email verified’ set to ON
github, kcadm.sh command examples
stackoverflow, kcadm.sh update user with group, lots of detailed commands and explanation
stackoverflow, adding attribute to user with kcadm.sh
stackoverflow, adding mapping protocol with kcadm.sh using nested values
github, workaround for adding Audience to newer Keycloak
github, sample Flask app protected with Keycloak
NOTES
Copying a file unto a pod container when ‘kubectl cp’ does not work because tar not available.
keycloak_pod=$(kubectl get pod -l app=keycloak --no-headers | awk {'print $1'})
cat myclient.exported.json | kubectl exec -i $keycloak_pod -- tee /tmp/myclient.exported.json

# even simpler if you run on deployment
cat myclient.exported.json | kubectl exec -i deployment/keycloak -c keycloak -- tee /tmp/myclient2.exported.json
Login directly to myrealm for administration
https://keycloak.kubeadm.local/admin/master/console/#/myrealm
Validate openid-configuration
https://keycloak.kubeadm.local/realms/myrealm/.well-known/openid-configuration
Validate login as ‘myuser’
Do not use admin console, instead use this url (myuser/Password1!)
https://keycloak.kubeadm.local/realms/myrealm/account/#/
Manual configuration of Keycloak Identity Provider
login to https://keycloak.kubeadm.local/admin/master/console/ (admin/admin)
create realm ‘myrealm’
enabled=On
Make sure ‘myrealm’ is selected for all operations below.
‘Realm Settings’ for ‘myrealm’
go to “Keys” tab, click on “Providers” secondary tab.
Click on ‘rsa-enc-generated’. Set Enable=Off and Active=Off so that keys are not encoded with RSA-OAEP which is too advanced for some OAuth client libraries
create group ‘mygroup’, ‘engineers’, ‘managers’
no attributes and no role mappings
create user ‘myuser’
email=’first.last@kubeadm.local’, first=’first’, last=’last’, user enabled=ON, email verified=ON
set ‘Credentials’ tab, password=Password1!, temporary=ON, and press “Reset Password”
set ‘Attributes’ tab, customer.id=1234
set ‘Role Mappings’ tab, assigned roles=’default-roles-myrealm’, groups=’mygroup’
create user ‘engineer1’ and ‘engineer2’
add to ‘engineers’ group
create user ‘manager1’
add to ‘managers’ group
create client ‘myclient’
‘Settings’ tab
client id=’myclient’, enabled=ON
client protocol=openid-connect, access-type=confidential
standard flow enabled=ON, direct access grants enabled=ON
Root URL=’${authBaseUrl}’
Valid Redirect URIs=’*’
Valid post logout Redirect URI=”*”
Web Origins=’https://keycloak.kubeadm.local’ and ‘https:/kubeadm.local’
Admin URL=’https://keycloak.kubeadm.local’
Client authentication=On (for OIDC)
Authentication flow=standard and direct access grant
backchannel logout session required=ON
‘Credentials’ tab
Client Authenticator=’Client Id and Token’
‘Keys’ tab
all OFF
‘Roles’ tab
no roles
‘Client Scopes’ tab
assigned default client scopes=email, profile
Assigned optional client scopes=address,microfile-jwt,offline_access,phone
‘Mappers’ tab
name=customer.id, Type=User Attribute, user attribute=customer.id, token claim name=customer.id, json type=String, add to ID token=ON, add to access token=ON, add to userinfo=ON
name=groups, Type=Group Membership, token claim name=groups, full group path=ON, add to id token=ON, add to access token=ON, add to userinfo=ON
name=Audience, mapper type=Audience, included client audience=myclient, included custom audience=<empty>, add to id token=OFF, add to access token=ON
‘Scope’ tab
Full scope allowed=OFF, no assigned roles
Use kcadm.sh instead of manual steps to configure
Place json file containing client export unto container filesystem.
cat myclient.exported.json | kubectl exec -i deployment/keycloak -c keycloak -- tee /tmp/myclient.exported.json
Exec into container so you can run kcadm.sh commands.
kubectl exec -it deployment/keycloak -c keycloak -- /bin/bash
cd /opt/keycloak/bin

# login
./kcadm.sh config credentials --realm master --user admin --password admin --server http://localhost:8080

./kcadm.sh get realms