![]() As an exploration of AppDynamics’ APM functionality, you may find it useful to deploy a sample application that can quickly return back useful data. The Java Spring PetClinic connecting back to a MySQL database provides a simple code base that exercises both database and application monitoring.
As an exploration of AppDynamics’ APM functionality, you may find it useful to deploy a sample application that can quickly return back useful data. The Java Spring PetClinic connecting back to a MySQL database provides a simple code base that exercises both database and application monitoring.
We’ll deploy the Java Spring PetClinic unto Tomcat running on Ubuntu 14.04. MySQL will be the backing persistence engine for the web application. The AppDynamics Java agent will be loaded into the JVM running Tomcat, and the AppDynamics Database Agent will connect to MySQL for metrics gathering.
Build petclinic.war
The Spring PetClinic is freely available on github, but the war needs to be built. The building and packaging of the war must be done on a host that has public access to the internet so that the dependencies can be downloaded. Then once the war is built it can be deployed into a more network-restrictive datacenter environment.
Here are instructions for building the petclinic with backing MySQL persistence:
> sudo apt-get install git openjdk-7-jdk maven -y
> git clone https://github.com/spring-projects/spring-petclinic.git
> cd spring-petclinic
> ./mvnw package -P MySQL –DskipTests
The war will be found at target/petclinic.war. Copy this over to the /tmp directory of the target host.
Install the MariaDB Database
Although we have been referring to MySQL, we will actually be using MariaDB, the popular and truly open fork of Mysql. This is a drop-in replacement.
We will install MariaDB in silent mode, providing “petclinic” as the root password:
# export DEBIAN_FRONTEND=noninteractive
# debconf-set-selections <<< "mariadb-server mysql-server/root_password password petclinic"
# debconf-set-selections <<< "mariadb-server mysql-server/root_password_again password petclinic"
# apt-get install -y mariadb-server
You can validate the installation with the following commands:
mysql -u root -ppetclinic
show databases;
exit;
Which should shows 3 databases: information_schema, mysql, performance_schema
Install Java and Tomcat
Now, we need to install Java and then Tomcat as the application server.
# apt-get install openjdk-7-jdk tomcat7 -y
Then edit /etc/default/tomcat7 so that it points at the JDK and increases the heap size to 512m:
JAVA_HOME=/usr/lib/jvm/java-7-openjdk-amd64
JAVA_OPTS="-Djava.awt.headless=true -Xmx512m -XX:+UseConcMarkSweepGC"
Make sure the Tomcat public port is open on the firewall:
# ufw allow 8080/tcp
Then copy petclinic.war to the Tomcat deployment directory and restart:
# cp /tmp/petclinic.war /var/lib/tomcat7/webapps/.
# chmod ugo+r+x /var/lib/tomcat7/webapps/petclinic.war
# service tomcat7 restart
Create Database Schema
Now we need to create the schema necessary to support the application:
> cd /var/lib/tomcat7/webapps/petclinic/WEB-INF/classes/db/mysql
> mysql -uroot -ppetclinic < initDB.sql
> mysql -uroot -ppetclinic petclinic < populateDB.sql
Validate Base Application
Now we should be able to validate the petclinic application. The AppDynamics Java agent is not configured yet, this is just to test that the application itself is deployed properly.
# service tomcat7 restart
# tail –f /var/log/tomcat7/catalina.out
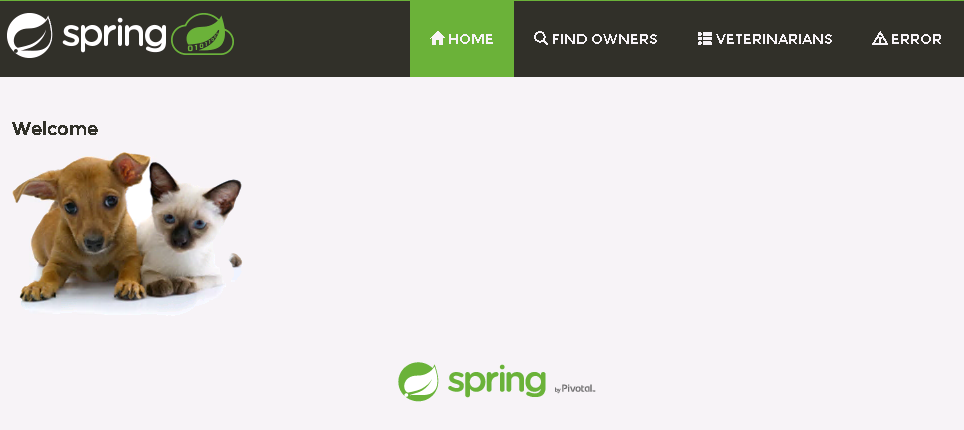
The bottom of catalina.out should say ‘Server startup in xxxx ms’. Then open your browser to the application server, where you should see a screen like below:
http://:8080/petclinic
Click on “Find Owners” tab, “Find Owner” button (should return list of users)
Click on “George Franklin”, press “Edit Owner”
Change name randomly, press “Update Owner”
Click on “Find Owners” tab, “Find Owner” button (list of users, with George Franklin modified).
The steps above will be repeated several times in this article to validate the extra telemetry.
Configure Java AppDynamics Agent
The first step is to grab the latest Java Agent from the AppDynamics download site. This requires an account, but even trial accounts have access to the download. You will end up with a file similar to the name, AppServerAgent-4.2.7.1.zip. Copy this to the /tmp folder of the target host, and then execute the following commands:
# mkdir -p /opt/appdynamics/java-agent
# cd /opt/appdynamics/java-agent
# mv /tmp/AppServerAgent-4.2.7.1.zip .
# apt-get install unzip -y
# unzip AppServerAgent-4.2.7.1.zip
# mkdir -p ver4.2.7.1/logs/<shortHostName>-tomcat8080
# chmod ugo+r+w ver4.2.7.1/logs -R
Then edit the configuration at ‘ver4.2.7.1/conf/controller-info.xml’:
<controller-host> should be set to the FQDN of the controller and needs to match the CN of the controller certificate if using SSL
<controller-port> typically 8090 or 8181 (secure)
<controller-ssl-enabled> true if hitting SSL enabled port of controller
<force-default-cerficate-validation> if SSL enabled, then “true” to prevent strict checking of the server cert
<use-simple-hostname> true
<application-name> petclinic
<tier-name> appserver
<node-name> shortHostname-tomcat8080
<account-name> customer1
<account-access-key> API key for Controller (Gear > License > Show key)
Now configure Tomcat’s JVM to use the AppD agent by editing /etc/default/tomcat7:
JAVA_OPTS="-Djava.awt.headless=true -Xmx512m -XX:+UseConcMarkSweepGC -javaagent:/opt/appdynamics/java-agent/ver4.2.7.1/javaagent. jar"
Then restart Tomcat:
# service tomcat7 restart
The AppD agent log can be viewed in the following location and will report back any errors in connectivity:
> tail –f /opt/appdynamics/java-agent/ver4.2.7.1/logs/<shortHostName>-tomcat8080/agent.*.log
Now from the AppDynamics Controller Web GUI, create an application:
Controller Web UI > Applications menu tab, and create an application using either the wizard or advanced menu.
Type: Java
application name: petclinic
tier name: appserver
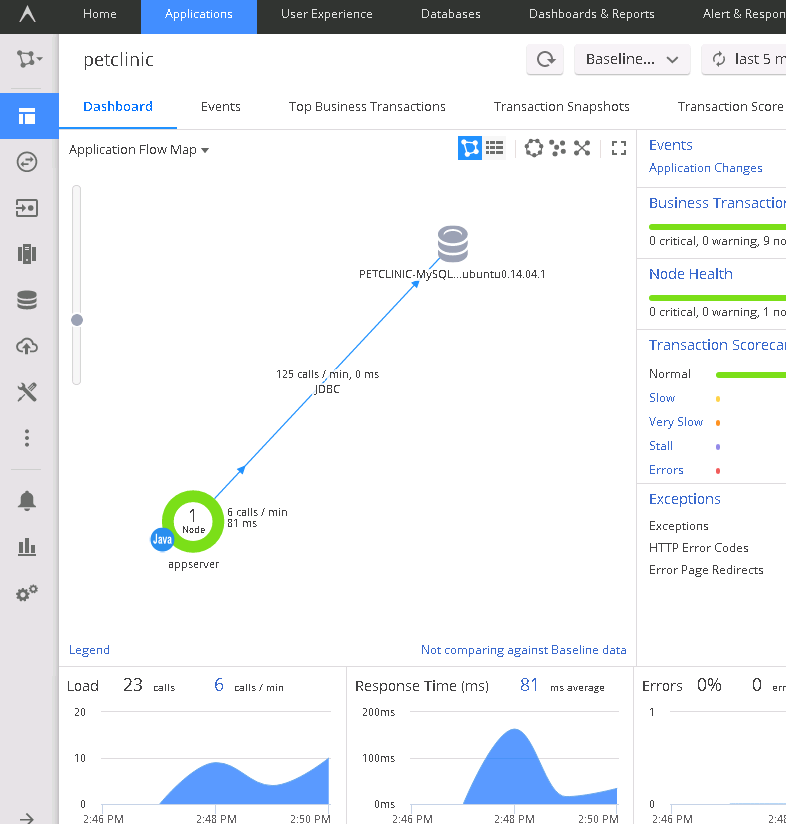
Now you should go back to the petclinic application in your browser and follow the same steps of listing and modifying an owner. Within two minutes, the data should be reflected back into the AppD Controller GUI similar to the screenshot below:
Configure AppDynamics Database Agent
The first step is to grab the latest Database Agent from the AppDynamics download site. You will end up with a file similar to the name, dbagent-4.2.7.1.zip. Copy this to the /tmp folder of the target host, and then execute the following commands:
# mkdir -p /opt/appdynamics/db-agent
# cd /opt/appdynamics/db-agent
# mv /tmp/dbagent-4.2.7.1.zip .
# apt-get install unzip -y
# unzip dbagent-4.2.7.1.zip
# chmod ugo+r+w logs -R
Then edit the configuration at conf/controller-info.xml:
<controller-host> should be set to the FQDN of the controller and needs to match the CN of the controller certificate if using SSL
<controller-port> typically 8090 or 8181 (secure)
<controller-ssl-enabled> true if hitting SSL enabled port of controller
<force-default-cerficate-validation> if SSL enabled, then “true” to prevent strict checking of the server cert
<use-simple-hostname> true
<account-name> customer1
<account-access-key> API key for Controller (Gear > License > Show key)
Then you need a startup script for the Database Agent. Download the initialization script from this page. Copy it to the target host as /etc/init.d/appdynamics-dbagent then change its mode to 755 and then edit the script so that the values below match your system
JAVA=”/usr/lib/jvm/java-7-openjdk-amd64/bin/java”

AGENT_HOME=/opt/appdynamics/db-agent

AGENT_OPTIONS="-Dappdynamics.agent.uniqueHostId='<shortHostName>'"
Check that the script is executable by issuing the command:
# /etc/init.d/appdynamics-dbagent
And if this returns a list of available actions, then add it to the startup services:
# update-rc.d -f appdynamics-dbagent start 99 2 3 4 5 .
# service appdynamics-dbagent start
Logs for the database agent can be viewed using:
tail –f /opt/appdynamics/db-agent/logs/agent.log
Now from the AppDynamics Controller Web GUI, add the Database. Controller Web UI > Databases, and press “Add”.
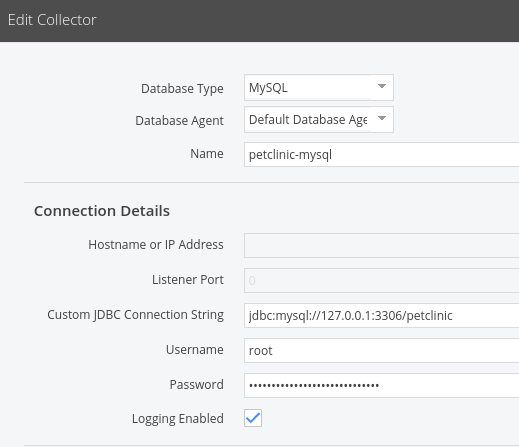
Type: MySQL
name: petclinic-mysql
jdbc:mysql://127.0.0.1:3306/petclinic
user: root
password: petclinic
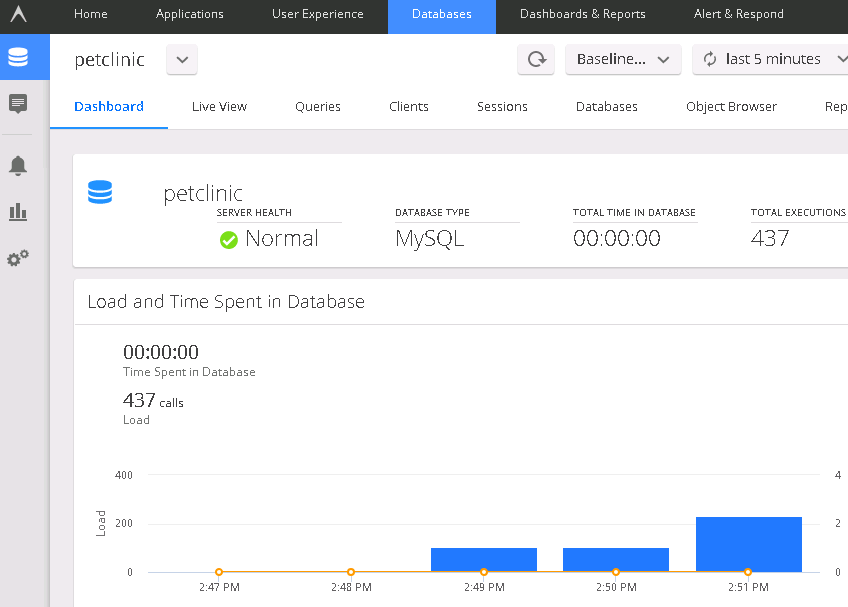
Now you should go back to the petclinic application in your browser and follow the same steps of listing and modifying an owner. Within two minutes, the data should be reflected back into the AppD Controller GUI similar to the screenshot below:
REFERENCES
https://github.com/spring-projects/spring-petclinic
http://spring.io/blog/2013/03/21/spring-petclinic-is-on-github/
https://docs.appdynamics.com/display/PRO42/Start+the+Database+Agent+Automatically+on+Linux
https://download.appdynamics.com/download/
https://www.appdynamics.com/product/application-performance-management/