 Update Feb 2021: See my newer article on extending an LVM volume group on Ubuntu Focal using either the same physical disk or a new disk using parted.
It is common for a virtualized Guest OS base image to have a generic minimal storage capacity. But this capacity can easily be exceeded by production scenarios, performance testing, logging, or even the general cruft of running a machine 24×7.
In a previous post, I described extending a virtualized disk when using classic partitions. In this post, I will perform the same task but with an LVM enabled system. We will use console level tools so that it could be done from a remote terminal or by automation.
For a visual representation of LVM concepts of volume groups, physical volumes, physical/logical volumes and filesystems, the LVM wikipedia page has a nice graphic shown below:

For a summary of the available utilities for physical volumes, volume groups, and logical volumes see this LVM cheat sheet.
Important Note: Manipulating partitions can lead to a bricking of the virtualized guest OS. If you are not completely comfortable with this procedure in a DEV environment, do not even consider running it in PROD. Backup all critical data before executing this on a production system.
The first step is to extend the storage capacity of the disk in the specific virtualization engine being used. Using VirtualBox, that means using vboxmanage modifyhd. Using vSphere, you can use the vSphere GUI client. and using vCloud Director you have this ability at the web client. Note that having snapshots on this VM may keep you from performing this operation.
In this example, I have an Ubuntu 14.0.4 virtualized guest OS that I initially configured with 24Gb on /dev/sda (23GB ext4 + 1Gb swap). I then increased the size of disk to 30Gb, but this extra 6Gb is not recognized by the guest OS yet.
Initial State
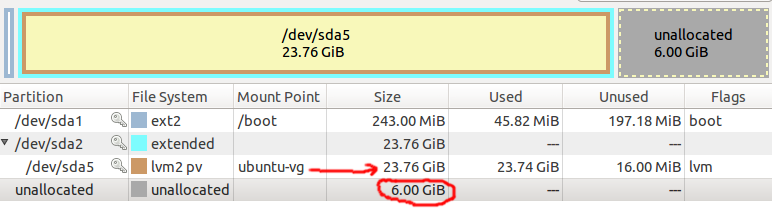
Let’s show the initial system settings, for the sake of reference later. This screenshot from gparted helps illustrate the initial partitioning and then the 6Gb of unallocated space.
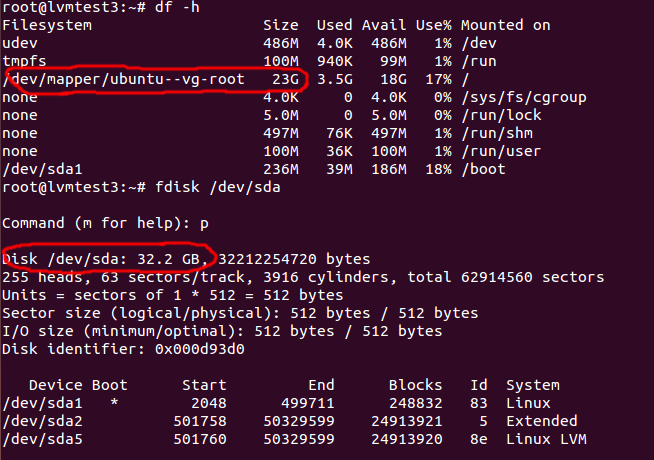
fdisk shows 32Gb available, but only 24Gb allocated to the LVM volume. df also shows only 23Gb mounted at ‘/’.
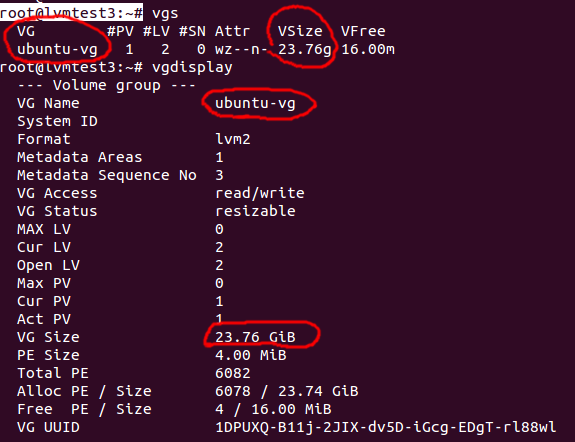
Viewing the volume groups with vgs and vgdisplay show the single ‘ubunty-vg’ volume.
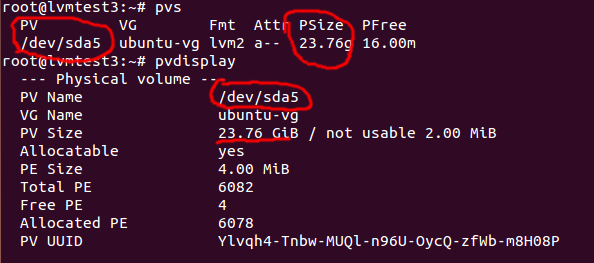
Viewing the physical volumes with pvs and pvdisplay show the single ‘/dev/sda5’ volume with 24Gb size.
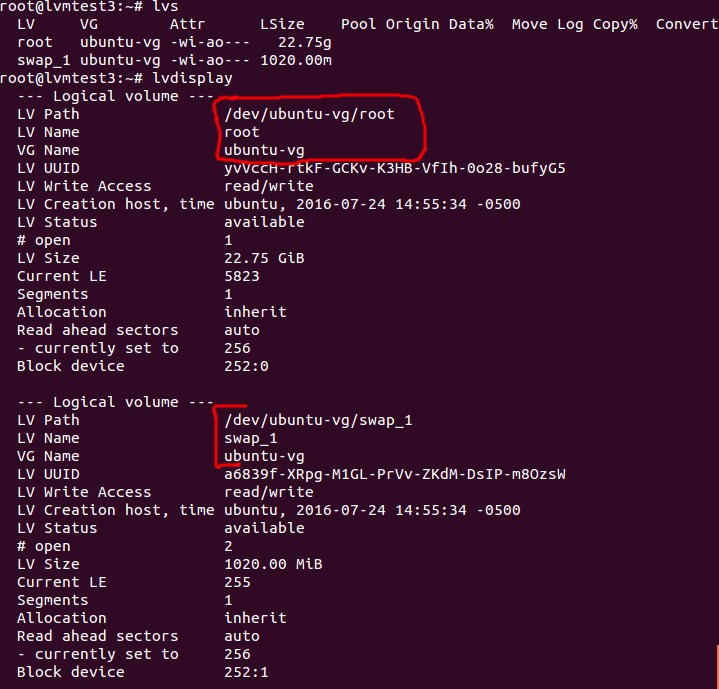
Viewing the logical volumes with lvs and lvdisplay show the primary ‘root’ volume at path ‘/dev/ubuntu-vg/root’, and then the swap volume.
Create the new physical partition
Run ‘fdisk /dev/sda’
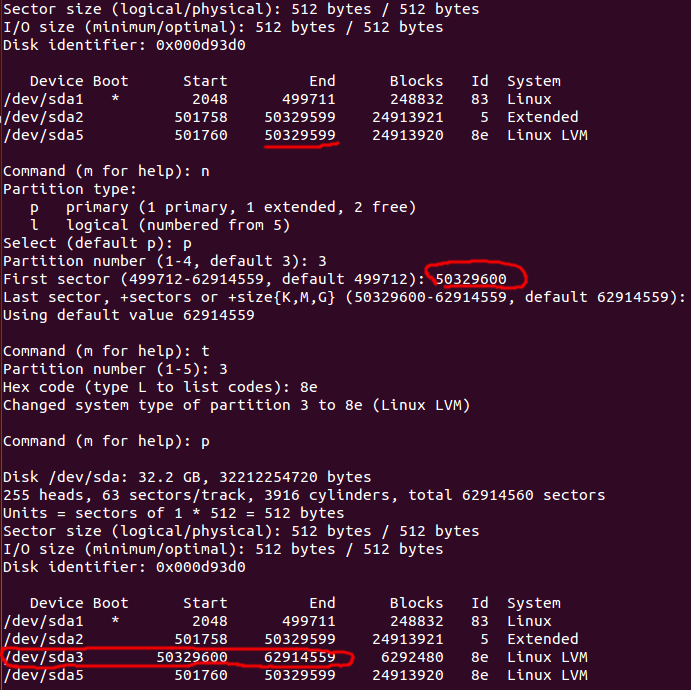
Type the command ‘n’ to create a new partition, then ‘p’ for primary, and ‘3’ for the partition number.
50329599 is the last sector in use by sda2, so use 50329600 as first sector of our new partition, then accept the default of 62914559 for the last sector.
Then set the partition type to Linux LVM. Type the ‘t’ command, then select ‘3’ for the partition number (the number you choose is dependent on your system), and ‘8e’ for the partition type, which is Linux LVM.
When you are done with that, type ‘p’ to validate your new partition which should look something like the screenshot below:
Then write the changes to disk by typing ‘w’
Reboot the Guest OS
To ensure that these changes take, go ahead and restart the guest OS.
init 6
Create the LVM Physical Volume
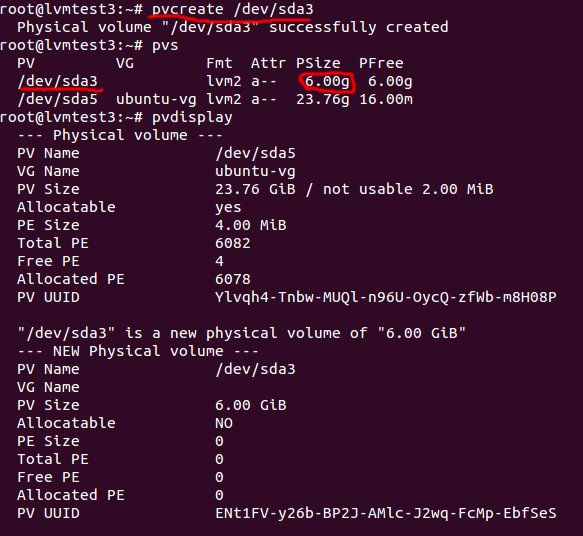
Run ‘pvcreate /dev/sda3’ to create the LVM physical volume. pvs then shows two physical volumes although there is no volume group assigned to /dev/sda3.
Extend the LVM Volume Group
Run ‘vgextend ubuntu-vg /dev/sda3’ to extend the existing volume group to also use sda3. vgdisplay will now show that the volume group size is 30Gb.

Extend the LVM Logical Volume
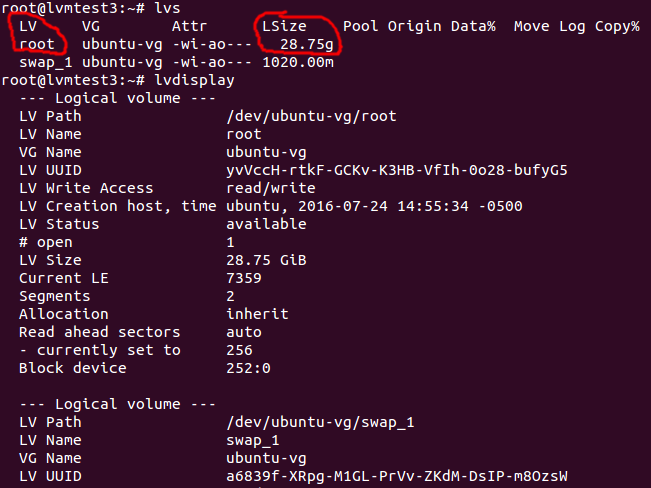
In order to extend the logical volume, you need the logical volume path which is available from lvdisplay. Use that to run ‘lvextend -L+6G /dev/ubuntu-vg/root /dev/sda3’ to extend the existing volume group to include this new sda3 space. You can also run with the switch ‘lvextend -l +100%FREE’ which means use all space available.

After this is run, you will see the following from lvdisplay
In order to have this space recognized you then need to run one last command, ‘resize2fs /dev/ubuntu-vg/root’.

Validate Increased Capacity
Running ‘df -h’ now wil show the increase in capacity:
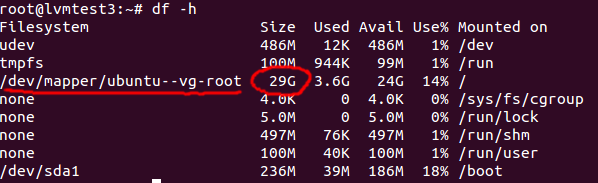
And running gparted or system-config-lvm can validate the increased capacity as well.
REFERENCE
http://www.howtogeek.com/howto/40702/how-to-manage-and-use-lvm-logical-volume-management-in-ubuntu/
http://www.linuxuser.co.uk/features/resize-your-disks-on-the-fly-with-lvm
http://www.tecmint.com/extend-and-reduce-lvms-in-linux/
http://www.tldp.org/HOWTO/LVM-HOWTO/extendlv.html
ext2online instead of resize2fs if centos