![]() An essential part of the standard build process for Java applications is having a set of repositories where project artifacts are stored.
An essential part of the standard build process for Java applications is having a set of repositories where project artifacts are stored.
Artifact curation provides the ability to manage dependencies, quickly rollback releases, support compatibility of downstream projects, do QA promotion from test to production, support a continuous build pipeline, and provides auditability.
JFrog puts out an open-source Maven server called Artifactory that is perfect for setting up a private Maven repository for internal applications.
Install
The first step is to install the Java8 prerequisite. You can download Oracle Java8 from here. But I prefer to use the OpenJDK where possible, and although OpenJDK7 is the only version available in the standard Ubuntu 14.04 repositories, you can add OpenJDK8 by using the ppa and selecting the java8 version as the default when running update-alternatives like below:
> sudo add-apt-repository ppa:openjdk-r/ppa
> sudo apt-get update
> sudo apt-get install openjdk-8-jdk
> sudo update-alternatives --config java
> java -version
You will need to note the true path of the JVM selected when running ‘update-alternatives’ above. This is the JAVA_HOME value we will need later and should be ‘/usr/lib/jvm/java-8-openjdk-amd64/jre’
Then download the zip from JFrog. will unzip this into ‘/opt/artifactory-oss-5.0.1’. At the time of writing, this is version 5.0.1, but please replace these with the latest version number.
# apt-get install openjdk-7-jdk unzip -y
# mkdir -p /opt
# wget https://bintray.com/jfrog/artifactory/download_file?file_path=jfrog-artifactory-oss-5.0.1.zip
# unzip jfrog-artifactory-oss-5.0.1.zip
Now we will install Artifactory as a service:
# cd /opt/artifactory-oss-5.0.1
# bin/installService.sh
But before starting the service, we need to make configuration changes by editing ‘/etc/opt/jfrog/artifactory/default’. The JAVA_HOME variable needs to be set to the default OpenJDK8 location listed earlier in update-alternatives.
export JAVA_HOME=/usr/lib/jvm/java-8-openjdk-amd64/jre
The rest of the variables such as ARTIFACTORY_HOME should already be set properly.
Start service
Now we make sure the server port is available through the firewall and then start the Artifactory service and get output similar to below:
> sudo ufw allow 8081/tcp
> service artifactory start
found java executable in JAVA_HOME
Starting Artifactory tomcat as user artifactory...
Max number of open files: 32000
Using ARTIFACTORY_HOME: /opt/artifactory-oss-5.0.1
Using ARTIFACTORY_PID: /opt/artifactory-oss-5.0.1/run/artifactory.pid
Using CATALINA_BASE:   /opt/artifactory-oss-5.0.1/tomcat
Using CATALINA_HOME:   /opt/artifactory-oss-5.0.1/tomcat
Using CATALINA_TMPDIR: /opt/artifactory-oss-5.0.1/tomcat/temp
Using JRE_HOME:        /usr/lib/jvm/java-8-openjdk-amd64/jre
Using CLASSPATH:       /opt/artifactory-oss-5.0.1/tomcat/bin/bootstrap.jar:/opt/artifactory-oss-5.0.1/tomcat/bin/tomcat-juli.jar
Using CATALINA_PID:    /opt/artifactory-oss-5.0.1/run/artifactory.pid
Tomcat started.
Artifactory Tomcat started in normal mode
The logs do not go to the standard ‘/var/log’ location, and instead you can find them at ‘/opt/artifactory-oss-5.0.1/tomcat/logs’. If you open catalina.out, the last lines should read like below.
#####################################################
### Artifactory successfully started (15.273 seconds)   ###
###########################################################
Create Repository
Using your browser, you should now be able to pull up, http://<server>:8081/artifactory. The default credentials are admin/password (which you should immediately change).
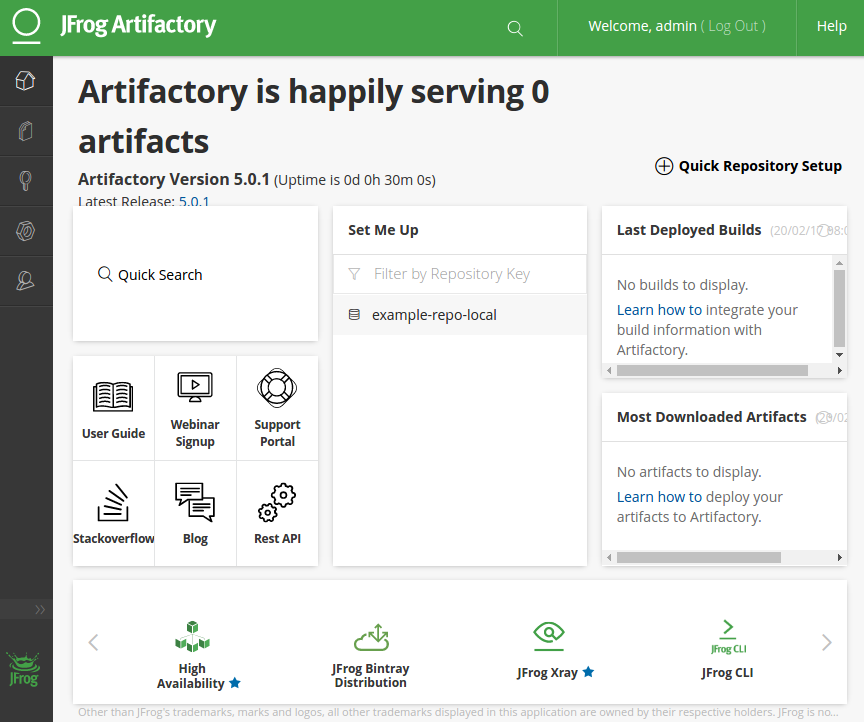
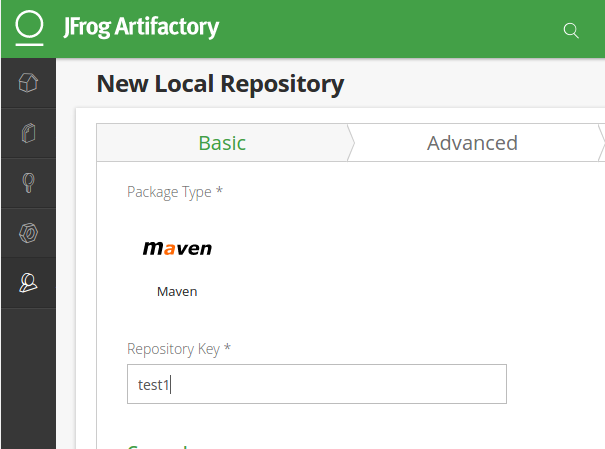
Then click the Admin icon at the bottom of the left-hand bar, and click on Repositories > Local. Click on the “+ New” label to popup a dialog where we want to create a new Maven repository named “test1”. This “test1” repository will be populated in our next step.
Publish artifact
In a previous article, I detailed deploying the Spring PetStore application for Postgres. We do not need to deploy the project, but we will use this same project to test publishing artifacts to our new Maven repository. First we pull the project down locally:
> sudo apt-get install git openjdk-7-jdk maven -y
> git clone https://github.com/fabianlee/spring-framework-petclinic.git
> cd spring-framework-petclinic
Then we need to edit the local pom.xml so that it publish to the “test1” maven repository we just created in Artifactory. Add the following elements right before <properties>:
<distributionManagement>
<repository>
  <id>central</id>
  <name>releases</name>
  <url>http://192.168.1.215:8081/artifactory/test1</url>
</repository>
<snapshotRepository>
  <id>snapshots</id>
  <name>snapshots</name>
  <url>http://192.168.1.215:8081/artifactory/test1</url>
  </snapshotRepository>
</distributionManagement>
The exact values will vary depending on your environment, you can pull up your specific settings in the Artifactory web interface by clicking on the browser icon on the left and clicking the “Set Me Up” label for your repository.
Then we need to provide the credentials necessary to upload these into Artifactory. Maven uses ~/.m2/settings.xml to store these values, so this file needs to be created if it does not already exist.
<settings>
  <servers>
    <server>
      <id>central</id>
      <username>admin</username>
      <password>password</password>
    </server>
  </servers>
</settings>
We are using the default credentials for Artifactory above, but of course this is not best practice and the password should reflect a non-elevated user that has the permissions to deploy. The web interface provides the ability to create new groups with their own authorization levels.
And, even if you are using a non-admin user, on a shared host (like a Jenkins build system), you would not want to expose a plaintext password. Maven allows encrypted passwords using the ~/.m2/security-settings.xml.
Now, we are ready to build the artifact and upload it to our private repository:
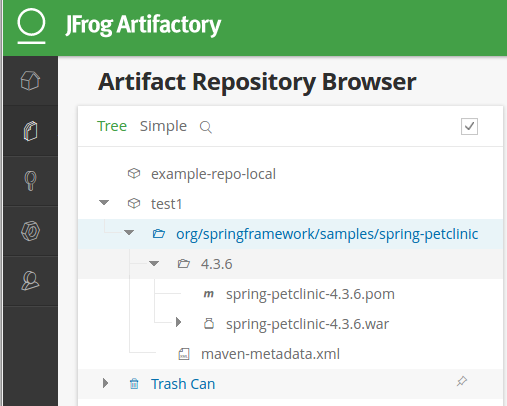
> mvn deploy -DskipTests
If the maven comes back with a ‘BUILD SUCCESS’, then the Artifactory web interface should reflect the fact that the war has been uploaded as shown below.
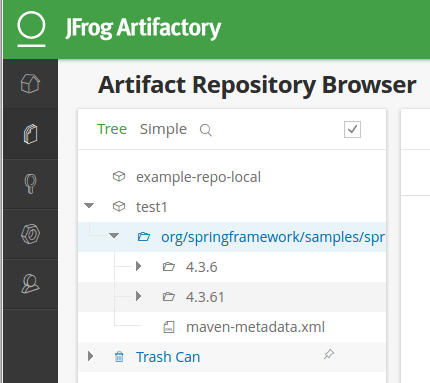
And if you change the pom.xml to <version>4.3.61</version>, simulating a new build, and run deploy again you will see both artifacts are available as shown below.
REFERENCES
https://www.jfrog.com/confluence/display/RTF/System+Requirements
http://ubuntuhandbook.org/index.php/2015/01/install-openjdk-8-ubuntu-14-04-12-04-lts/
http://askubuntu.com/questions/464755/how-to-install-openjdk-8-on-14-04-lts
http://www.naturalborncoder.com/methodology/2015/05/26/artifactory-on-ubuntu-14-04/
https://www.jfrog.com/open-source/