 Flask OIDC is an extension to the popular Flask web framework that enables OAuth2/OIDC for your application. The base project does not support ADFS, but I have create a personal fork of this module that supports Windows 2019 ADFS as the OAuth2 Authentication Server.
In this article, we will exercise the OAuth2 Authorization Code flow. This allows an application to access a 3rd party API on behalf of the end user as illustrated by the diagram below.

These are the entities we will deploy:
- Authentication Server a local Windows 2019 ADFS server, configured per my article here
- Client Application a Flask web app that orchestrates with the ADFS Authentication Server to authenticate, and trade a code for an Access Token
- Resource Server a Flask web app that validates the JWT Access Token and provides access to its services according to scope/role/claim
Prerequisites
A Windows 2019 Domain Controller, and a Windows 2019 ADFS server configured with an Application Group for OAuth2 access.
I have articles on creating and configuring these in previous articles:
- Creating a Windows 2019 Domain Controller using Powershell
- Creating a Windows 2019 ADFS server using Powershell
- Configuring an Application Group for OAuth2/OIDC on ADFS 2019
For the local solution validation, you also need a local Docker daemon to run the images.
And the following groups in Active Directory:
- Group=engineers
- Group=managers
If you followed along with my previous articles on AD/ADFS, then you have run create-test-users-2019.ps1 and have these AD groups with members added to the group. The group membership is inserted as a custom claim into the Access Token JWT by ADFS as described in my previous article.
The REST methods on the Resource Server check the JWT for these group claims when evaluating permission.
Bring up OAuth2 entities (Auth Server,Client App,Resource Server)
Configure “Authentication Server”
You should have already configured Windows 2019 ADFS with an OAuth2 Application Group per the prerequisites.
You will need to know the:
- ADFS fully qualified server name
- ADFS client ID
- ADFS client secret
- ADFS custom CA certificate (pem encoded custom CA certificate of the ADFS server)
If you followed along with my previous article on configuring ADFS 2019, the custom CA cert is located in c:\certs. If you are using a public certificate and CA for ADFS, then you do not need this value because the default Python CA trust store file will already have the root CA.
Bring up local “Client Application”
In one console, bring up the Flask web application which runs at http://localhost:8080
This Client Application is the one that negotiates the authentication flow between the end user and the Authentication Server.
# your ADFS server hostname
export AUTH_SERVER=win2k19-adfs1.fabian.lee
export AUTH_PROVIDER=adfs

# OAuth2 client-id and client-secret from ADFS
export CLIENT_ID=<the oauth2 client id>
export CLIENT_SECRET=<the oauth2 client secret>
export SCOPE="openid allatclaims api_delete"

# override to match 'Redirect URI' from ADFS server app config
export CALLBACK_ROUTE=/login/oauth2/code/adfs

# add custom CA from ADFS server to CA filestore
# If custom ADFS CA, you must provide or you will get CERTIFICATE_VERIFY_FAILED
export CA_PEM=$(cat myCA.pem | sed 's/\n/ /')

# clear out any older runs
docker rm docker-flask-oidc-client-app

# run docker image locally, listening on localhost:8080
docker run \
--network host \
-p 8080:8080 \
--name docker-flask-oidc-client-app \
-e AUTH_SERVER=$AUTH_SERVER \
-e AUTH_PROVIDER=$AUTH_PROVIDER \
-e CLIENT_ID=$CLIENT_ID \
-e CLIENT_SECRET=$CLIENT_SECRET \
-e SCOPE="$SCOPE" \
-e CALLBACK_ROUTE="$CALLBACK_ROUTE" \
-e CA_PEM="$CA_PEM" \
fabianlee/docker-flask-oidc-client-app:1.0.0
This app is now ready to accept a code back from ADFS at “http://localhost:8080/login/oauth2/code/adfs” that will opaquely be exchanged for an Access Token.
Bring up local “Resource Server”
In another console, bring up the Flask Resource Server which runs at http://localhost:8081
This Flask web app represents the 3rd party microservice API whose services are consumed on the end user’s behalf.
# your ADFS server hostname
export AUTH_SERVER=win2k19-adfs1.fabian.lee
export AUTH_PROVIDER=adfs

# add custom CA from ADFS server to CA filestore
# If custom ADFS CA, you must provide or you will get CERTIFICATE_VERIFY_FAILED
export CA_PEM=$(cat myCA.pem | sed 's/\n/ /')jj

# clear out any older runs
docker rm docker-flask-oidc-resource-server

# run docker image locally, listening on localhost:8080
docker run \
--network host \
-p 8081:8081 \
--name docker-flask-oidc-resource-server \
-e AUTH_SERVER=$AUTH_SERVER \
-e AUTH_PROVIDER=$AUTH_PROVIDER \
-e CA_PEM="$CA_PEM" \
fabianlee/docker-flask-oidc-resource-server:1.0.0
This application will be sent requests with the HTTP header “Authorization: Bearer <jwtToken>”. The app is responsible for checking the JWT is valid, then evaluating the claims/authority/scope information to return a response.
Use browser to test OAuth2 Authorization Code flow
I would recommend you enable the developer mode of your browser (F12 on Firefox and Chrome), so that you can follow along with the network requests being made from the browser.
Orchestrate login between Client App and Auth Server
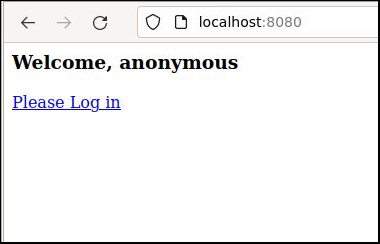
Pointing your browser at http://localhost:8080 will show a simple web page with a login button.

Press “Default Login” and it will take you to the the “localhost:8080/protected” page, which will silently redirect you to the ADFS server at “/adfs/oauth2/authorize” with parameters for client_id, scope, and redirect_uri.
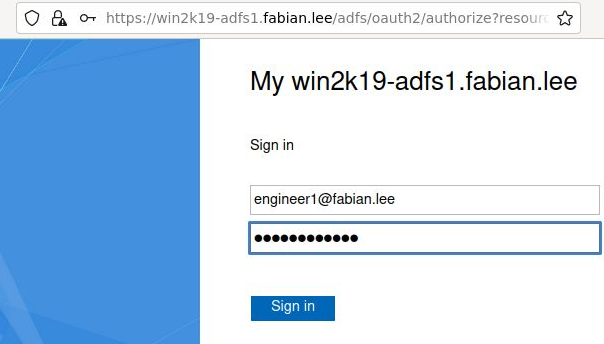
ADFS will then display a login form where you can enter in the credentials of a valid Active Directory user. Login as a member of the Active Directory “engineers” group, which is “engineer1” in our case (since we used create-test-users-2019.ps1 when setting up AD).

Press “Sign in” and from the browser developer console you will see a GET response back to the “localhost:8080/login/oauth2/code/adfs” (the redirect URL) with a code parameter.
Opaque to the end user, the flask-oidc module from the Client web application then takes this code and exchanges it for an ID and Access Token via POST to ADFS at https://ADFS/adfs/oauth2/token.
You will then be redirected back to the “:8080/protected” of the Client Application. In the console log of the Client App, you will see the ID Token claims as well as the raw Access Token.
OAuth2 Access Token used to call 3rd party Resource Server on behalf of user
But a direct login to the Client Application is not the end of the Authorization Code flow purpose. This Access Token JWT is meant to be used as authentication into a service on an separate Resource Server.
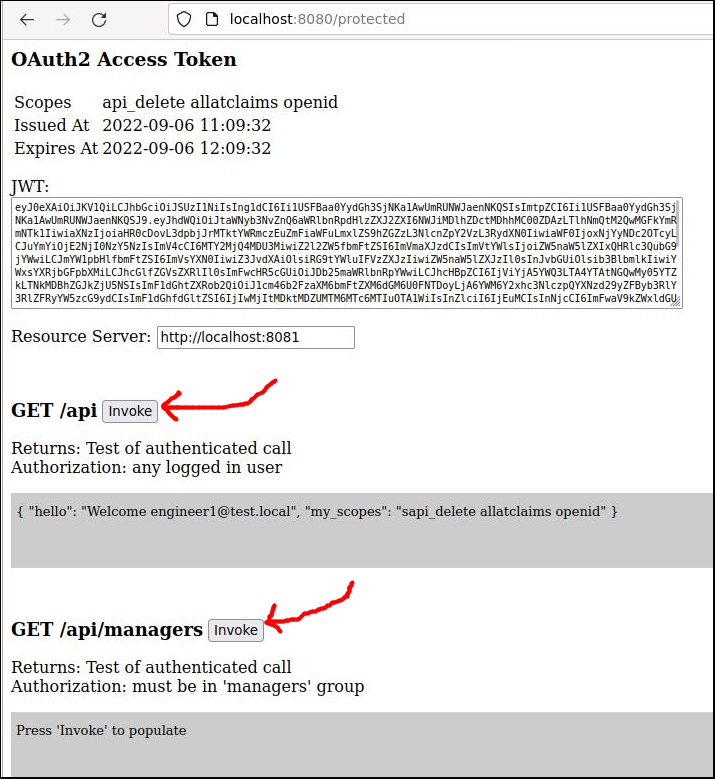
To this end, the “:8080/protected” page will show you the current scope and raw Access Token, that can be used to invoke the microservice on the Resource Server at port 8081.

Below this are Javascript buttons that will invoke the remote REST microservice endpoints at http://localhost:8081
This page uses Javascript Fetch to send the JWT in the ‘Authorization’ header and make the calls to the Resource Server. CORS is enabled so these cross-site calls can be made.
- GET /api – returns logged in user info (callee must be logged in)
- GET /api/managers – returns logged in user info (callee must be in ‘managers’ group)
Press each of these buttons to view the result coming back from the microservice. Your browser’s developer console will show each of these Javascript network calls also.
Expected permission 403 errors for “engineers”
Note that as “engineer1” you will get a 403 error when attempting to GET “/api/managers” because you are only a member of the ‘engineers’ group and not ‘managers’ group.
This is expected because of the ‘accept_token’ decorator in app.py that limits access based on the group claim of the Access Token. ‘groups_required‘ is a customization I added to my personal fork, it is not in the main project. Below is a snippet of the code showing the decorator definition.
@app.route('/api/managers', methods=['GET','POST'])
@oidc.accept_token(require_token=True, scopes_required=['openid'], groups_required=['managers'])
def hello_manager():
...
The “engineer1” user token does not have a ‘managers’ role claim, so these calls correctly throw a 403 forbidden.
Access Token used to make Resource Server calls as member of ‘managers’
If you open a new private browser and go through the login process at http://localhost:8080 again, but this time with a user in the “managers” AD group (such as “managers1”), then when you navigate to the protected page and test each call you will see success to every function.
REFERENCES
Github, Flask main init python source
github fabianlee, flask-oidc fork that enables ADFS
github issue #153 against main project, ADFS not working
github fabianlee, python Flask apps that exercise OAuth2 Client App and Resource Server
Thomas Darimont, Flask OIDC against Keycloak
Erika Dike, Python flask-oidc app and okta
stackoverflow, flask-oidc and keycloak
Roberto Prevato, validating JWT tokens from Azure in Python
stackoverflow, known issue httplib2 does not honor disable_ssl_certificate_validation in python3
AppDividend blog, python certifi module usage
twilio.com, 5 ways to make http requests in python
stackoverflow, Makefile test for file existence outside of target using make constructs
auth0.com, explaining fields coming from jwks url
aaddevsup.azurewebsites.net, how to logout of oauth2 for AzureAD using login_hint
NOTES
Testing JWT Access Token from console
cd resource-server
export AUTH_SERVER=win2k19-adfs1.fabian.lee
export JWT=<the access token>

# runs tests against /api and /api/managers using bearer token
./test-jwt-auth.sh