![]() If you are going to implement major changes to your publicly hosted WordPress site, it can be beneficial to create a local sandbox where those changes can be tested ahead of time.
If you are going to implement major changes to your publicly hosted WordPress site, it can be beneficial to create a local sandbox where those changes can be tested ahead of time.
In this article, I will show how to use Docker Compose to create a local instance of WordPress, and the “All-in-One WP Migration” plugin to clone the data and bring it into this local instance.
Prerequisites
Go through the steps in my article on installing Docker and Docker Compose on Ubuntu.
Export data from live site
To export all the posts, pages, themes, settings, and plugins from your current live site use the “All-in-One WP Migration” plugin that can be installed directly through your WordPress manager.
Go to Plugins > “Add New” and then search for “All-in-One WP Migration” and press “Install Now”.
Now added to the left hand column will be “All-in-One WP Migration”. Click on its submenu, “Export”. Select “Export to File” so that all your data is archived into a file. Detailed screenshots can be found here.
Then select the submenu, “Backups” and you will see a “<name>.wpress” file, click on its green download icon and your browser will download the archiving containing which contains all your posts and other site metadata that will be used to reconstruct the site on the local Docker instance.
Create local instance of WordPress
Now create a local instance of WordPress running in a Docker container (credit to A. Tate Barber).
mkdir mywordpress && cd $_
Create a “docker-compose.yml” file containing:
version: "3"
services:
  my-wpdb:
    image: mariadb
    ports:
      - "8081:3306"
    environment:
      MYSQL_ROOT_PASSWORD: P4ssword
  my-wp:
    image: wordpress:latest
    volumes:
      - ./wp:/var/www/html
    ports:
      - "8080:80"
    links:
      - my-wpdb:mysql
    environment:
      WORDPRESS_DB_PASSWORD: P4ssword
Notice we specified the image as “wordpress:latest” which gets the latest WP version possible from the Docker official images. If your public site is running an older version, you can instead specify something like “wordpress:5.1” or “wordpress:4.9.7”.
Then have Docker Compose create the MariaDB and WordPress instances:
# create subdirectory where WP volume files are kept
mkdir wp

# bring WordPress/MariaDB instance up
sudo docker-compose up -d

# go into WP files directory
cd wp
ls -l
One change we want to immediately make to the defaults is to allow file uploads larger than 2Mb so that we can ensure that our import of the site data is possible.
Modify the “.htaccess” file using sudo because its ownership is by ‘www-data’.
sudo vi .htaccess
Make sure the rewrite rule is there so posts can be delivered and append the php_values required to allow larger file uploads.
# BEGIN WordPress

<IfModule mod_rewrite.c>
RewriteEngine On
RewriteBase /
RewriteRule ^index\.php$ - [L]
RewriteCond %{REQUEST_FILENAME} !-f
RewriteCond %{REQUEST_FILENAME} !-d
RewriteRule . /index.php [L]
</IfModule>

php_value upload_max_filesize 128M
php_value post_max_size 128M
php_value memory_limit 256M
php_value max_execution_time 300
php_value max_input_time 300

# END WordPress
Now open your browser and go through the initial configuration pages of WordPress at http://localhost:8080. Select “English” or your preferred language at the first screen and press “Continue”.
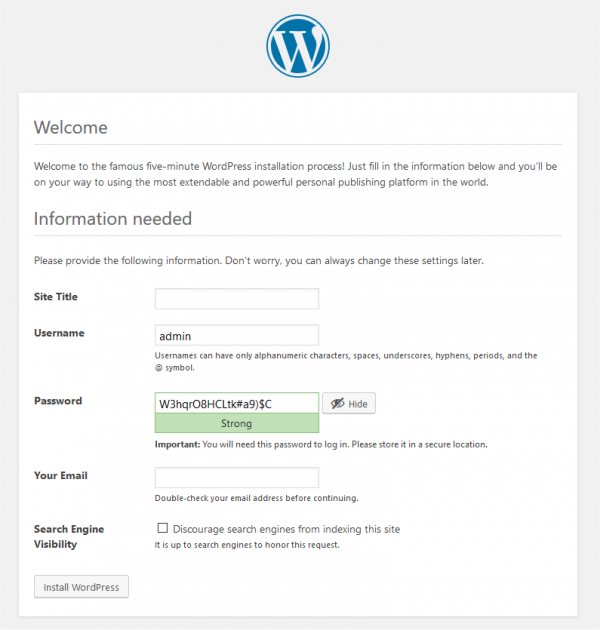
It does not matter what you fill in at the second information screen because as soon as we load the data from our public site, these settings and even the password will all be overwritten.
So you can use site title=”temp”, username=”admin”, password=”password”, email=”noone@nowhere.com”, and check to allow the weak password. The press “Install WordPress” and you should get the success page.
Press “Log In”, and use the username/password credentials you entered above. You should now see the WP Admin dashboard, and it will look completely fresh.
Populate local WP instance with site data
To load the data from our public site, you first need to install the “All-in-One WP Migration” plugin similar to our steps above.
Go to Plugins > “Add New” and then search for “All-in-One WP Migration” and press “Install”, then “Activate”.
If you see message about needing FTP credentials, that needs to be troubleshot at the filesystem level. All the files in the ‘wp’ directory should be owned by ‘www-data’.
Now added to the left hand column will be “All-in-One WP Migration”. Click on its submenu, “Import”. Select “Import from File” and select the .wpress archive that you previously exported from your live site.
As done earlier, open the “.htaccess” file and verify you still have the rewrite rule which is required and file size values, and that they were not overwritten by the import.
Press on “Posts”, and you will get a message saying the database needs to be updated, press “Update WordPress Database”. You will need to login again, take note that it will now require the user/password that you have on your live site (it is no longer the temporary credentials).
Take one more step before trying to view any posts, go to Settings > Permalinks, and press “Save Changes”. This ensures the proper slug paths.
Also, if you have any plugins that are forcing SSL, you should disable those now. This small local site is not currently setup for SSL.
Validate Site
Now you are ready to validate your site. Go ahead and go to the home page by navigating to http://localhost:8080
The theme, posts, images, metadata, etc. have all been migrated and you now have a test site where you can freely play with changes before moving them to your production site.
REFERENCES
local WordPress development with Docker in 3 easy steps
local WordPress development using Docker
Linode, WordPress with Docker Compose
Increase max upload file size in wordpress
Different versions of WordPress available
NOTES
Show different WordPress images pulled down for Docker
sudo docker images