![]() Updated article to latest Minikube, Feb 2019
Updated article to latest Minikube, Feb 2019
Minikube is a tool that runs a Kubernetes stack inside a single VM being run by a local virtualization engine such as VirtualBox. This makes it ideal for local development and experimentation.
In this article we’ll be going through installation and validation of a Minikube installation on Ubuntu using VirtualBox as the hypervisor.
VirtualBox is a level 2 hypervisor, if you would rather install Minikube on top of a Level 1 hypervisor like KVM, see my other article here.
VirtualBox Prerequisite
The first step is to install Oracle VirtualBox 5.x+ as the type 2 hypervisor. I have written up full details for Ubuntu in this article.
Install kubectl
kubectl is the command line tool used to deploy and manage applications using Kubernetes.
curl -Lo kubectl https://storage.googleapis.com/kubernetes-release/release/$(curl -s https://storage.googleapis.com/kubernetes-release/release/stable.txt)/bin/linux/amd64/kubectl && chmod +x kubectl && sudo mv kubectl /usr/bin/.
You can verify the version using:
which kubectl
kubectl version
Make sure you are using at least version 1.10, use of 1.6 will result in errors during deployment of the test application later.
Install minikube
Now download and put the latest minikube binary into /usr/local/bin
curl -Lo minikube https://storage.googleapis.com/minikube/releases/latest/minikube-linux-amd64 && chmod +x minikube && sudo mv minikube /usr/local/bin/

# check version
minikube version
Run minikube
$ minikube start
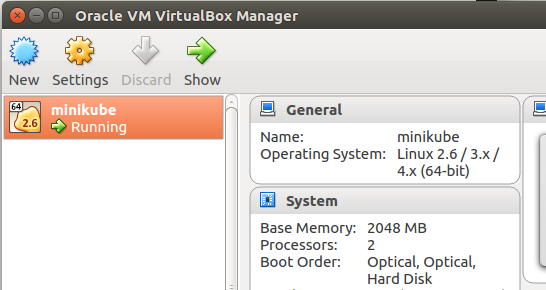
This will begin with the minikube ISO being downloaded (~180Mb) and then will create the VM in VirtualBox named “minikube”.
This will begin with the minikube ISO being downloaded (~150Mb) and then will create the VM in VirtualBox named "minikube".

Starting local Kubernetes v1.13.2 cluster...
Starting VM...
Downloading Minikube ISO
 181.48 MB / 181.48 MB [============================================] 100.00% 0s
Getting VM IP address...
Moving files into cluster...
Downloading kubeadm v1.13.2
Downloading kubelet v1.13.2
Finished Downloading kubeadm v1.13.2
Finished Downloading kubelet v1.13.2
Setting up certs...
Connecting to cluster...
Setting up kubeconfig...
Stopping extra container runtimes...
Starting cluster components...
Verifying kubelet health ...
Verifying apiserver health ...
Kubectl is now configured to use the cluster.
Loading cached images from config file.

Everything looks great. Please enjoy minikube!
VirtualBox will now show the minikube VM running.
And from the console, minikube returns the service list from the fresh deployment.
$ minikube service list
|-------------|----------------------|-----------------------------|
| NAMESPACE   | NAME                 |             URL             |
|-------------|----------------------|-----------------------------|
| default     | kubernetes           | No node port                |
| kube-system | kube-dns             | No node port                |
|-------------|----------------------|-----------------------------|
Validate Kubernetes connection
Use the ‘cluster-info’ command to validate that kubectl is able to connect to the minikube VM.
$ kubectl cluster-info
Kubernetes master is running at https://192.168.99.100:8443
KubeDNS is running at https://192.168.99.100:8443/api/v1/proxy/namespaces/kube-system/services/kube-dns
If you look at the VirtualBox settings, you will see that a new host-only network was created for 192.168.99.1/24.
View a list of the available Kubernetes nodes.
$ kubectl get nodes
NAME STATUS AGE VERSION
minikube Ready 10m v1.13.2
And if you list the pods in all the namespaces, you will see the internal services supporting your Kubernetes installation.
$ kubectl get pods --all-namespaces

NAMESPACE     NAME                               READY   STATUS    RESTARTS   AGE
kube-system   coredns-86c58d9df4-m8x4j           1/1     Running   0          6m44s
kube-system   coredns-86c58d9df4-np6hl           1/1     Running   0          6m44s
kube-system   etcd-minikube                      1/1     Running   0          5m49s
kube-system   kube-addon-manager-minikube        1/1     Running   0          5m37s
kube-system   kube-apiserver-minikube            1/1     Running   0          5m53s
kube-system   kube-controller-manager-minikube   1/1     Running   0          5m58s
kube-system   kube-proxy-mcj6q                   1/1     Running   0          6m44s
kube-system   kube-scheduler-minikube            1/1     Running   0          5m46s
kube-system   storage-provisioner                1/1     Running   0          6m42s
Deploy test application
Now as a validation of the Kubernetes deployment, we will deploy a simple echo application.
$ kubectl run hello-minikube --image=k8s.gcr.io/echoserver:1.10 --port=8080
deployment.apps "hello-minikube" created

$ kubectl get deployments
NAME DESIRED CURRENT UP-TO-DATE AVAILABLE AGE hello-minikube 1 1 1 1 2m

$ kubectl get pod
NAME READY STATUS RESTARTS AGE
hello-minikube-6c47c66d8-k5dfj 0/1 ContainerCreating 0 <invalid>
After a few seconds, the ‘hello-minikube’ application will show status as ‘Running’ as shown below.
$ kubectl get pod
NAME READY STATUS RESTARTS AGE
hello-minikube-6c47c66d8-k5dfj 1/1 Running 0 4m


$ kubectl get services
NAME TYPE CLUSTER-IP EXTERNAL-IP PORT(S) AGE
kubernetes ClusterIP 10.96.0.1 <none> 443/TCP 36m
Now expose the service, and then minikube should be able see it and provide you a URL to the service.
$ kubectl expose deployment hello-minikube --type=NodePort

$ minikube service list
|-------------|----------------|-----------------------------|
|  NAMESPACE  |      NAME      |             URL             |
|-------------|----------------|-----------------------------|
| default     | hello-minikube | http://192.168.99.100:31961 |
| default     | kubernetes     | No node port                |
| kube-system | kube-dns       | No node port                |
|-------------|----------------|-----------------------------|
$ minikube service hello-minikube --url
http://192.168.99.100:31961
A curl to this URL adding a custom header and path:
curl -H "X-mytest: 123" $(minikube service hello-minikube --url)/path123
Will show these custom values in the response.
Hostname: hello-minikube-6fd785d459-sl9hc

Pod Information:
	-no pod information available-

Server values:
	server_version=nginx: 1.13.3 - lua: 10008

Request Information:
	client_address=172.17.0.1
	method=GET
	real path=/path123
	query=
	request_version=1.1
	request_scheme=http
	request_uri=http://192.168.99.100:8080/path123

Request Headers:
	accept=*/*
	host=192.168.99.100:31961
	user-agent=curl/7.47.0
	x-mytest=123

Request Body:
	-no body in request-
Kubernetes dashboard
If you want to use the Kubernetes web dashboard, you can get the URL with the following comand:
$ minikube dashboard --url
Enabling dashboard ...
Verifying dashboard health ...
Launching proxy ...
Verifying proxy health ...
Opening http://127.0.0.1:39807/api/v1/namespaces/kube-system/services/http:kubernetes-dashboard:/proxy/ in your default browser...
Open the URL with a browser and you should be able to see the “hello-minikube” deployment and pod as shown.
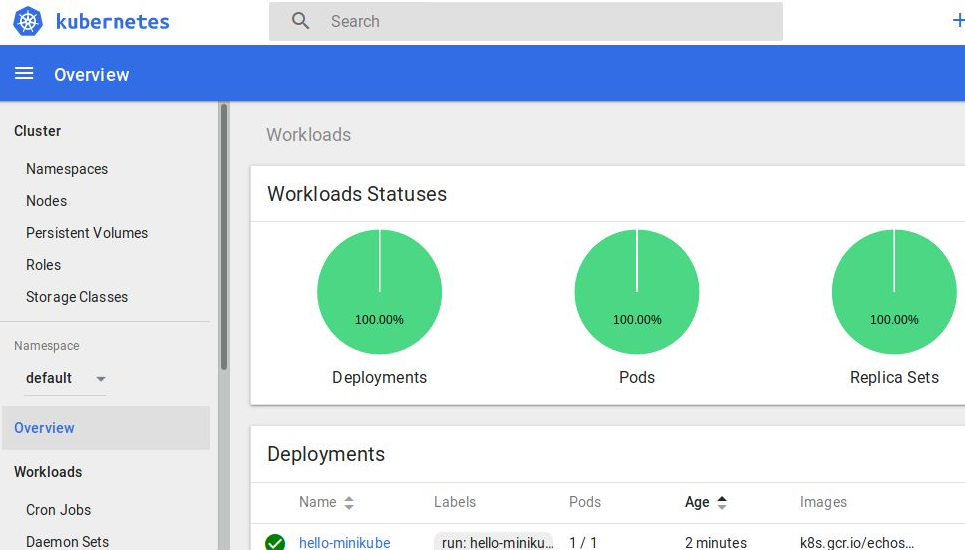
If you want to expose the dashboard using the proxy, read more here.
Stopping minikube
# stop
minikube stop

# start back up
minikube start
Stops the VM running in VirtualBox. The “hello-minikube” will still be deployed after the restart.
Deleting service
# delete service
kubectl get services
kubectl delete service hello-minikube

# delete deployment
kubectl get deployments
kubectl delete deployment hello-minikube
REFERENCES
https://github.com/kubernetes/minikube
http://cloudmaniac.net/minikube-kubernetes-in-5-minutes/
https://kubernetes.io/docs/tasks/tools/install-kubectl/#install-kubectl (native pkg mgmt or via curl)
https://kubernetes.io/docs/getting-started-guides/minikube/
https://kubernetes.io/docs/reference/kubectl/cheatsheet/
http://blog.arungupta.me/minikube-rapid-dev-testing-kubernetes/
https://github.com/kubernetes/contrib/tree/master/ingress/echoheaders (echo server source)
NOTES
kubectl install using apt-get (good for xenial, gets older packages for trusty)
$ sudo apt-get update && sudo apt-get install -y apt-transport-https
$ curl -s https://packages.cloud.google.com/apt/doc/apt-key.gpg | sudo apt-key add -
$ sudo touch /etc/apt/sources.list.d/kubernetes.list
$ echo "deb http://apt.kubernetes.io/ kubernetes-$(lsb_release -sc) main" | sudo tee -a /etc/apt/sources.list.d/kubernetes.list
$ sudo apt-get update
$ sudo apt-get install -y kubectl
$ kubectl version