![]() By default, KVM will use an older SeaBIOS x86 firmware for your virtual machines. If you want to use a more recent version of seaBIOS or want to drop the older BIOS standard and instead use the newer UUEFI specification (Unified Extensible Firmware Interface), KVM can support that with configuration changes.
By default, KVM will use an older SeaBIOS x86 firmware for your virtual machines. If you want to use a more recent version of seaBIOS or want to drop the older BIOS standard and instead use the newer UUEFI specification (Unified Extensible Firmware Interface), KVM can support that with configuration changes.
In this article, I will show how to create virtual machines under KVM that uses a custom seaBIOS or OVMF UUEFI compliant firmware.
Prerequisite
Before going through this article, I will assume you have:
- Installed KVM on Ubuntu, test using Ubuntu network install ISO
- Built a custom seaBIOS image
- Built a custom OVMF image
KVM virtual machine with custom seaBIOS
Now let’s create a virtual machine running under KVM that uses the custom seaBIOS image.
Create VM using OVMF image for firmware
$ virt-install --virt-type=kvm --name=sbios1404 --ram 1024 --vcpus=1 --virt-type=kvm --hvm --cdrom ~/Downloads/mini.iso --network network=default --graphics vnc --disk pool=default,size=20,bus=virtio,format=qcow2 --boot cdrom,hd --noautoconsole --force
Then stop the VM and edit the configuration:
$ virsh destroy sbios1404
$ virsh edit sbios1404
And add an element named <loader> under <os> with the full path to the bios.bin file.
<os>
...
<loader>/home/fabian/Downloads/src2/seabios/out/bios.bin</loader>
...
</os>
Then start the machine up again
$ virsh start sbios1404
Once started, you can connect the CDROM containing the Ubuntu network installer.
$ virsh attach-disk sbios1404 ~/Downloads/mini.iso hdc --type cdrom --mode readonly
Then reboot the machine which will start the guest VM up with the CD-ROM connected.
$ virsh reset sbios1404
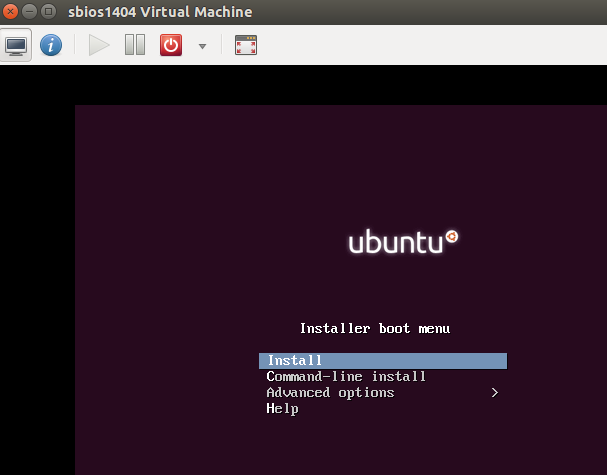
This should give you the seaBIOS screen momentarily, and then you will see the Ubuntu network installer start screen.
To delete this VM, use destroy and undefine.
$ virsh destroy sbios1404
$ virsh undefine sbios1404
KVM virtual machine with custom OVMF
Now let’s create a virtual machine running under KVM that uses a custom OVMF image for firware instead of the default SeaBIOS.
Create VM using OVMF image for firmware
$ virt-install --virt-type=kvm --name=ovmf1404 --ram 1024 --vcpus=1 --virt-type=kvm --hvm --cdrom ~/Downloads/mini.iso --network network=default --graphics vnc --disk pool=default,size=20,bus=virtio,format=qcow2 --boot cdrom,hd --noautoconsole --force
Then stop the VM and edit the configuration:
$ virsh destroy ovmf1404
$ virsh edit ovmf1404
And add an element named <loader> under <os> with the full path to the OVMF.fd file.
<os>
...
<loader>/home/fabian/Downloads/src2/edk2/Build/OvmfX64/RELEASE_GCC48/FV/OVMF.fd</loader>
...
</os>
Then start the machine up again
$ virsh start ovmf1404
Once started, you can connect the CDROM containing the Ubuntu network installer.
$ virsh attach-disk ovmf1404 ~/Downloads/mini.iso hdc --type cdrom --mode readonly
Then reboot the machine which will start the guest VM up with the CD-ROM connected.
$ virsh reset ovmf1404
This should give you the OVMF splash screen momentarily, and then you will see the Grub network installer start screen that starts the Ubuntu network installer.

To delete this VM, use destroy and undefine.
$ virsh destroy ovmf1404
$ virsh undefine ovmf1404
REFERENCES
http://www.linux-kvm.org/page/OVMF
http://www.linux-kvm.org/downloads/lersek/ovmf-whitepaper-c770f8c.txt (whitepaper)
https://wiki.ubuntu.com/UEFI/EDK2 (building OVMF from source)
https://github.com/tianocore/tianocore.github.io/wiki/OVMF (source code)
https://www.kraxel.org/repos/ (prebuilt binary images, no need to build)
https://github.com/tianocore/tianocore.github.io/wiki/Using-EDK-II-with-Native-GCC (building from source)
https://en.wikipedia.org/wiki/BIOS#Vendors_and_products (BIOS feature comparison)
https://github.com/tianocore/tianocore.github.io/wiki/How-to-build-OVMF (building OVMF from source)
https://github.com/tianocore/tianocore.github.io/wiki/Common-instructions (common *nix instructions for building)
https://github.com/tianocore/edk2/blob/master/Vlv2TbltDevicePkg/bld_vlv.sh (examples of scripting changing of Conf/target.txt)
https://www.garyhawkins.me.uk/custom-logo-on-uefi-boot-screen/ (Logo.bmp dropped at MdeModulePkg/Logo/Logo.bmp)
https://wiki.archlinux.org/index.php/PCI_passthrough_via_OVMF (near native performance)
http://ubuntu-on-big-iron.blogspot.com/2017/11/virt-install-kvm-vm-install-options.html (serial interface to vms)
https://superuser.com/questions/239870/change-cd-rom-via-virsh (attach/remove cdrom)
http://vfio.blogspot.com/2014/09/ovmf-split-image-support.html (description of split CODE/VARS and how to modify xml)
http://blog.vmsplice.net/2011/04/how-to-pass-qemu-command-line-options.html (adding qemu command line arguments)
https://raymii.org/s/articles/virt-install_introduction_and_copy_paste_distro_install_commands.html (virt-install commands for different OS)
NOTES
if ERROR – internal error: cannot load AppArmor profile ‘libvirt-
$ sudo service apparmor status
$ sudo apt-get install apparmor-utils
$ sudo aa-complain /usr/sbin/libvirtd (complain only)
$ sudo aa-enforce /usr/sbin/libvirtd (enforce again)
Validate OVMF image
For a quick smoke test, you can use qemu to bring up a virtual machine using this OVMF firmware image.
$ sudo apt-get install qemu-kvm qemu virt-manager virt-viewer libvirt-bin
$ qemu-system-x86_64 -–bios Build/OvmfX64/RELEASE_GCC48/FV/OVMF.fd
Getting remote URL of local git project
$ git config --get remote.origin.url
Detach CD
$ virsh attach-disk sbios1404 "" hdc --type cdrom --mode readonly
Add user to ‘kvm’ so ISO images are still readable by user
$ sudo adduser $USER kvm
$ virsh start ukvmOVMF1404
To add QEMU arguments like splash-delay to kvm xml
Add xmlns:qemu to root <domain>
<domain type='kvm' xmlns:qemu='http://libvirt.org/schemas/domain/qemu/1.0'>
Then add <qemu:commandline> element right before closing </domain> element at end.
 <qemu:commandline>
<qemu:arg value='-boot'/>
<qemu:arg value='menu=on,splash-time=15000'/>
</qemu:commandline>
Adding cdrom source
Then add an element named <source> under <disk .. device=’cdrom’> with the full path to the OS boot disk.
<disk type='block' device='cdrom'>
...
<source file="/home/fabian/Downloads/mini.iso"/>
...
</disk>