 WireGuard aims to be the successor to IPsec and more performant than OpenVPN. It is a general purpose VPN that is secure enough for servers, yet light enough to run on embedded devices.
In a previous article I described the installation of a WireGuard server with a Windows VPN client. I will extend those instructions here to create a VPN client tunnel from an iPhone.
Below is a diagram that shows the logical deployment.

Prerequisites
You must first install the WireGuard server and validate using a Windows VPN client connection as described in my previous article.
This will get the WireGuard server in the proper form as well as proving out that client connections are possible. Once we involve mobile devices, there are many environmental issues (enterprise lockdown, IPv6, mobile carrier port blocks, etc) that may affect the solution.
So we want proof that a basic client works properly before moving forward.
Key exchange using QR code
In the previous article for the Windows client, we generated the client’s public/private keypair on the client host. We then moved the client’s public key to the WireGuard server side so we could add it as a valid client peer. This is a robust security stance because the server and client never see each other’s private key. They exchange is only of public keys.
However, if you allow the client’s public+private keypair to be generated on the WireGuard server (or another server), then you have the ability to send this keypair to the client via a secure third-channel (secure mail or some other means) while in parallel having the WireGuard server add the public side of the keypair to its authorized peer list.
In exploration of this solution, we will have the WireGuard server itself create the client’s public+private keypair, and this will be used to:
- Authorize the client to connect to the server, by adding the public side of the key to the WireGuard server peer connections
- Generate a QR code for the iPhone client that will populate its tunnel connection
Generate client’s public/private keypair
As we discussed, we are creating the client’s keypair from the WireGuard server.
sudo mkdir -p /etc/wireguard/clients
sudo chmod 755 /etc/wireguard/clients
cd /etc/wireguard/clients
wg genkey | sudo tee mobile.key | wg pubkey | sudo tee mobile.pub
Add client authorization as peer
Using the client’s public key, we can now add it to the server’s authorized peer list.
# authorize mobile client as peer with WireGuard server
sudo wg set wg0 peer '$(cat mobile.pub)' allowed-ips 10.0.14.8/32

# server will now show this peer
sudo wg show
Create client configuration file
Then create the client configuration file with placedholders we will replace momentarily.
$ sudo vi wg0-client.conf
[Interface]
PrivateKey = <clientPrivateKey>
Address = 10.0.14.8/24
ListenPort = 51820

[Peer]
PublicKey = <serverPublicKey>
Endpoint = <serverPublicEndpoint>:51820
AllowedIPs = 172.16.0.0/16
PersistentKeepalive = 15
Now define the values and do a replacement.
# client keypair just generated
clientPrivateKey=$(cat mobile.key)
clientPublicKey=$(cat mobile.pub)

# the location of the WireGuard server public key
# from the previous article
serverPublicKey=$(cat ~/publickey)
echo "serverPublicKey: $serverPublicKey"

# the public IP address or fronting router address of WG server
serverPublicEndpoint=199.99.99.99

# do replacements in file
sudo sed -i "s|<clientPrivateKey>|$clientPrivateKey|" wg0-client.conf
sudo sed -i "s|<serverPublicKey>|$serverPublicKey|" wg0-client.conf
sudo sed -i "s|<serverPublicEndpoint>|$serverPublicEndpoint|" wg0-client.conf

# show WireGuard client configuration
cat wg0-client.conf
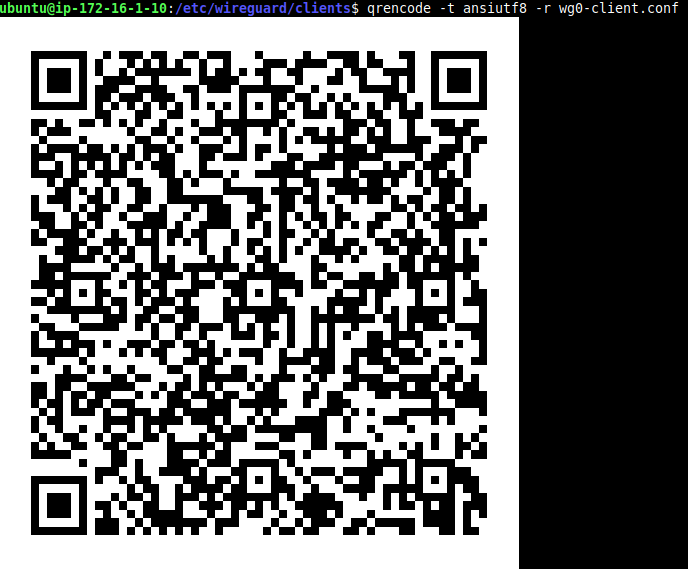
We now need a way to pass this configuration to the iPhone client. You could send the information via secure email, but another way is to generate a QR code that can be scanned by the phone.
# required package
sudo apt-get install qrencode -y

# generate QR code using ANSI
qrencode -t ansiutf8 -r wg0-client.conf
This utility is capable of generating HTML and other image formats, but for our purposes ASCII encoding is sufficient.
iPhone WireGuard app installation
We are now ready to configure the iPhone. Go to the App Store and search for “WireGuard”. You should see an app that looks like below from the “WireGuard Development Team”.

“Get” and then “Open” the application. Click the plus icon at the top right to get a choice of how to create the new tunnel configuration (file,QR, or scratch). Choose “Create from QR code” and then point your phone at the QR code generated earlier on the server.
Save this configuration as “iphone1”. Then select the new tunnel configuration which will pull up the settings like below.

If you need to adjust any values (for example the public Endpoint of the WireGuard server changes because of DHCP), you can press “Edit” at the top left to make any adjustments.
Slide the status to “Active” where it will now show as green. Then open Safari and manually type in the address “http://172.16.1.10”, and you should get the same message that the Windows VPN client did from the previous article as shown below.
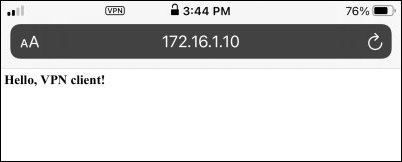
Other public internet sites are still available because it is only IPs in the client ‘AllowedIPs’ CIDR block that are directed toward the VPN tunnel (172.16.0.0/16).
REFERENCES
fabianlee github, diagram source
fabianlee.org, WireGuard server and Windows VPN client
stanislas, Wireguard and IPv6, qrcode
serverssideup.net, QR codes for WireGuard
stanislas.blog, Wireguard and IPv6
artixlinux.org, wireguard preshared secrets psk
gitlab.com, wireshark capture of wireguard traffic
NOTES
generated psk (preshared secret on server)
wg genpsk > presharedkey
from server, adding client peer that has psk
wg set wg0 peer <publicClientKey> preshared-key client-psk.psk allowed-ips 10.0.14.8/32