![]() Gunicorn is a WSGI HTTP server commonly used to run Flask applications in production. If you are running these types of workloads on a production Kubernetes cluster, you should consider an observability platform such a New Relic to ensure availability, service levels, and visibility into transactions and logging.
Gunicorn is a WSGI HTTP server commonly used to run Flask applications in production. If you are running these types of workloads on a production Kubernetes cluster, you should consider an observability platform such a New Relic to ensure availability, service levels, and visibility into transactions and logging.
In a series of previous articles, we first created a Docker image of a Flask application deployed on Gunicorn. We took this one step further in the next article by enabling the New Relic agent inside the container.
In this article, we will use that instrumented Docker image and show how to deploy it on a Kubernetes cluster, and verify that it is reporting back to the New Relic web UI.
New Relic Account and License Key
To use New Relic, you first need to sign up for a free account (no credit card required).
Then click on the top-right menu pulldown, and select “API keys”, or use this direct link.
If you have an “INGEST – LICENSE”, then right-click the 3 dot icon next to it and “copy key”. This is your New Relic License Key and will be passed into the container as an environment variable in a later section.
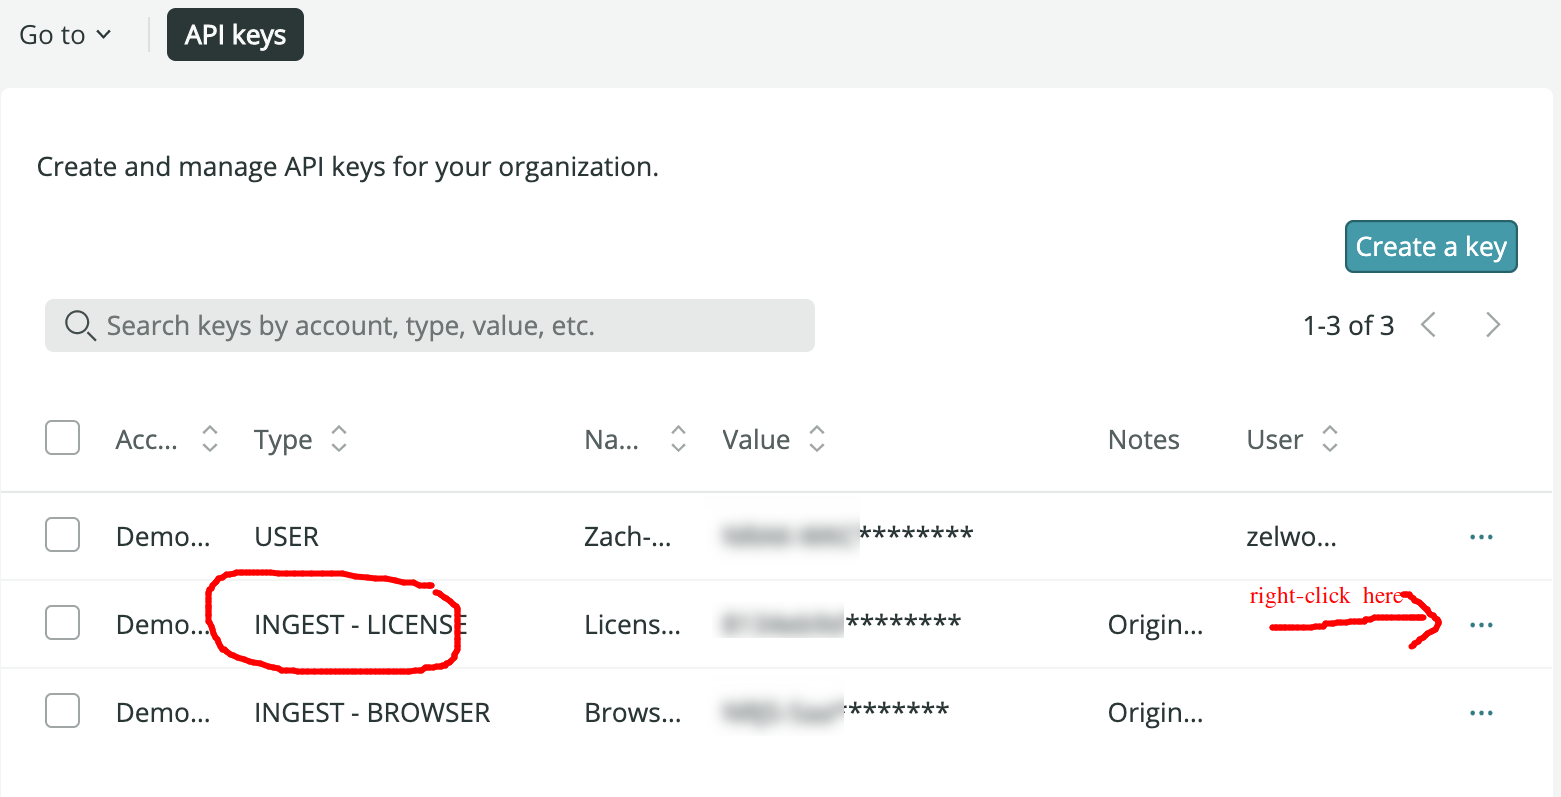
If you do not have an “INGEST-LICENSE”, then press the “Create a key” button, select the type “Ingest – License” and press “Create a key”.
Prerequisites
To complete this article you need a standard GKE cluster, valid KUBECONFIG environment variable, and the kubectl binary installed.
Kubernetes manifest yaml
Grab the yaml manifest from my github project.
wget https://raw.githubusercontent.com/fabianlee/docker-gunicorn-hello-world-web/main/gunicorn-hello-world-web.yaml
This manifest refers to the image instrumented with New Relic that we built in previous articles.
Deploy Instrumented image to Kubernetes
The yaml manifest has variable placeholders we need to replace, so we define environment variables and use envsubst to render the final output.
# fetched from New Relic web UI earlier
export NEW_RELIC_LICENSE_KEY=xxxxxxxxxxxxxxxxxxxxxx
# name of app in New Relic
export NEW_RELIC_APP_NAME="k8s-gunicorn-hello-world-web"
# version of docker image
export VERSION=2.0.0

# view manifest that will be applied with substitutions
envsubst < gunicorn-hello-world-web.yaml

# deploy to K8S
envsubst < gunicorn-hello-world-web.yaml | kubectl apply -f -
Verify this has been deployed to Kubernetes.
# check deployment health
$ kubectl get deployment gunicorn-hello-world-web -n default
NAME READY UP-TO-DATE AVAILABLE AGE
gunicorn-hello-world-web 1/1 1 1 2m

# check logs for errors
$ kubectl logs deployment/gunicorn-hello-world-web -n default
Test HTTP request to instrumented image
The yaml manifest only created a deployment and not a Service because there are many ways your individual cluster may be doing Ingress.
So instead, we will just create the deployment, and get kubectl to do port forwarding of the deployment to our local host. Then we can use the local curl command for testing.
$ kubectl port-forward deployment/gunicorn-hello-world-web 8000:8000
Forwarding from 127.0.0.1:8000 -> 8000
Handling connection for 8000
From another console, validate a curl against the localhost on port 8000.
$ curl http://localhost:8000
Hello, gunicorn_kubernetes
request 1 GET /
Host: localhost:8000
The message “gunicorn_kubernetes” comes from the MESSAGE_TO environment variable defined in the yaml manifest.
Run batch test against container
Instead of running just one curl request, let’s create some traffic that New Relic can measure. Use Apache Bench to run 100 requests with 5 user concurrency against the container.
# install Apache Bench
$ sudo apt install apache2-utils -y

# this will be a lot slower than other tests,
# because the kubectl port forwarding bottleneck
$ ab -n 100 -c 5 http://localhost:8000/
New Relic UI reports
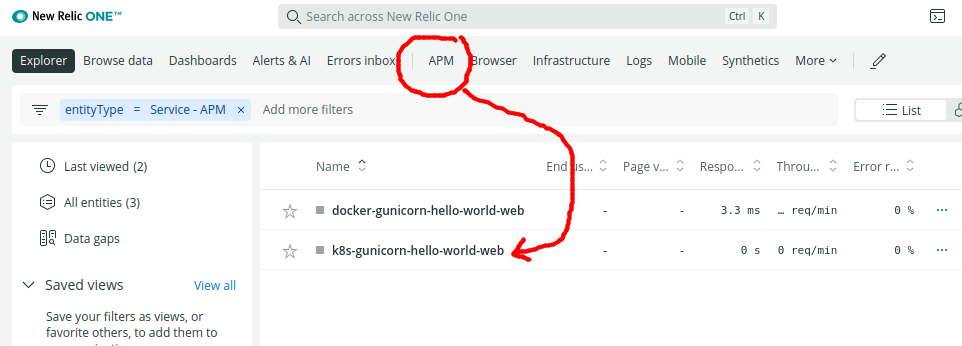
Within 2-5 minutes, you should be able to see the requests from above show up in the New Relic web UI. Click on “APM” in the top menu bar, and you should see our “k8s-gunicorn-hello-world-web” app.
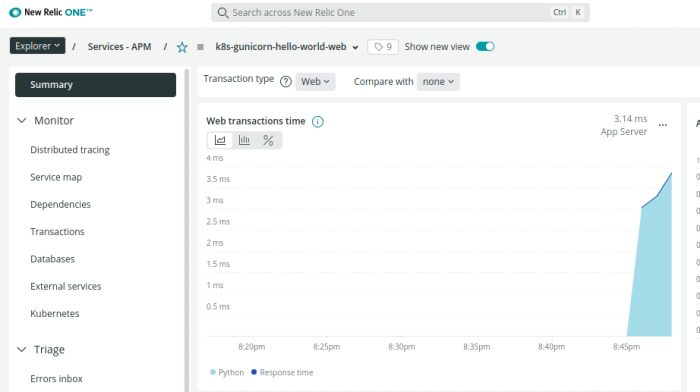
Click on our application, and the summary will be brought up that displays the latest requests, including our requests created by Apache Bench.
REFERENCES
New Relic, install the Python agent for docker
New Relic, Python Agent advanced usage
github project for this article
google kubectl, port forwarding doc
phoenixnap.com, kubectl port forwarding
dockerhub, Flask/Gunicorn image with New Relic Agent installed